
Downloading
Download and install CURA from https://ultimaker.com/software/ultimaker-cura
Download or create an .stl file.
Download the bed level file, CHEP_Ender_3_bed_level.gcode, from https://www.thingiverse.com/thing:3235018. Transfer to a microSD card.
Setting Up CURA
Open the CURA software.
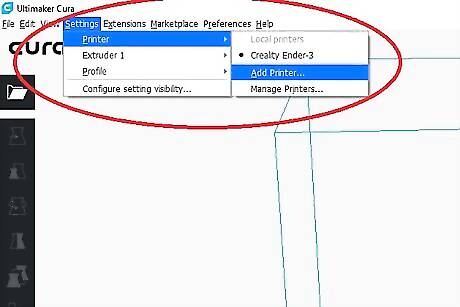
Add the printer profile. Go to Settings > Printer > Add Printer.... Select Other. Add Printer 2.jpg Select Creality Ender 3. Add Printer 3.jpg
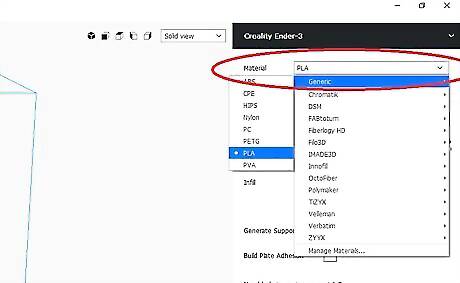
Select the material from the Material drop down menu to specify your material.
Using CURA
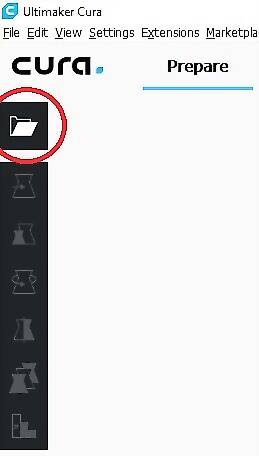
Open your file by selecting Open File icon. Choose your desired .stl file to print and click Open. Open stl.jpg
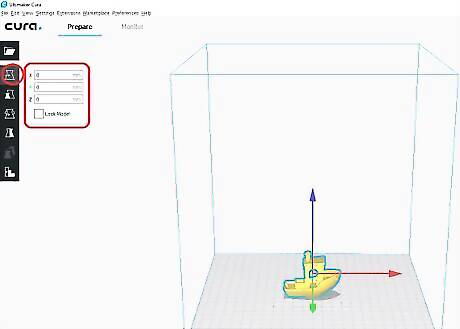
Adjust the 3D model by selecting the model then adjustment icons, if needed. Move - Click, hold, and drag the desired axis to move object. MoveObject.jpg Scale - Change the size of the object by percentages. ScaleObject.jpg Rotate- Press, hold and rotate on the desired circle axis to rotate object. Pressing the Lay Flat icon to position object flat on surface may reorient object. RotateObject.jpg
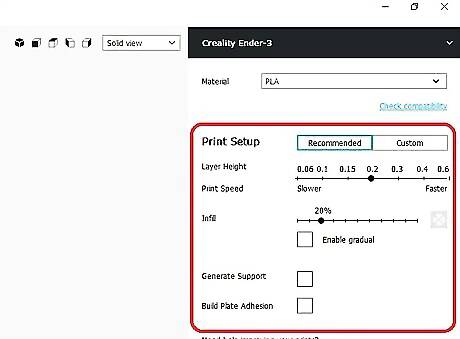
Adjust the 3D print settings. Go to "Print Setup" area with "Recommended" selected to adjust the Layer Height, Infill, Support, and Build Plate Adhesion. Layer height - Select your desired layer height. The lower the layer height, the higher quality the print, but the longer it takes to print. Infill - Select desired infill percentage. The higher the infill percentage, the stronger the print, the longer the print time. Generate Support - Used for overhangs greater than 45 degrees. Build Plate Adhesion - Brims or rafts may be used to help plate adhesion and to reduce warping.
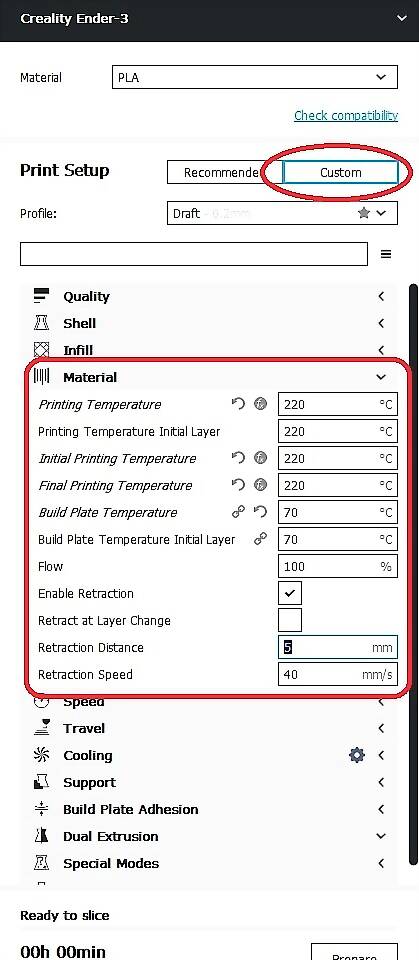
Adjust the print temperatures. Click Custom and go to Material to adjust printing temperatures based on the material's manufacturer recommendation.
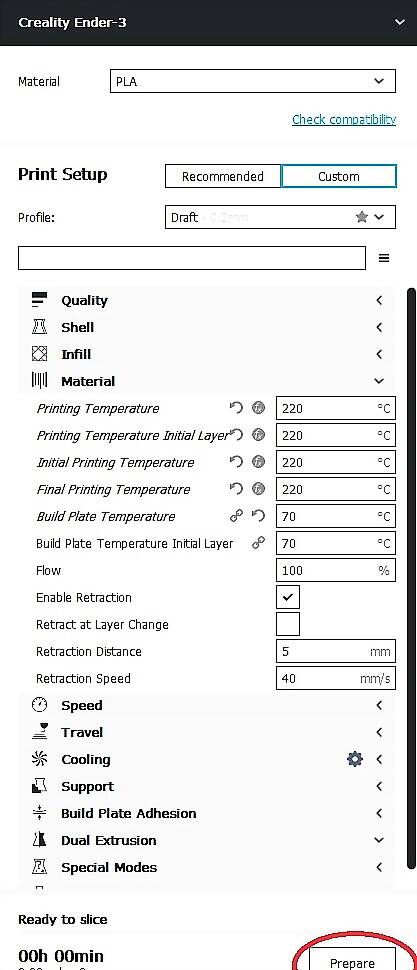
Click Prepare to estimate the print time, material use, and to slice the .stl file.
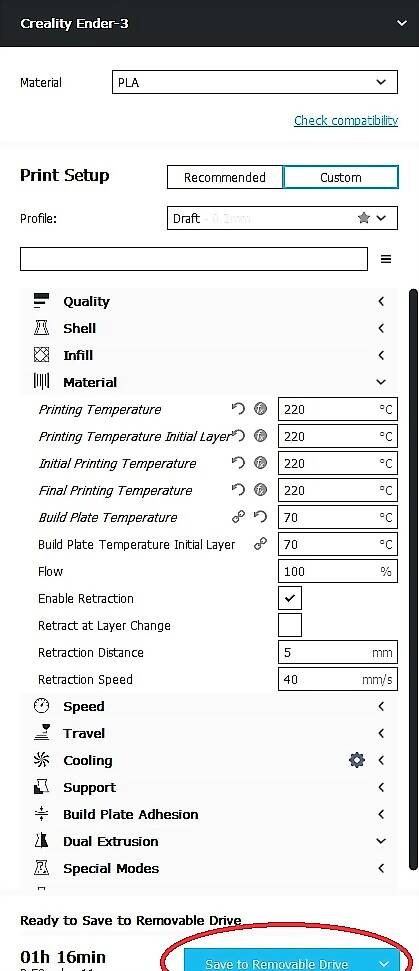
Save the .gcode file to a microSD card using a microSD USB adapter. Then press Save to Removable Drive.
Loading the Filament

Place the material onto the spool holder.
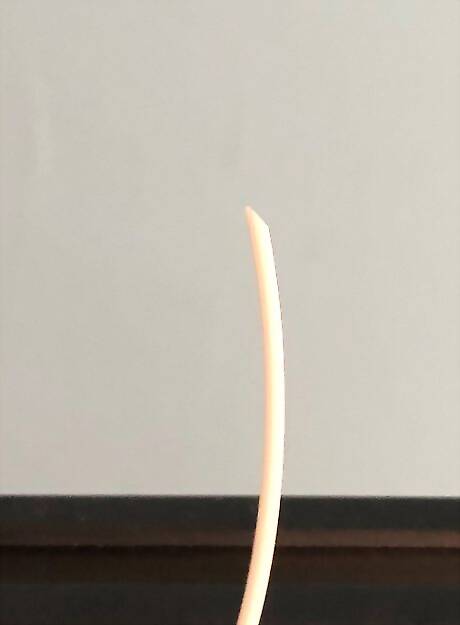
Cut the end of filament at ~45 degrees using the snippers.
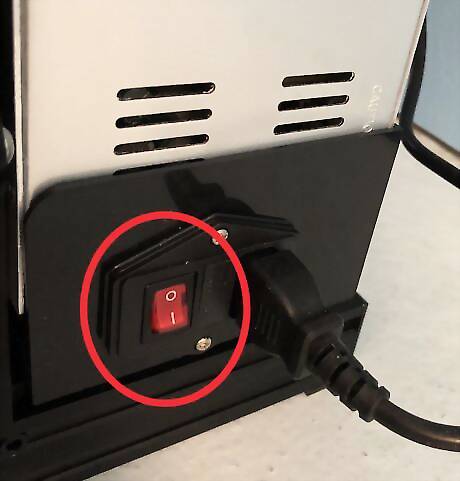
Turn on the printer by pressing the red power switch into the On position represented with the "|" symbol.
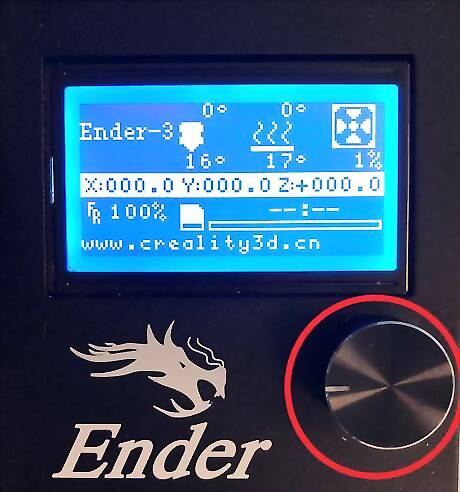
Press the control knob to access the menu options. Rotate the control knob to highlight desired selection, and press it to confirm selection.
Move the Z-axis off the bed by ~40-60mm. Press the control knob to highlight and select Prepare. PreparePLA.jpg Highlight and select Move Axis. MoveAxis.jpg Highlight and select Move 1mm. Move1mm.jpg Highlight and select Move Z. MoveZ.jpg Rotate the control knob until the screen reads ~40-60mm and the print nozzle is ~40-60mm above the print bed. Zheight.jpg
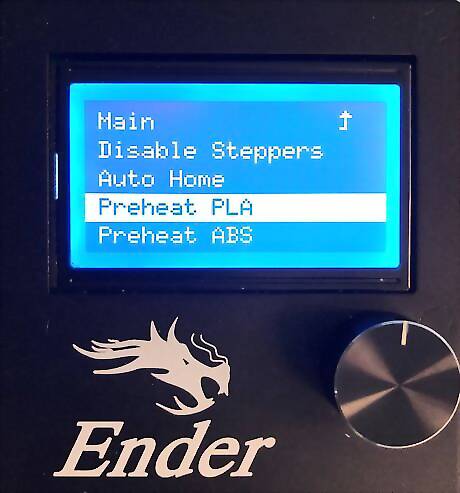
Preheat the print nozzle by highlighting and selecting Prepare then Preheat PLA. Wait for the nozzle to reach 185 degrees. The red circled number indicates the current nozzle temperature and the number above represents desired temperature. PreheatPLA.jpg
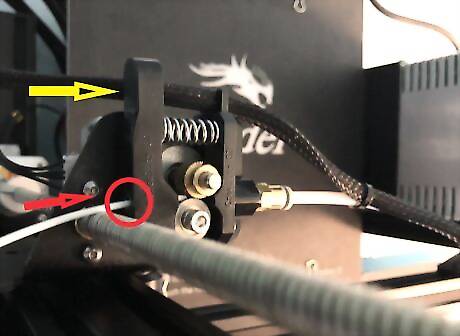
Load the filament into the printer. Squeeze the extruder lever and feed the filament through the extruder hole. Continue feeding the material until it comes out of the print nozzle. NozzleExtrude.jpg
Turn off the printer or proceed to "Leveling the Print Bed."
Leveling the Print Bed

Insert the microSD card into the microSD card slot.
Turn the printer on.
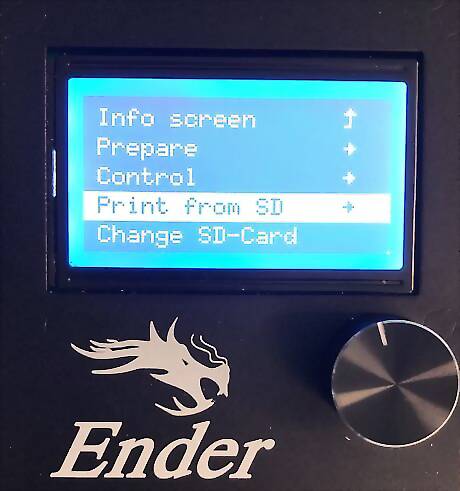
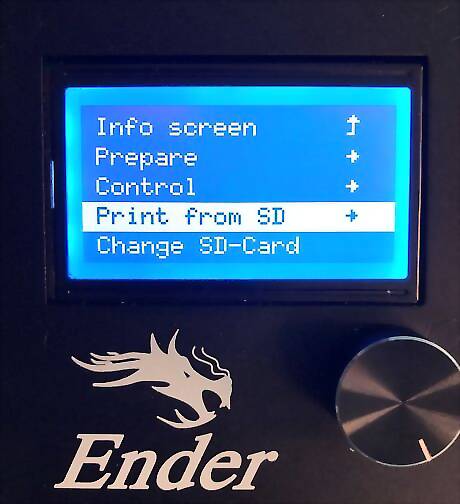
Level the print bed using the CHEP_ENDER_3_bed_level.gcode, paper, and adjustment screws. Press and rotate the control knob to highlight and select Print from SD. Highlight and select the CHEP_Ender_3_bed_level.gcode. BedLevelSelect.jpg Wait until nozzles comes to a stop before proceeding. NozzleStopping.jpg Continually slide a piece of paper back and forth underneath the nozzle. The nozzle will "scratch" the paper if it's at the correct level. Using the adjustment screw of each corner below the heat bed, raise the bed by turning clockwise/lower the bed by turning counter-clockwise, while continually sliding the piece paper.BedLevelAdjustmentScrews.jpg Press the control knob to level other corners of the bed. The center point used to check if the bed is calibrated correctly. Repeat this until you no longer need to turn adjustment knobs.
Turn off the printer or proceed to "Printing the Object."
Printing the Object
Insert the microSD card if not already inserted, and then turn the power on.
Select Print from SD then highlight and select the desired .gcode file.
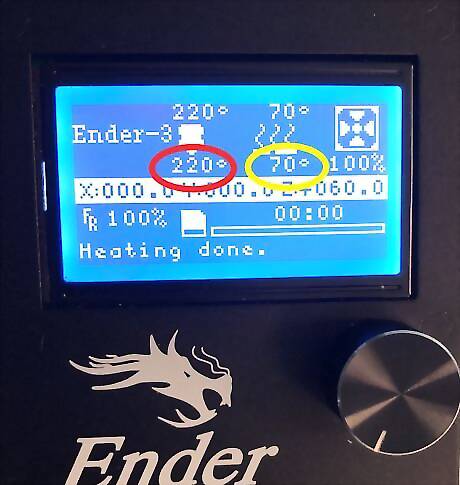
Wait for print bed and print nozzle to heat up. The circled numbers on the bottoms will match the ones on top. Caution: Do not touch print bed or print nozzle at this point. It may cause burns!
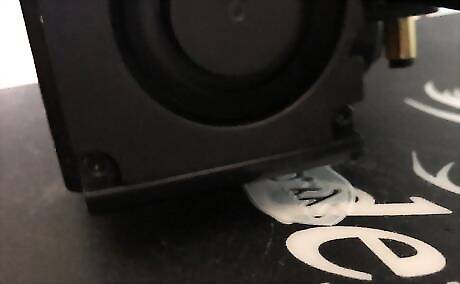
Examine the first print layer for adhesion quality. The material will stick to the bed in an even layer if properly leveled. If little to no material is extruding, then lower the print bed. If the material is not sticking, then raise the print bed.
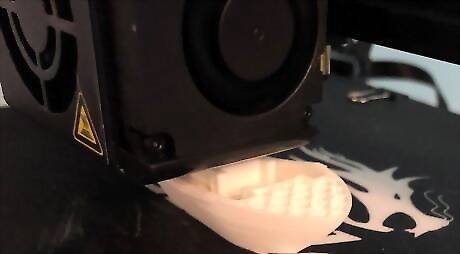
Wait for the file to print while checking back periodically until the print is finished. Check to see if the object is printing properly. If not, press on the control knob, select Stop Print.
Turn off the 3D Printer by switching the power button into the on position.
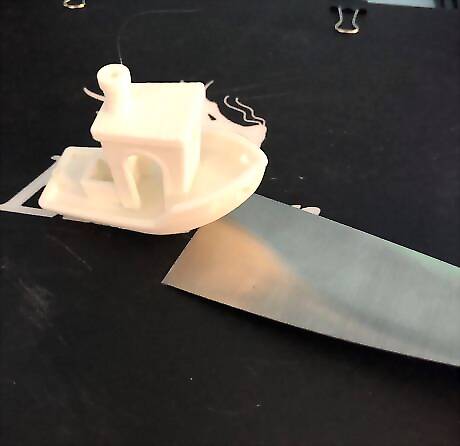
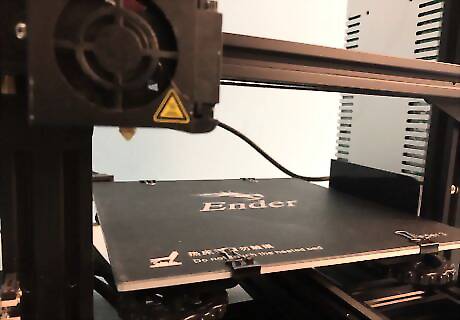
Remove the 3D printed object with the scraper tool once the print bed, print nozzle, and object have cooled.
Remove rafts, skirts, and/or supports from the object if necessary. Use sandpaper to smooth out object if needed. If printing an object with multiple parts that need to join, sand the adhesion area and use superglue.
Cleaning the Build Plate
Remove the binder clips and remove the build plate.
Clean the build plate bed by scraping off excess material with scraper tool and washing with warm soapy water and let dry.
Align the build plate onto heat bed. Secure with binder clips.


Comments
0 comment