

Decide what you are going to animate Before you start drawing, you'll need to come up with a good (better, a great!) story. wikiHow has several such entries to guide you; "How to write a short story" is a good place to start. Remember, effective stories have...an introduction, complications, and a resolution.

Storyboard your script (reducing it to a series of cartoon-like drawings). See articles elsewhere in wikiHow for tips on storyboarding.
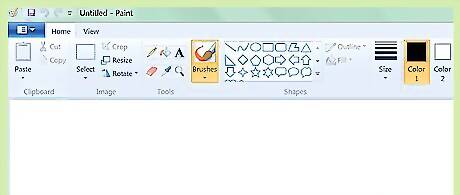
Begin animating!. Open MS Paint (or any image processing software, such as JASC Paint Shop Pro). PSP is fairly straightforward, although there is a learning curve. Most importantly, in PSP you can add the bits that will move in your animation, as layers. Then, you move the layer to get the effect of movement (vs. redrawing your entire frame, or "cel").
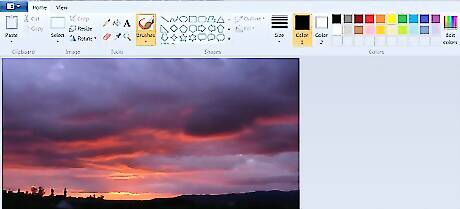
Draw your first frame (or, import a photograph). Be sure to make it look just the way you wanted it, or you'll hate the end result, and you will have wasted your time.
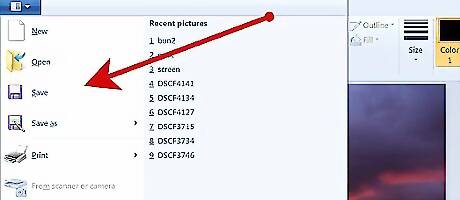
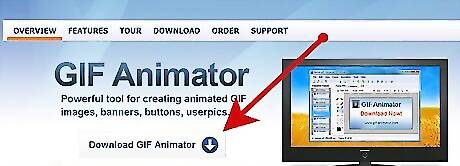
Save it into the image software you are using (or, better, paste it into an animation software package). GIF Animator (GIF-A) is free and, for your first animation, it's recommended. You might also look at JASC Animator (the 'trial' version never seems to expire). Animation programs will speed your progress in far too many ways to itemize here.
Make any adjustments you wish to make for the next cel. Usually (but not always) you will not make them drastic. This is animation, so you need to take it a step at a time. Each cel will usually be just slightly different from the last one. If you have learned about 'layers' and are using PSP, this will be accomplished with a flick of your mouse.
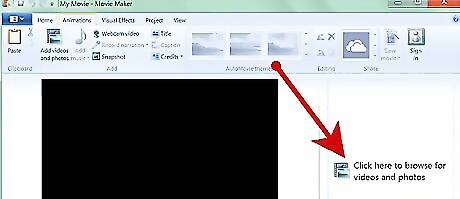
Import the saved photos (or, better, the animation file) into Windows Movie Maker (MM). Do this when you have your scenes finished. Drag them down onto the story board. You will probably iterate this step many times, until you get your creation just right.
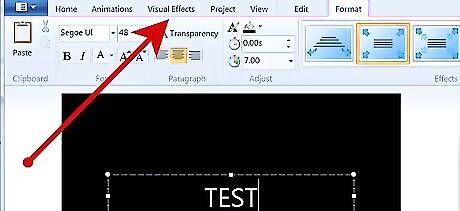
Add titles and special effects. Once you have all the visuals exactly as you like them, then is the time to add special effects, credits, a title, anything you need.
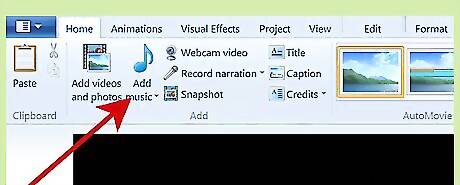
Add sound; it is essential for an effective film. While MM does have a sound editor, it is buggy, very difficult to modify, and is prone to hanging without warning (often requiring a complete reboot). You can edit your sound in any separate sound editing software (like Cooledit, but any comparable package should do), then drop the entire file into MM. You can download for free very nearly any type of sound you need, off the net.
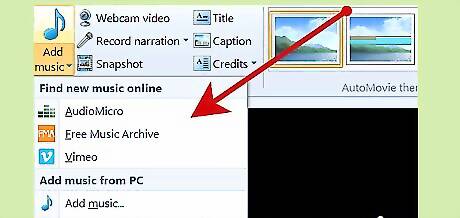
Don't forget Ambient sound. This is the incidental background sound, usually, some sort of a dull murmur; if you have none, the effect of going from "talking" to "complete silence" is jarring. You can put a soundtrack in the background, but, failing that, you should never (well, hardly ever) have a complete lack of sound. This is another time sound processing software like Cooledit proves its use: you put your ambient (or, your music) soundtrack on one channel, and your speech and sound effects on the second.

Search for examples of animation using the software mentioned in this article. See www.youtube.com (and search there for "nzfilmprof"). "Kiwi Kids" has samples of young students using Paint; and other examples done with PSP.


Comments
0 comment