
Search for a free HTML email signature generator. One safe, free option is MySignature. We’ll use it in our examples. The free version of MySignature does not allow you to add images to your signature.

Click Create free email signature. If you’re using a site other than MySignature, look for a button or link that says something similar.
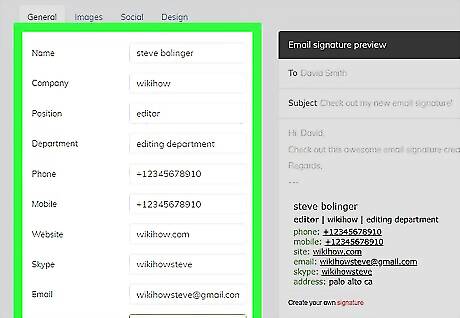
Enter the details you want in your signature. You’ll see a list of blanks (e.g. Name, Company, Website) that you can fill in with identifying information. The information you type will appear in the preview on the right side of the screen.
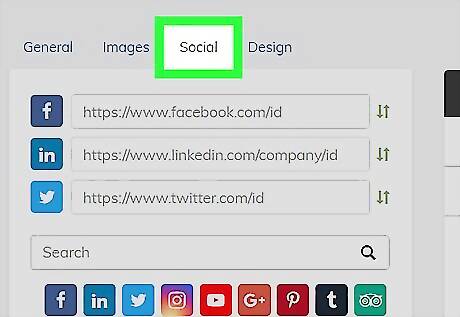
Click the Social tab. If you’re using MySignature, you can click this tab to view a list of social media types you can add to your signature.

Click each social media type you want to add. For example, if you want to include links to your Facebook, Instagram, and Tumblr profiles, click the icons for those services. New blanks will appear near the top-left corner of the page.
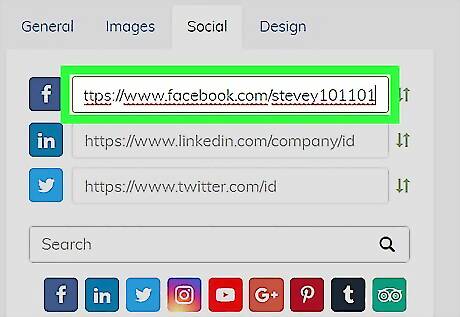
Type or paste your personal URL for each social media option. Use the format shown in each blank.
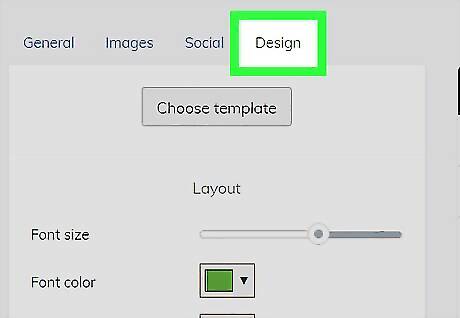
Click the Design tab. It’s next to the social media tab in MySignature.
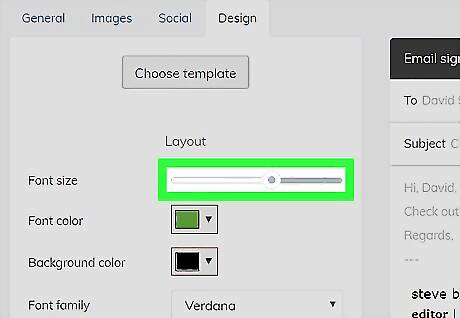
Select your layout options. If you’re using MySignature, you can edit the font size, face, and color without upgrading to a paid account. You can also select a color for the background. To choose one of the app’s templates, click Choose template at the top-left corner of the page, and click one of the options without ″PRO″ listed at the top-right corner.
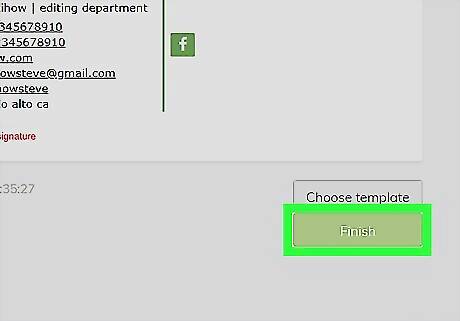
Click Finish. You’ll see a preview of how your signature will look at the top of the screen.
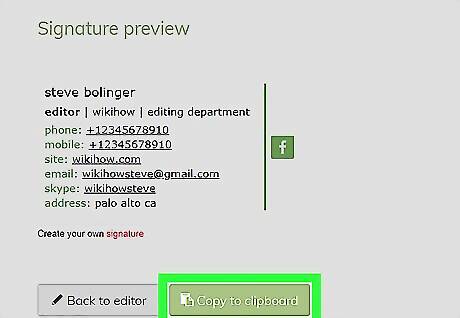
Click Copy to clipboard. It’s at the bottom of the signature preview box. This copies the HTML code for your signature to your computer’s clipboard.
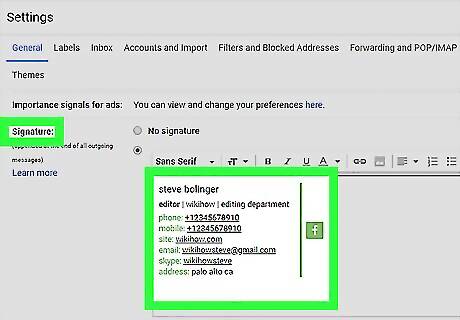
Install your new signature. The steps to do this vary by email service and app. Gmail: Click the gear icon at the top-right corner of the page. Select Settings. Scroll down to the ″Signature″ section. Press ⌘ Command+V (Mac) or Ctrl+V (PC) to paste your signature into the box. If prompted to do so, select Keep Source Formatting and then click OK. Apple Mail: Click the Mail menu, select Preferences, click Signatures, then select the account. Click + to create a new signature and give it a name. Remove the check from ″Always match my default message font.″ Paste the signature into the ″Edit Signature″ box. The signature might look wrong in the box, but that’s okay. Create a new email message to see what it will really look like. Outlook: Compose a new message. Click the Message tab. Click Signature and then Signatures. Click New and then name the new signature. Click +. If you’re using a Mac, click the ″Signature″ box, press ⌘ Command+V, select Keep Source Formatting, then click OK. If you’re using a PC, right-click the ″Edit Signature″ box, select Keep Source Formatting, then click OK.


Comments
0 comment