

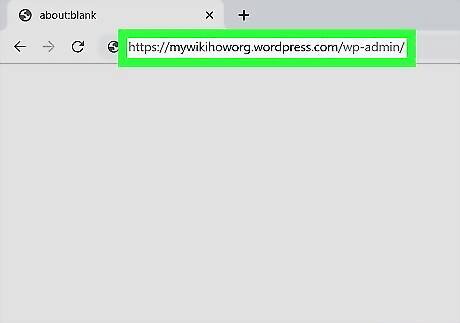
Log in to your WordPress website. The login URL is based on your domain name but generally looks like: www.[website].com/wp-admin. Use your browser to go to this URL and enter your username and password to log in. You will then be taken to your website’s dashboard.
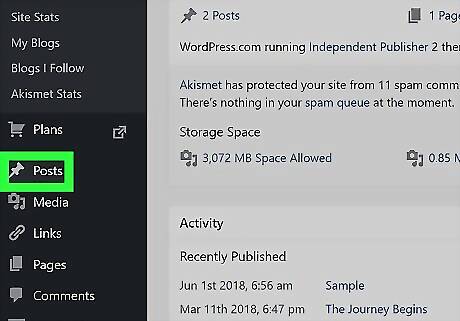
Click on Posts in the side menu. From the website’s dashboard, you will see a menu on the left side of the screen. It has a black background and a list of options in grey text. The “Posts” option has a thumbtack icon to the left of it. Clicking on this will take you to your list of posts. If you don't see "Posts," click on "Site" and a drop-down menu should appear. You should find "Posts" near the top of the list. Depending on the type of WordPress blog you have, this might be labeled "Blog Posts" or "Site Pages" instead of "Posts."
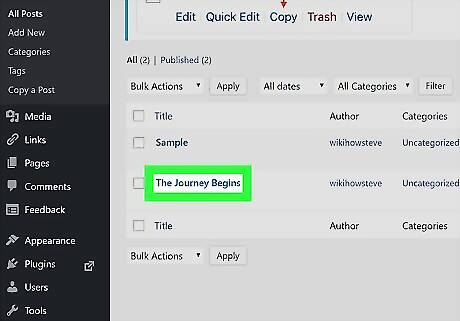
Click on the title of the post you want to edit. The post titles will be just to the right of the side menu and will be in bold blue text. If you have a lot of posts and you know the title of the post you want to edit, you can use the search option. On the right side of the screen near the top of the page, you will see a text box with a “Search Posts” button next to it. Type the post title into the box and click on the button to search.
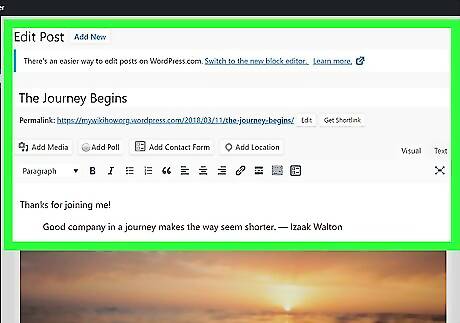
Click on the information you want to change to edit it. The “Edit Post” page gives you the power to change most of the text and visuals on the page. Click on the text and type in your changes to edit the post. To change the title of the page, simply click on the text box with the title in it and type in the new title. If you want to change the post URL, find the “Permalink” right beneath the post title. Click on the “Edit” button next to the URL, type in any changes, and click “OK” to save it. To edit the post's featured image, look for the "Featured Image" box on the right side of the page. Clicking on the current image will bring up your media library where you can pick from a gallery of images. Alternatively, you can click "Upload Files" to upload a new image. Once you have selected a new picture, click "Set featured image" in the bottom right corner of the window. If your website uses categories or tags, you can also edit those by finding them on the right side of the page. Under "Categories," simply click the check mark next to the categories you want this post to appear under. Under "Tags," type in the words or phrases you want to associate with the blog post and then click "Add."
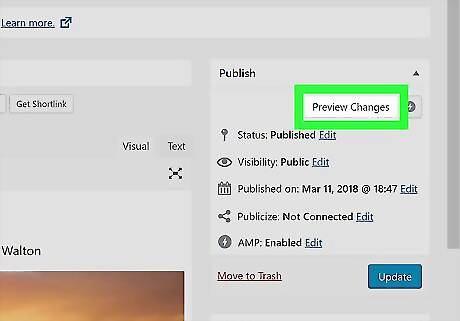
Click on Preview Changes. Once you have made all of the desired changes, you can preview your work before putting the changes on your live website. You should see “Preview Changes” near the top right of the window in the “Publish” box. Clicking on this will open a new tab or window where you can see what the updated page will look like.

Return to the Edit Post window. Once you’ve reviewed the changes, return to the tab/window where you were making the page edits.
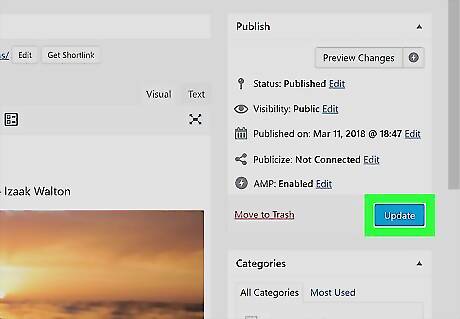
Click the blue Update button. Once you are done making edits and are ready to make the changes live, click on the “Update” button. You can find this button on the righthand side of the screen, near the top of the page.


Comments
0 comment