
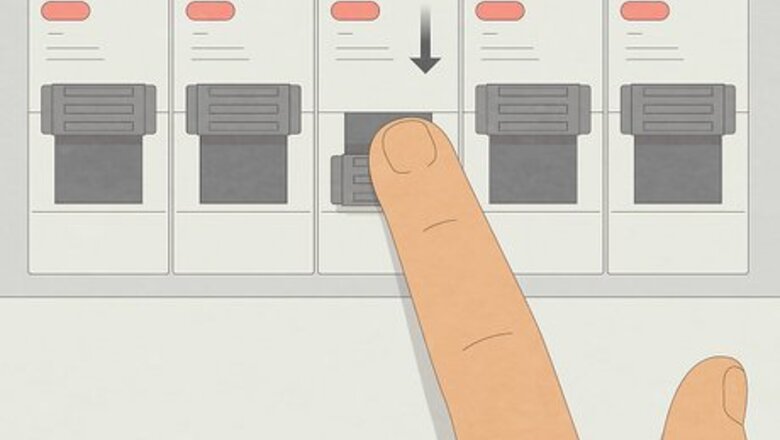
Turn the electricity off.
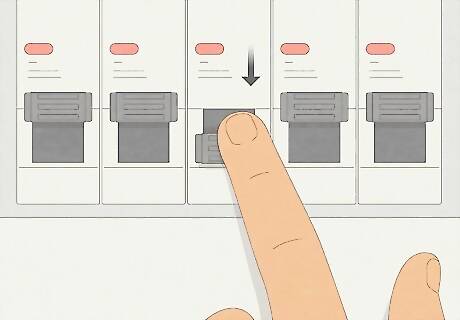
Flip the fuse on the circuit breaker box to avoid shocking yourself. Lee explains that you must cut power to the area before you touch anything else. Locate the circuit breaker box in your home and turn off the power to the room or area your fan will be installed in. Some homes will have multiple breaker boxes, with one main and several sub-breaker boxes in different places. If you have multiple breaker boxes, turn off power at the sub-breaker box and the main box before beginning work. If you aren’t sure which fuse corresponds to the room where you’re installing the fan, just flip the main breaker to shut power off to the whole home.
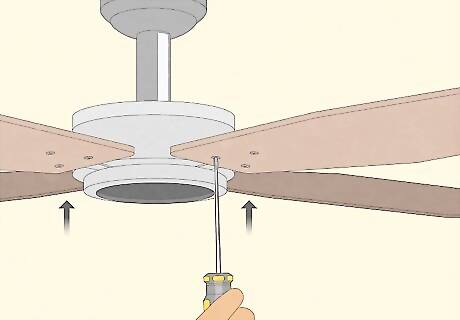
Remove the old fixture or fan.
Remove any screws holding the old fixture in place and remove it. Use a ladder to safely climb up towards the ceiling. Remove any screws or brackets holding the fan in the ceiling (don’t worry, it won’t fall to the ground). Then, twist the fan out of its bracket and hang the fan from the hook in the ceiling. Disconnect all of the wires before taking the fan down. Take a photo of the wiring setup before undoing it if you’re worried about connecting the right wires to the new fan. If there is no fitting where you want to install your new ceiling fan, call a licensed electrician to install one for you. You will need to run wiring through your walls, which is very difficult to do and can be very dangerous if done wrong. Lee says you shouldn’t use a step-ladder—use an actual ladder with enough structural support to hold your weight. You’ll also want a ladder with a platform at the top to rest the fan on as you work.
Confirm the ceiling box is code or replace it.
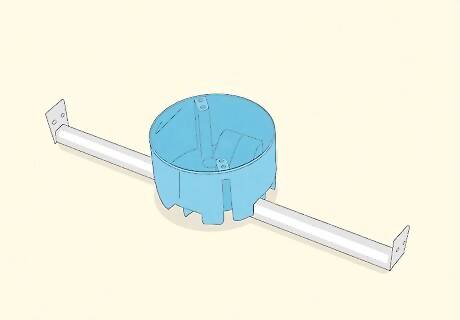
Inspect the box to see if you’re able to still use it. The ceiling box is a circular metal fitting that other fixtures attach to. Only a ceiling-rated box will be sturdy enough to hold the weight of your fan. Lee explains that you cannot use the existing ceiling box unless you are absolutely certain it is rated for a ceiling fan. It should say if it’s rated for ceiling fans on the box itself. If you're unsure or you don’t see a ceiling stamp, contact an electrician—you’ll need them to install the new box anyway. If the ceiling box isn’t up to code, contact an electrician to have them install one. This isn’t a DIY job. The box must be installed by a professional who knows how to ground the box and run the wires correctly.
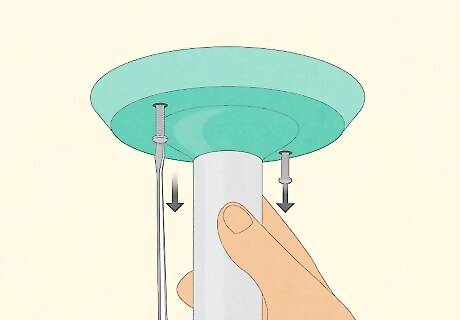
Attach the ceiling bracket.
The ceiling plate/bracket is what the fan hangs on. Hold the ceiling plate up to the fan box and pull all of the wires through the hole in its center. Use the provided screws to tightly secure the ceiling plate in place. If your new fan’s ceiling plate looks identical to the old one, you don’t need to replace it. Always follow the manufacturer’s instructions when working with specific parts. The method for attaching ceiling plates and brackets may vary, so consult your manual. If you have a ceiling medallion or any molding to go around the fitting, attach it now. This will be a decorative piece that surrounds the fitting and is secured to the roof. Use a small amount of urethane-based adhesive to hold it to the ceiling, before securing it in place with four finishing nails. For a better-finished appearance, cover the nail holes with caulk or spackle.
Assemble the fan.
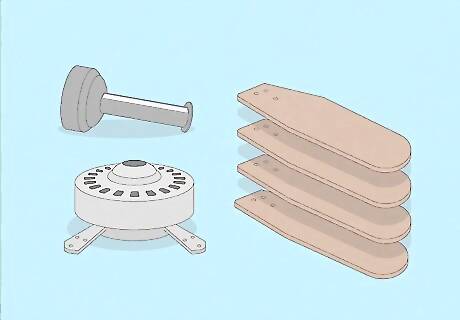
Follow your fan’s manual to assemble as much as you can on the ground. Minimize the amount of effort you have to put in on the ceiling by assembling the fan on the ground. Follow your manual’s instructions to connect the base plate, downrod, motor, and switches. Pro-tip: Install half of your fan blades now. The added weight will make it easy to stabilize the fan on the ceiling as you work and you won’t have to do all of the blades after the fan is attached to the ceiling, which can be a pain to do.
Hang the fan on the ceiling bracket.
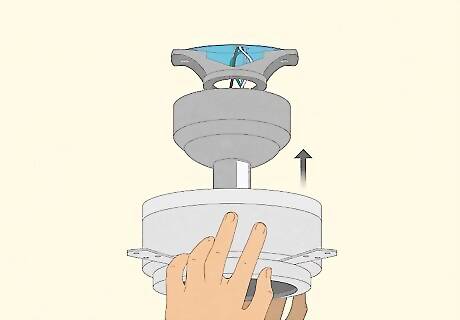
Carefully hang the fan on the hook portion of the ceiling bracket. Use a ladder to carefully lift the fan assembly up towards the ceiling. Every fan has a hook or loop on the bracket to suspend the fan just below the ceiling while you connect the wiring. Look on the body of the fan for a small opening that matches the hook and hang your fan on it. In the extremely rare off-chance your fan’s bracket doesn’t have a hook, ask someone else to hold the fan in place while you work.
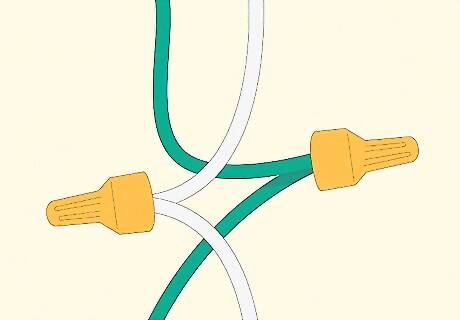
Wire the fan.

Connect the color-coded wires together with wire nuts. Hornof explains that while you should check your instruction manual to confirm which wire connects to what, ceiling fans are generally all the same: white (neutral) goes to white, black (hot) goes to black, and the green/copper wire is for the ground (do this one separately). Connect the wires by holding the exposed copper together and twisting a wire nut over each pair you’re connecting. If there’s a blue wire, it’s for a dimmer, dual switch, or light. Connect it to the two black wires. Wiring schemes will vary between different ceiling fans. Check the manufacturer’s guide if your wires differ, or call a licensed electrician.
Ground the fan with the green/copper wire.
Connect the ground wires or use the grounding screw. Hornof says the ground wire will usually be green or entirely bare. It prevents electrical shocks and fires by grounding the circuit. Find the two ground wires, twist them together and secure with a plastic wire connector. Use electrical tape to keep the wires and the connector in place. If there is no ground wire on the fan, look for a screw attached to bare metal. Connect the ground wire to that screw. Safety warning: If you don’t have a ground screw, or you don’t know how to ground a wire, call a licensed electrician.
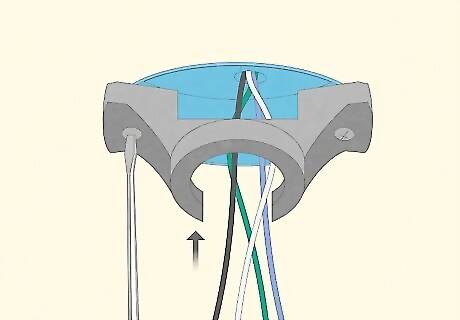
Secure and tuck the wires in the ceiling.
Tuck the wires into the fan box carefully. Carefully push the wires coming from the ceiling back into the fan box to secure them. As you do, make sure the wire connectors and electrical tape stay secure and no wiring is exposed. Exposed wiring could lead to a dangerous short circuit and further issues. If you see any exposed wiring, immediately secure it and cover it fully.
Finish assembling your fan.
Now is the time to attach the canopy, fan blades, and any toggles. Attach the fan blades. One by one, lift the fan blades up to their mountings on the fan motor. Slot them into place according to the manufacturer’s guide, and use the provided screws to tightly secure them to the motor. Add any shades, aesthetic covers, etc. Make sure the screws are as tight as you can make them. Loose screws will cause the fan blades to wobble and potentially come loose as the fan is running.
Install any light bulbs and glass fixtures.

Leave any fragile or glass components for last. The bulbs will usually be very simple to wire up and secure into place (if you have to do any wiring to begin with). Check your manufacturer’s guide for instructions on how to install the lighting fixture into your specific fan. The wiring for the lighting fixture will generally follow similar rules as wiring the fan. Connect the wires of the same color together and secure with connectors and electrical tape to prevent short-circuiting.
Turn the power back on and test your fan.
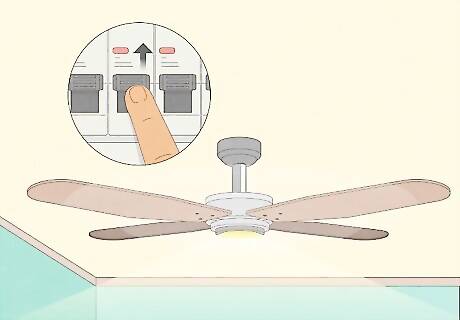
Make sure everything works before you put the ladder away. Go back to the circuit breaker box or boxes and restore power the necessary sections of your home. Turn the fan on at the wall and watch it for a few minutes to make sure it is working as intended.


Comments
0 comment