views
Educating Yourself About Bead Weaving
Watch online tutorials. If you want to learn how to do bead weaving, you can begin by watching a variety of online tutorials. For example, there are tutorials that can teach you how to make basic jewelry, how to choose the appropriate beads, needles, and thread, and how to complete basic stitches. In order to find a bead weaving tutorial, complete a google search for exactly what you are looking for. Some tutorials will be better than others, so you may need to search around until you find one that works for you. For example, search for "How to bead weave", "How to get started bead weaving", "Bead weaving tutorials for beginners."
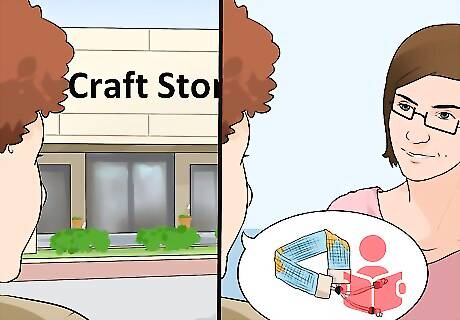
Take a bead weaving class. Bead weaving classes are also a great way to learn how to bead weave. In order to find a bead weaving class in your area, go to your local craft store and ask around to find out if there are any available. You can also search online for bead weaving classes. You may even be able to find classes provided online. Typically a class will focus on a specific skill and item such as making a bracelet using a diagonal stitch.

Download a bead weaving pattern. You can also download a bead weaving pattern online. For example, you could purchase a pattern at the online craft store esty.com or search through a variety of online bead suppliers. Many bead suppliers will also provide free bead weaving patterns that can be downloaded. Follow the instructions provided with the pattern in order to learn how to make that specific piece.
Selecting the Appropriate Supplies
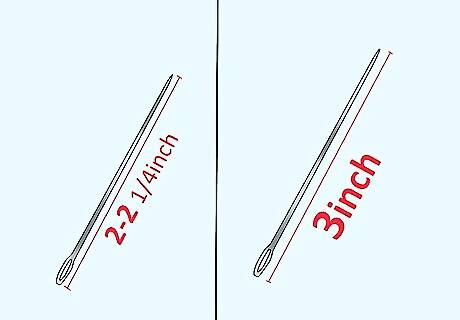
Choose a bead weaving needle. Bead weaving needles are different from regular sewing needles because they are much thinner in order to pass through the holes of small beads. They also vary in length. For standard, hand bead weaving it is recommended that you use a needle that is 2 to 2 ¼ inches (5 to 6 cm) long. If you are using a loom, then you will want to use a slightly longer needle that is about 3 inches (7 ½ cm) long. You may also use needles that are slightly more pliable if you need them to bend when stitching.
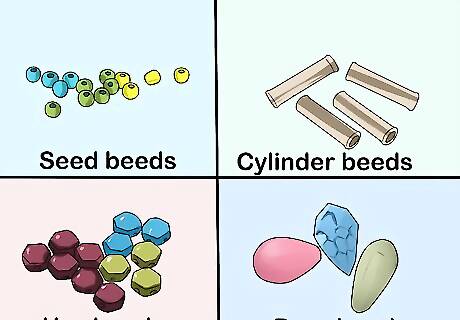
Select the type of beads. There is also a huge variety of beads available for bead weaving. They come in a number of different colors, shapes, and sizes. In order to select the appropriate type of bead, you need to determine the project you are creating. For example, certain stitches work better with certain beads. A few basic bead types are listed below. Seed beads are the most common type of beads. They are typically described as small glass beads. Cylinder beads are uniform in shape and typically have straight sides and large holes. These are the best beads to use if you want to achieve uniform and smooth beadwork. Cut beads are similar in shape to seed beads; however, they have one or more cuts on the side. This gives them a shimmering or sparkling effect similar to a gem. Hex beads are a combination of cylinder beads and cut beads. They have six cuts in them, giving them a more sparkly look. Drop beads are larger beads that look similar to a drop of liquid. They have rounded edges and look best at the end of a beaded fringe. Bugle beads are long tubular looking beads and are most commonly used in beaded fringes.
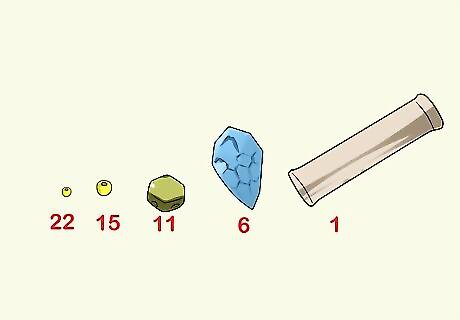
Pick the right sized bead. Beads also come in a variety of sizes. Bead sizes are numbered from size 1, which is an extremely large bead, all the way to a size 22, which is a very tiny bead. The most common bead sizes range from size 15 as the smallest to size 6 as the biggest. Size 11 is typically the most commonly used bead size. Larger beads are best if you have trouble seeing, and they are the easiest to use. Smaller beads are best for intricate detail work.
Learning Basic Beading Techniques and Stitches
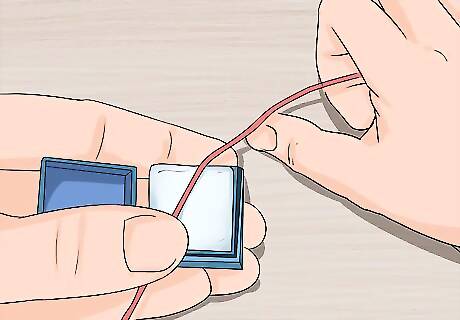
Condition your thread. In order to prevent tangles and tears, you can lubricate your thread using a conditioner. Some threads will already contain a wax or conditioner. This will be stated on the thread spool. If you are working with a thread that has not been conditioned, place the thread in the conditioner and hold it down with your index finger. Then pull the thread along the conditioner using your other hand. Do this a few times in order to make sure that it is thoroughly conditioned. Thread conditioner is a waxy-like substance that can be purchased at a local craft supply store.
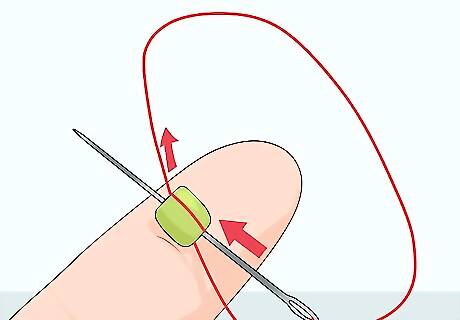
Put on a stopper bead. At the beginning of most beading projects, you will need to start by putting on a stopper bead. This will help to hold your beads in place so that they do not fall off the thread. In order to put on a stopper bead, put your beading needle through the hole of the bead and slide it down towards the end of the thread. Before the bead reaches the end of the thread, bring the needle back through the bead from the bottom. This will create a loop around the bead and hold it in place. You can still slide the bead along the thread to position it.
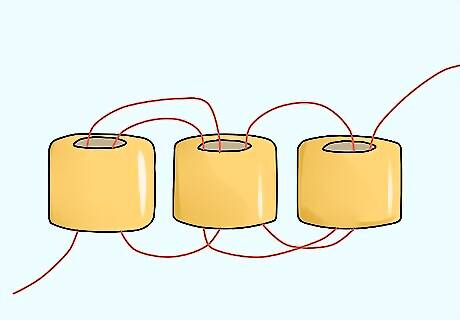
Learn the ladder stitch. The ladder stitch is a foundational stitch in bead weaving and is typically used to make the first row of other more complex beading stitches. It can also be used on its own to create jewelry or embellishments. Begin with a stopper bead, and then thread through two additional beads. Bring your needle down, loop back through the bottom of the first bead, and pull tightly. This will stack the two beads. Then thread down through the top bead to secure it. Thread a third bead onto your needle and then bring your needle down through the second bead. Put the needle through the opposite end of where the thread is hanging out. Then pull the needle up through the bead that you just added to secure it in place. Repeat this pattern until you have reached the desired length.
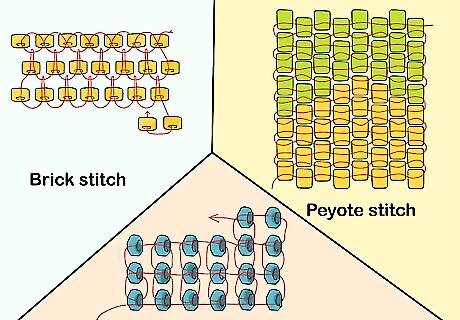
Try other stitches. Once you have mastered the ladder stitch, you can begin learning some other basic stitches. For example, try the brick stitch, the peyote stitch, and the square stitch. Remember to always apply a stopper bead before you begin stitching your beads.
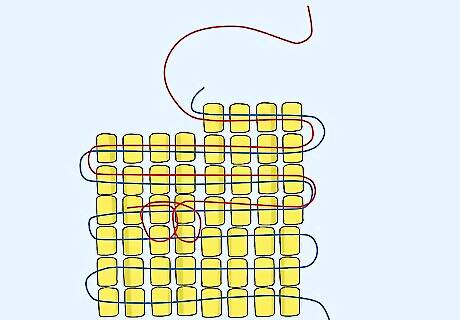
Tie off your thread. Once you have reached the end of your thread, you will need to tie if off before continuing your project. To do this, you want to hide the thread within the beads already sewn into the project. Take your needle and sew back through a few rows. Always tie off a thread near the centre of your project, not along the edges. This will make it easier to hide the end of the thread. Loop the thread around a few beads to keep it in place, cut the thread, and tuck it into the project. You should use this same method, regardless of the type of stitch you are completing. To start up again, take a new thread and loop it around a few beads before stitching through the last bead you were working on. Then continue with your project.





Comments
0 comment