
Gathering Materials
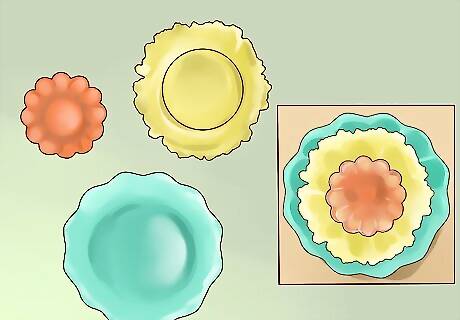
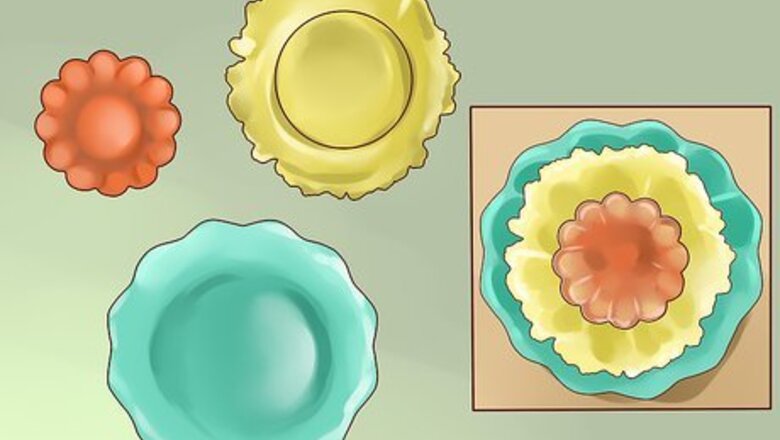
Source your old plates to begin creating your art. Start your hunt for plates by scouring yard sales and thrift stores. Keep an eye out for plates with interesting colors and textures. Aim to get 3 plates, one of each that is small, medium and large. These will need to fit together so that all 3 are visible, so each needs to be slightly larger than the next. A mix of solid-color and patterned plates works well. Don't limit yourself to just plates – pretty pot lids, teacups, small vases, votive candle holders, or glass lampshades can also work nicely. Transparent glass plates work well, and ones with textured edges. You don’t have to use china or glass. Consider using metal or plastic plates, lids, or colanders. You can always try customizing your plates by painting them with glass paints or gluing on marbles and glass beads to add extra color and texture.
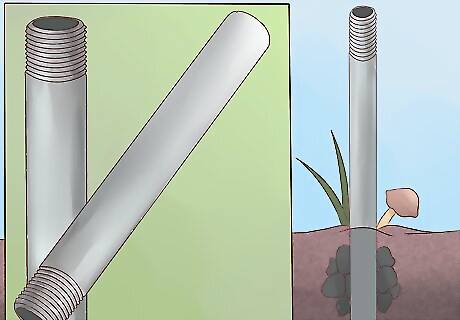
Get some lengths of piping to build your flower stem. In addition to the plates that will make your flower's head, you’ll need some lengths of piping (copper piping works well), threaded rods, or wooden stakes to form the long flower stem. Remember that this stem will be driven into the ground, so make sure it’s at least 1/3 of it can sink into the ground while still maintaining your desired flower head height. The deeper you can drive it into the ground, the more secure and stable it will be.
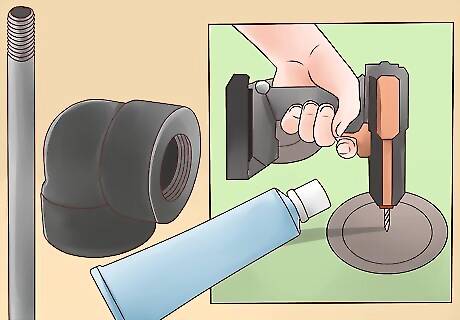
Acquire materials to fasten the flower head to the stem. You’ll need something to fix your plates to their stems. Gather pipe fittings, coupling nuts, a washer/nut, or wire. The following methods require different materials, so pay close attention to the materials used. Depending on how you plan to assemble your plate art, you’ll also need glue, or a drill and drill bits and a way to stabilize the plates while drilling them.
Assembling Your Flower With Glue
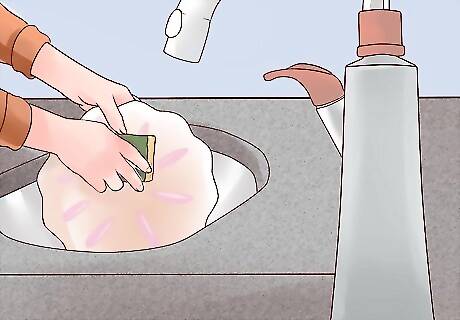
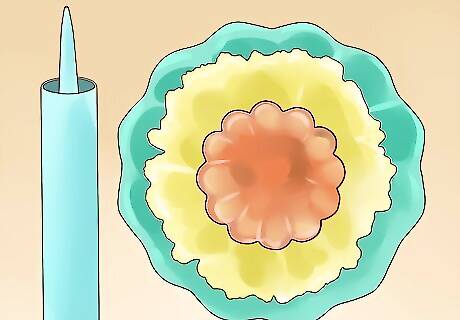
Prepare your plates for gluing. Before you begin gluing, make sure your plates are ready and that you have the proper materials. You’ll need to get a really strong glass glue, such as E6000 glue or marine grade glue. If you plan to paint your plates with glass paint, do so in advance and fire in the oven if needed. Surfaces need to be clean and dry before gluing, so wash and dry the plates beforehand.
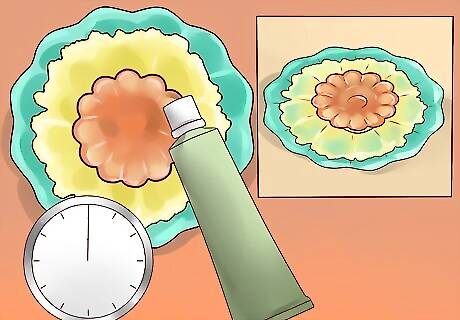
Glue your plates to one another. Arrange your plates in your desired order, and glue them so that the designs you want are visible. Make sure that you glue them facing the right direction, to avoid one part of your design being inadvertently hidden. Let it air dry for about 24 hours (check the instructions on the glue). Once it has set firm, turn the flower head over.

Attach a coupling nut to secure the plate head to the pole. Glue a half inch coupling nut or pipe fitting onto the back of your plate by sticking it to the plate's side. Again, leave this to dry overnight. Once that’s dried, you can thread a 3 inch (7.6 cm) threaded rod into the coupling nut, or (if you used a pipe fitting) a length of pipe to secure your plate head to the rod.
Assembling Your Flower By Drilling
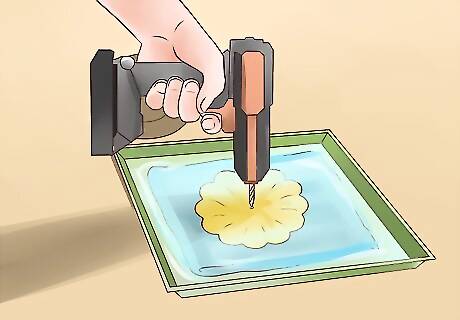
Create a safe surface to drill into. You need to find a way to hold the plate in position while you drill. One way to do this is to wet an old towel that you don’t mind putting holes in. Put the sodden towel onto an old metal oven tray. The sides will stop the contents from shooting out if your drill slips. Add a bit more water. Make sure the water slightly covers the towel. This will help stop the drill from overheating and being damaged, as you will be drilling continuously for long enough for it to heat up. Alternately, try spraying the surface of the drilling site with water as you drill.
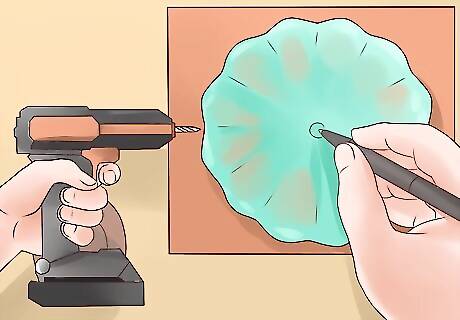
Mark where you want to drill. Mark where you want to drill your hole using a pen or marker, in order to guide yourself. Before drilling, it’s a very good idea to practice on an old plate that you don’t mind breaking. After your first successful attempt, you can then use plates you want to use for your art. Make sure you are wearing safety goggles and gloves.
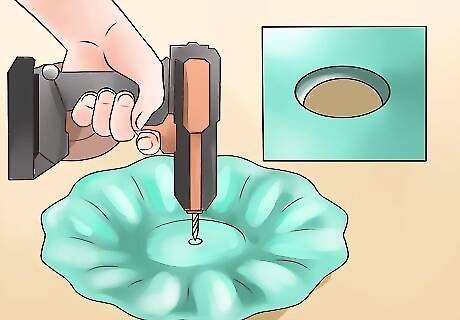
Make a pilot hole. You might want to make a pilot hole first using a diamond-tipped 1/8” drill bit. This just scores the surface to create a divot you can start from. A pilot hole can make the upcoming drilling easier if you have never drilled a slippery surface before.
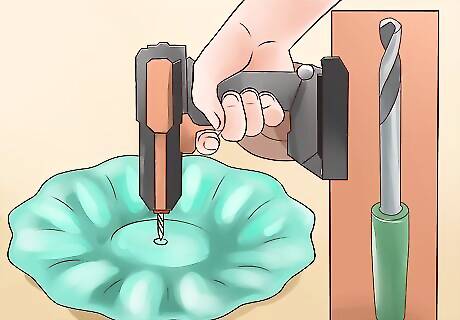
Drill your hole. Attach a 5/16” masonry drill bit and begin drilling. Drill without applying much pressure. You’ll need to be very patient, as it can take several minutes to penetrate. You may find it easier to drill at a 45 degree angle for the first few seconds to score the surface, then switch to a 90 degree angle to penetrate it. Unfortunately not all plates can be drilled. If you haven't made any progress after 7 or 8 minutes of drilling, consider gluing tough plates instead! Repeat the entire drilling procedure for each of your plates.
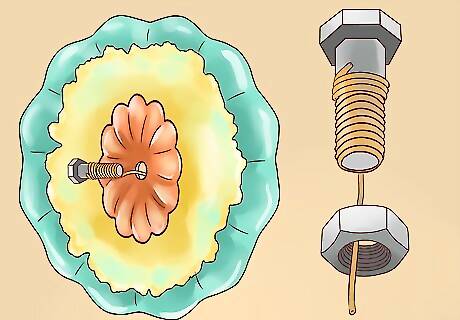
Thread a nut onto a piece of wire. Once your plates are drilled, thread a nut onto a piece of wire. Then, fold the wire in half and thread it through a washer. Thread the wire through each of the plates' holes, front to back, so the nut and washer are at the front (nut at the front of the plates, washer against the back of the rear plate). Use the excess wire to attach the flower to a length of piping or a wooden stake.
Seal your plates with silicon sealant. If you are using the drilling method, you might like to doubly secure the plates against each other using silicon sealant. This stops them rubbing against each other. Preventing friction can make the wire on your flower head last longer.
Positioning Your Flower Head
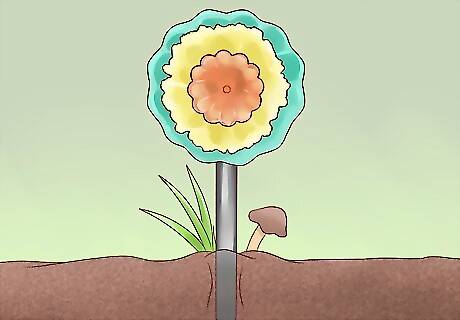
Insert the stem of your flower (the threaded rod or pipe) into the soil. You’ll want to insert it pretty deeply in the ground for stability. The deeper you can sink the stem, the more resistance it will have to wind and other environmental forces.
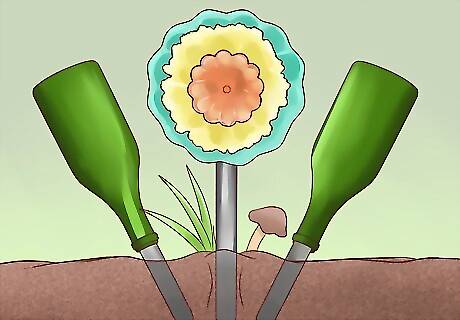
Finish your flower with some wine bottle leaves. You might like to finish off your flower by creating ‘leaves’ using colored glass wine bottles. To do this, remove the labels from a couple of wine bottles (green works well). Stick some rods into the ground and stick the bottles over the rods. Position them in the ground so they look like the leaves on a flower.
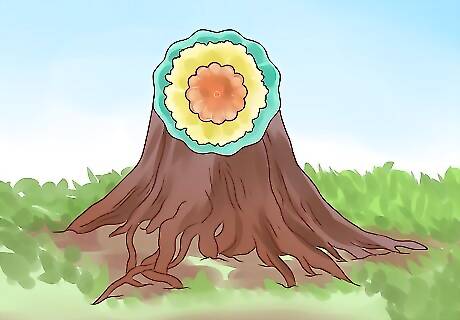
Try attaching the plates directly to a surface. If you don't want to bother with creating stems for your flower plates, you can attach the plates directly to a surface such as an old tree stump or wooden fence. It’s best to use the drilling method and nail them to the surface through the hole. This can be a good way to solve the issue of stability, by affixing them to a strong and immobile surface.


Comments
0 comment