views
How to Hold a Bass
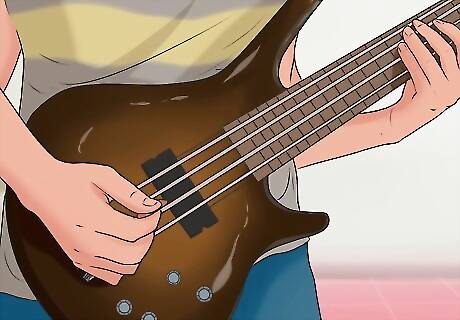
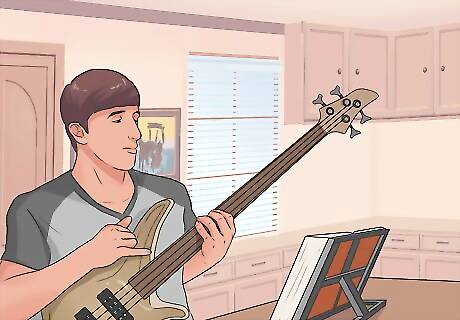
Adjust the slant and height so your arms and wrists are comfortable. To hold the bass correctly, put on your strap and adjust the height of the bass so that the body lays somewhere between your chest and hips (most people play with it held near their belly button, but it’s all personal preference). Then, slant the bass about 30 degrees so that the headstock (the end piece at the end of the neck) is somewhere around your shoulder or eyes. Avoid playing the bass purely horizontally since this forces your fretting hand to reach or stretch uncomfortably to hit the low notes. Aim for a height and angle that lets your wrists straighten and your arms stay relaxed and close to your body. Your left hand will move up and down the frets while your right hand hovers over the body to pluck the strings. Professional guitarist Nicolas Adams says, “You can sit or stand up, but make sure that you have good posture in either position.”
Tuning a Bass
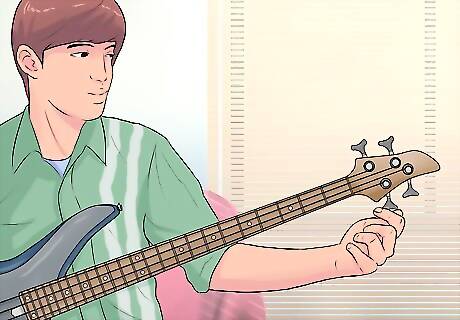
Clip your digital tuner to the headstock and check the pitch of each string. To tune your bass, attach your tuner to the headstock and turn it on. Then, pluck each string one by one to see if they’re in tune. The tuner will tell you whether the pitch is sharp (too high), flat (too low), or exactly in tune. To adjust the pitch of a string, turn its corresponding tuning peg (flat metal or wood pieces that stick out of the headstock): If a string is flat, tighten the tension with the tuning peg to raise the pitch. If it’s sharp, loosen the tension on the string to lower the pitch. The pitches of the 4 strings are the same as the 4 lowest strings on guitar, but an octave lower: E: E1, or the E below the bottom line of the bass clef (41 hz) A: A1, or the A in the bottom space of the bass clef (55 hz) D: D2, or the D on the middle line of the bass clef (73 hz) G: G2, or the G in the top space of the bass clef (98 hz) Note that on bass, the notes sound an octave lower than written. Some tuners may struggle to pick up the low E string. Some practice amps also have a built-in tuner you can plug into.
Should you use a pick or your fingers?
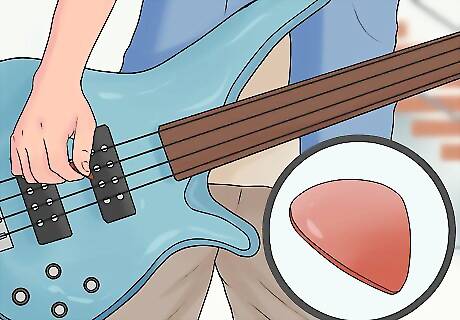
Ultimately, it depends on the sound you want and what feels easier to you. Traditionally, bass is played with the fingers (usually the pointer and middle fingers of the right hand). This gives you a meatier sound, more control, and access to a wider variety of sounds and attacks. The downside is that mastering fingerwork usually takes longer than learning to play with a pick. Picks, on the other hand, give you a brighter and more nimble sound and are great for fast, technical playing. Guitarists that convert to bass often stick with a pick since they’re used to it already. Many serious bassists learn to use both their fingers and a pick for greater tonal variety and versatility.
Plucking the Bass
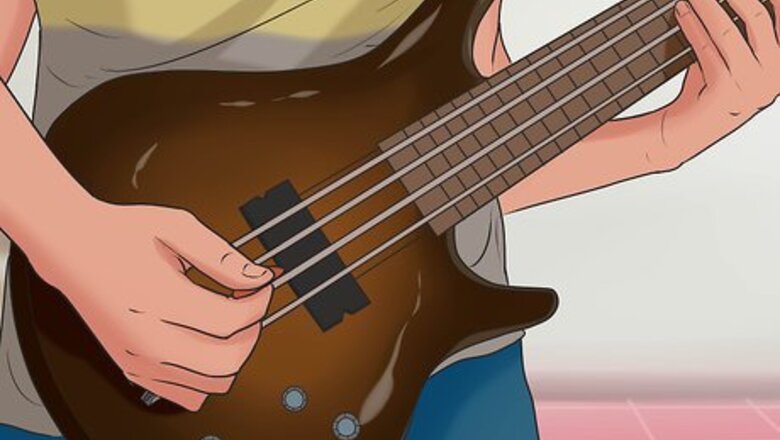
Pluck the strings with your right hand between the bridge and neck. Where you pluck alters the tone of the bass slightly. Plucking nearer to the bridge (where the strings terminate on the body) creates a bright, percussive sound while plucking closer to the neck makes a warmer, flatter sound. Exactly where you pluck is up to your preferences and the style of music you’re playing. When you practice, keep your plucking isolated to a small area without a lot of movement up or down the strings.
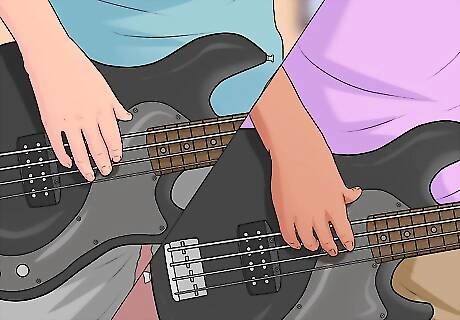
Keep your hand relaxed and roll your fingertips over strings to pluck them. Let your hand stay somewhat limp in a natural, relaxed position with your thumb resting on the face of the body, just above the E string. Instead of pulling on the strings from underneath, roll your fingertips over them for a rounder, more controlled sound. If you want to increase your volume, turn up your amplifier instead of plucking at the strings harder. Keep your nails trimmed short. Your nails will change the sound of the bass if used against the strings.
Alternate between your pointer and middle finger for speed and agility. Rather than using one finger to pluck every note (which will exhaust you and your finger), use your first 2 fingers in alternation. Start with either your pointer finger or middle finger depending on what feels most comfortable. On the bass, your fingers are labeled T (thumb), 1 (pointer finger), 2 (middle finger), 3 (ring finger), and 4 (pinky finger). So, your alternating plucking pattern might look like 1-2-1-2 or 2-1-2-1.
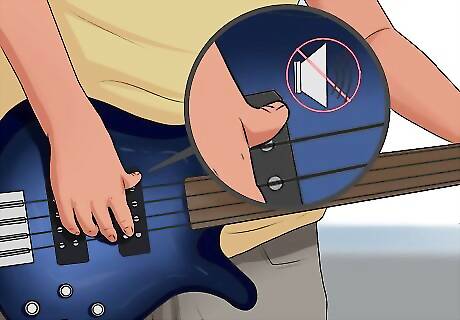
Mute the strings that aren’t being played. The bass is a resonant instrument, and open strings will still ring even if you aren’t plucking them. In order to give a clear sound and avoid muffling the notes you play, mute the strings by lightly resting a finger on them: To mute the E string, keep your thumb as close to the string as you can and rest it on top of the string to keep it from vibrating. You can choose to move your thumb off the E string to mute other strings if you are playing higher strings. Which finger you use to mute the other strings depends on which string you’re plucking. Often, you’ll use your ring finger (3) to mute the G, D, or A strings. Don’t push down hard on the strings, but gently rest your finger or thumb on them to block the vibrations that cause sound. You can also use the fingers on your fretting (left) hand to mute strings if the right hand is very active.
Learning the Frets & Playing Scales
Basses have 21, 22, or 24 frets that are all an interval of a half step apart. The frets are thin strips of metal or wire that lay perpendicular to the strings and show you where to place your fingers to play different notes. A half step is the smallest possible interval between 2 notes in Western music, so each time you move up 1 fret, you’re moving up by 1 adjacent note. Another very common interval is the whole step, which is made of 2 half steps. To play a whole step interval, pluck 2 frets higher or lower than your first note (skipping 1 fret). The physical distance between frets gets smaller and smaller as you move higher, but the musical interval between them sounds the same.
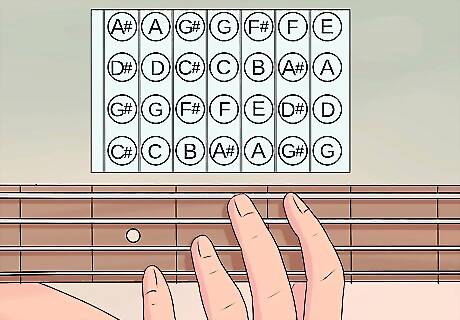
Begin practicing scales to learn your way around the frets. Most scales are a series of 8 ascending or descending notes that span one octave (an octave is 12 half steps wide, or the distance between 2 notes of the same letter name, like low G to high G). The most common scale types that will help your bass technique are the major and natural minor scales, with each having a unique pattern of half and whole steps: Major scales use the following step pattern between notes: Whole, whole, half, whole, whole, whole, half. For example, in a C major scale, the notes are C, D, E, F, G, A, B, C. C to D and D to E are whole step intervals, so you’d skip a fret between each note. E to F, however, is a half step, so those frets are right next to each other. Natural minor scales use the following step pattern between notes: Whole, half, whole, whole, half, whole, whole. For example, in an A natural minor scale, the notes are A, B, C, D, E, F, G, A. A to B is a whole step, so you’d skip a fret to play that interval. B to C is only a half step, so you’d play the next fret up. Some of the most commonly occurring and helpful scales on the bass to know are G, A, B-flat, and E major, and A and G natural minor. Play an entire scale on one string, or switch to a higher string as you ascend so your hand doesn’t have to travel all the way up toward the body. Learning scales helps you improve your fingering, learn how to play with speed, and make soloing and improvising easier.
How to Play Chords
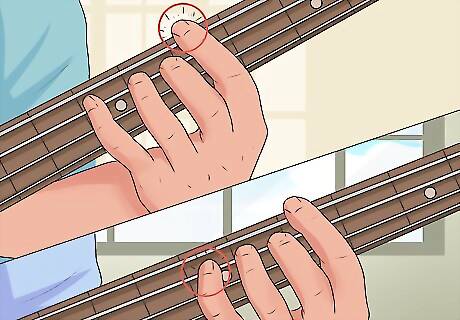
Play the root note of chords to get familiar with chord progressions. A chord is a 3- or 4-note set of notes played simultaneously. Chords are labeled by their root, or the lowest “home” note of the chord. Bass players do not play full chords very often (unlike guitarists), so navigating the roots of a chord progression will help you begin learning bass lines. For example: Say you have a chord progression of F major, G major, C major, and A minor. The roots of these chords are F, G, C, and A, so these are the notes you would play.
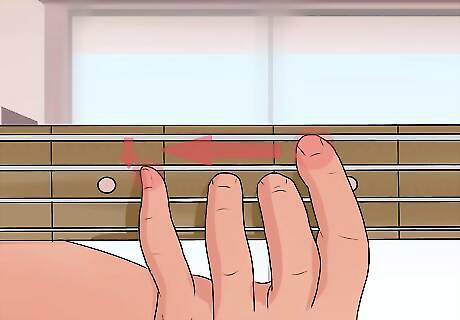
Play the root and fifth of a chord together. Once you understand roots, try playing the fifth of the chord simultaneously. The fifth is 5 scale tones away from the root of the chord, and playing these 2 notes together supports the more complex harmonies that guitarists or keyboard players have. Finding your fifths is pretty simple: To play the fifth above the root, play the note two frets higher on the next string up. To play the fifth below the root, stay on the same fret and move one string lower. For example, if you add fifths to the F, G, C, A chord progression, you end up playing F and C, G and D, C and G, and A and E simultaneously. A basic chord, or triad, consists of 3 notes: the root, the third (the note 3 scale tones higher), and the fifth.
Reading Bass Tablature
Tablature is a visual guide to playing notes if you can’t read sheet music. Reading bass tabs also lets you know which string and fret to play to make a certain note. Tablature looks almost like a regular staff; it has 4 horizontal lines representing each string (the E string is the lowest line and the g string is the highest). The number printed on a line indicates which fret to press. For example, if you saw “2” on the D string line, you’d play the second fret on the D string. If you see a “0” on a line, it means to play the open string (no frets). The downside of tablature is that it doesn’t indicate rhythm, or how long each note should be. Use tabs if you already have an idea of how the music sounds and just need to know the notes. Focus on learning fingerpicking tabs if you decide to play with your fingers instead of a pick.
Creating a Bass Line
Base your bass line around the roots of the song’s chord progression. Say you’re writing a bass line for a song’s chorus and the chord progression is A minor, E minor, F major, G major. The roots of these chords are A, E, F, and G, so these are the notes you’d highlight or prioritize.
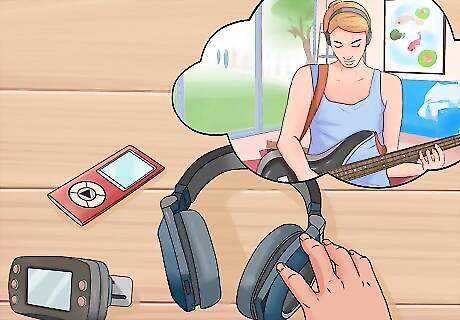
Write or improvise a catchy rhythm based around the root notes. The bass is as much a part of the rhythm section as it is a melodic instrument, so play around with different rhythms that complement the melody and feel of the song. For a punk or rock song, you might use driving, accented, repeated notes, while for a ballad, longer and more sustained notes might fit better. Don’t be afraid of silence, either! Having the bass sit out for a beat or two and then coming in on an off-beat or at an unexpected time can help the melody shine and accentuate the harmonies of the song. Listen to the bass performances in some of your favorite songs to hear the ways that they keep rhythm. The most important job of a good bass player is to keep the rhythm of their music. The bass definitely adds great sound to any song, but the vital task is keeping a good beat.
Add other chord or scale tones to give your line variety. Playing the roots is a good place to start, but the most beloved bass lines use additional notes to sound catchier. For example, if you’re moving from an F chord to a C chord, you could add in the notes G, A, and B in between to “step up” to the C chord in a scalar motion. Similarly, you could use other notes from each chord in the progression besides just the roots. In an A minor chord (A, C, and E), you could punch out some Cs and Es in addition to As to add more variety. Stay within your key signature (or the notes of whichever major or minor scale your song is based on) to avoid any unwanted clashes or dissonant notes.
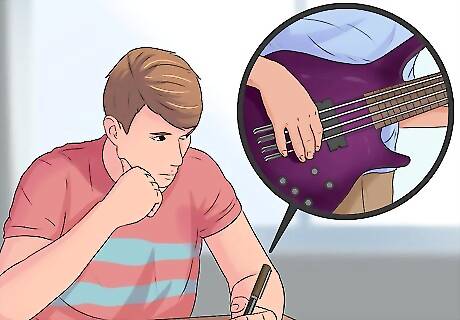
Try writing your own songs to put your bass lines into action. If you enjoy writing your own material, try fleshing out your bass lines with a drum beat, harmonies in the guitar or keyboard, and a melody (sung or played by an instrument). Or, if you’re unsure what to write, get a group of musical friends together and jam to see what you come up with! Some of the biggest hits of all time have multiple writers and composers credited. Music is about connection, so don’t feel the need to write and record everything all by yourself. Writing your own music is also a great opportunity to give yourself a bass solo to show off your skills.
Bass Practice Tips
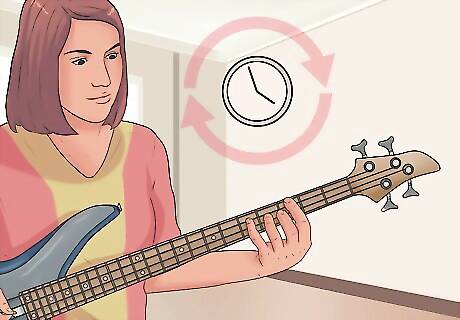
Practice on a regular basis. The best advice for anyone learning a new instrument is to practice regularly. According to professional guitarist Nicolas Adams, “Giving yourself at least 10–20 minutes of practice a day will not only help your hands to feel comfortable with the bass, but make your music sound clearer and better over time.” Practicing consistently during most days of the week is better for your musical growth than trying to cram several hours into one day while not touching the bass for the rest of the week. It’s better to do 10 minutes every day than 3 hours the night before a concert!
Practice with a metronome to improve your rhythm. Metronomes are small tools that emit a clicking noise at a certain rate, helping you to play with a steady beat. You can adjust their speed to practice at a fast or slow pace, depending on what you’re working on. You can buy a physical metronome (digital or analog), or download a metronome app to your smartphone so that you always have one on you.
Consider taking bass lessons for one-on-one instruction. It’s certainly possible to teach yourself the bass, but working with an experienced teacher is a great way to hone your skills faster and make sure you’re not accidentally reinforcing any bad techniques in your playing. Check local community music schools or universities for private lessons or group classes. If you live in or near a big city, there are also probably many bassists around that offer lessons. Google something like “bass teachers near me” to see who’s available. If you’re in a remote area, try taking virtual lessons. In-person lessons are generally more effective, but video lessons are still a great way to improve! Remember, a great player doesn't necessarily translate to a good teacher. A good teacher will challenge your abilities and help you understand the instrument.
Choosing a Beginner-Friendly Bass & Strings
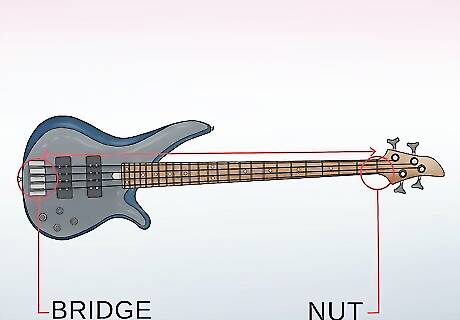
Select a bass with a short scale if you have small or sensitive hands. The scale of an electric bass guitar refers to the distance from the nut to the bridge (essentially, it’s the vibrating length of the strings). A longer scale has longer strings and produces a deeper sound, but the distance between frets will be larger, meaning your fingers have to stretch more to play. The most common scale for an electric bass is 34 inches (86.4 cm). If you’ve got small hands, a condition that makes them less nimble like arthritis, or are a child under about 12, choose a shorter scale. Try a medium scale (30–33 inches (76.2–83.8 cm)) or if necessary, a short scale (30 inches (76.2 cm) or less). A shorter scale may be easier to maneuver for a beginner, but will lack the depth of sound a long scale bass will have. Unless your hands are very small, stick with a 34” scale for the best sound. Most basses have 4 strings. If you get a 5- or 6-string bass down the road, choose a large 35 inch (90 cm) scale or longer for a deep, powerful sound.
Test a few basses to find the tone or sound quality you’re looking for. Are you picking up the bass to play in a hard rock band, or do you want to play in a softer jazz trio? While the biggest factors in how your bass sounds is your technique when you play it and the amp or pedals it’s hooked up to, there are a few other considerations to keep in mind when you’re looking for a bass: The material. Hard woods like maple, walnut, ebony, and rosewood give a percussive sound to your bass, while soft like alder, basswood, and swamp ash make a softer, warm sound. Synthetic graphite and luthite basses don’t vary by instrument like wooden ones and are versatile instruments for many styles. The neck shape. A U-shaped neck is thick and adds body to the sound while a V-shaped neck provides an overall rounded sound. C-shaped necks are versatile and good for many styles of playing.
Pick strings that are comfortable to play and give you the sound you want. The thickness, tension, and material of the strings also contribute to your bass guitar tone. Strings can be changed fairly easily (and should be changed every couple of months, depending on how much you play), so don’t be afraid to experiment with different sets! Quality strings for beginners can cost as low as around $20. Consider the following: The string winding (the outer layer of the strings). Flatwound strings give a round and mellow sound while tapewound strings are a bit duller and darker. Roundwounds sound bright and crisp, and half rounds preserve some brightness while reducing extra string noise. The string gauge (thickness). Thicker strings give a meatier sound but may be harder to pluck. Thinner strings are brighter and more percussive while being easier to play. Consider buying a few sets of strings at once so you have backups in case one breaks or you need to replace them sooner than expected.
Consider your budget. Most bass prices can vary from around $150 to $1,500 or more, so shop around and look for options in your price range. Often, you can find decent quality “starter basses” or beginning bass packages on the lower end of the price range that may also include accessories like straps, cables, picks, and maybe even an amp.
Bass Accessories You’ll Need
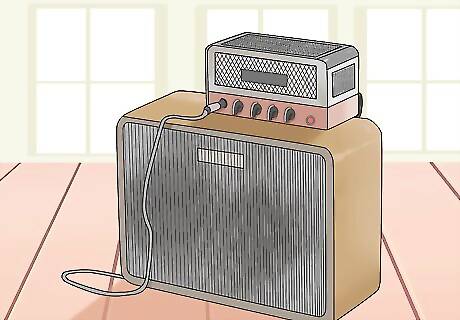
Amp Purchase an amp so that you can hear yourself play. An amp has three main components: the power amp, preamp, and speaker cabinet. The easiest way to get all three is to buy a combo amplifier. Although these may lack the power of bigger amps, they are very easy for beginners to use. Start with a small combo amp. If you find the need to upgrade it later on your bass journey, you will know better what to look for on a higher-end amplifier. The biggest advantage of having separate pieces of gear (rather than a combo), is that you can choose each one to match your personal taste. Consider purchasing headphones to plug into your amp. That way, you can practice and hear yourself without disrupting your neighbors.
Audio interface (amp alternative) Some amps may run expensive, but there is a cheaper alternative! Buy an interface with a sound card instead, or a device that acts as a middle man between your bass and computer. Just plug your bass into the interface, then the interface into your computer. You’ll be able to hear yourself play through your computer’s speakers. You can get a quality audio interface for around $50. The audio quality will not be as clear as on an amp, especially for very low notes, but hooking up to the computer is an easy and convenient alternative.
Instrument cable This cable connects your bass to the amp. Make sure the one you buy is long enough to suit your needs. For example, will you be roaming a wide stage and need an extra long cable? Or will you primarily be seated near your amp for more intimate performances or practice?
Bass strap The strap loops around your body to hold up the weight of the bass while you play. Most straps are adjustable, so choose one you like the look and feel of! Most straps only cost around $10–15.
Digital tuner Most electric basses can use a special tuner that you plug your bass into in order to check that your strings are at the correct pitches. However, a clip-on tuner that attaches to the neck of the basis best for fast and easy tuning.
Medium-sized picks While bass can be played with picks or just your fingers, having a few picks on hand can be helpful, especially if you’re experimenting with different sounds. For beginners, a medium pick is usually the most comfortable to play with.


Comments
0 comment