views
Identifying the Problem
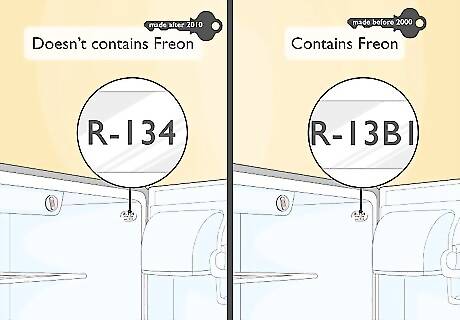
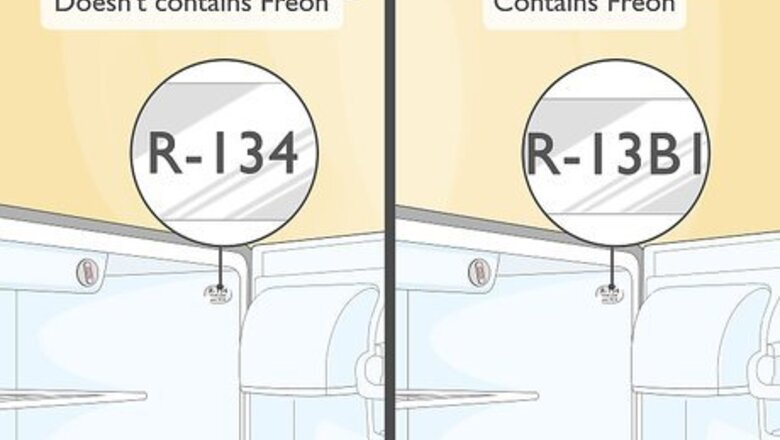
Determine whether or not your refrigerator even uses Freon. Freon is toxic for the environment and most refrigerators made after 2010 don’t use it. There are a good number of fridges that were made after 2003 that don’t use Freon either. To see if your refrigerator uses Freon, open the doors for the fridge and look for a metal or plastic label that contains the product information. It will list the cooling method there. Tip: CFC stands for chlorofluorocarbon. This is the scientific name for Freon. If your fridge runs on CFC, it uses Freon. There are different types of Freon. The possible options are R-12, R-13B1, R-22, R-410A, R-502, and R-503. If you need to add Freon, you need to use the same kind of Freon listed on the label.
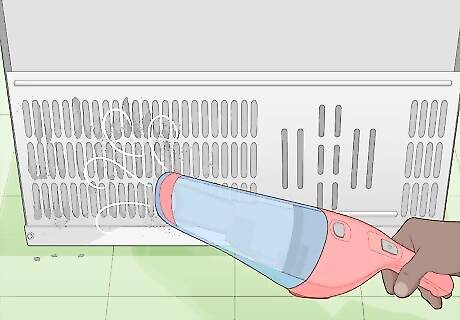
Check your vents for clogs and clean them as needed. One of the most common causes for high internal temperatures are clogs in the vents. Start by checking the vent on the back of your fridge. Then, open up the back panel in the freezer by prying it out with a flathead screwdriver to check the interior vent. If they’re dirty, clean them out with a paper towel and remove and debris. Clean up the water and see if the problem resolves itself. If a vent fitting is damaged, you can order a replacement from the manufacturer. Follow your specific model’s instructions to determine how you remove a vent. Usually they can be pried off with a flathead screwdriver or chisel.
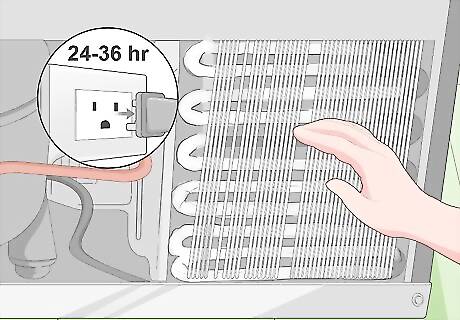
Inspect your freezer coils to see if they’re frozen and defrost them. If your freezer is functioning poorly but the fridge is otherwise fine, your freezer coils may be frozen. Check the coils behind the back panel in your freezer to see if they have any chunks of ice on them. If the coils in the freezer are frozen, unplug the machine and let it sit for 24-36 hours to defrost it. You may need to remove the defrost drain hose from the service panel and soak it in hot water before reinstalling it.
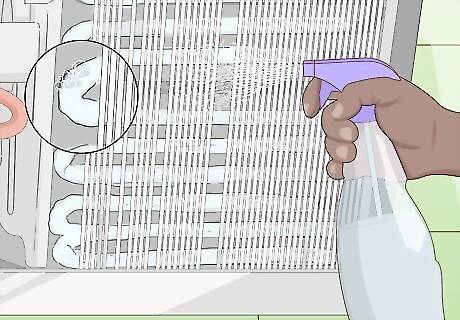
Spray a suspected leak on freezer pipes with water to see if it bubbles to find holes. Inspect the pipes in your freezer behind the panel and underneath your fridge in the back near the compressor tanks. If you see any water pooling up, clean it up and wipe the water off of the pipes. Fill a spray bottle with tap water and spray the pipes. If the water bubbles up on a certain location, you’ve found a hole. You can solder aluminum pipes to fill holes or you can replace the pipe entirely.
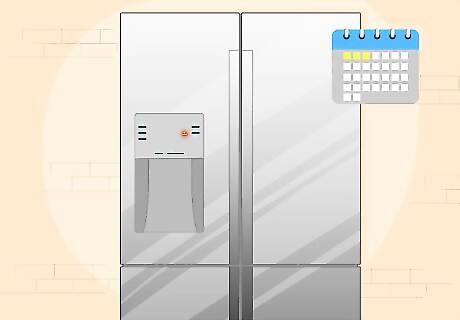
See if the problem resolves itself before adding more Freon. If your vents, coils, or water lines have an issue, you probably don’t need to add more Freon. Once you’ve solved a problem, wait 2-3 days to see if your fridge goes back to working the way that it’s supposed to. if it does, you don’t need to any Freon. If the issue doesn’t resolve itself, you’ll need to check the Freon levels. Problems with the Freon can cause other problems in your fridge. It is possible that the frozen coils, leaky pipes, or blocked vents are symptomatic of a larger problem with your Freon lines.
Repairing Leaks and Faulty Parts
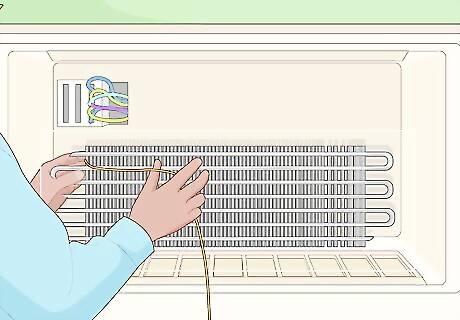
Get a new evaporator coil if it needs to be replaced. Usually, one of the first components of a fridge to suffer damage is the evaporator coil. Pry out the back panel in your freezer by fitting a flathead screwdriver around the edges and popping it out. You’ll see a large set of coils that are connected together in one piece. Inspect the coils to see if the evaporator needs to be replaced by looking for leaks or rust. You can order a replacement from your manufacturer and install it yourself by unscrewing the pipe that connects it to the supply line in the bottom of your fridge. Screw the new set of coils into the same port and ensure that they’re tight before starting your fridge again. Your coils may simply be dirty. Clean them with coil cleaning foam and paper towels if they look filthy. The dirt could be locking evaporation inside your freezer and it may be dripping down to the bottom of your fridge. Never use a different brand of evaporator coil in your fridge. They are designed to work for specific models.
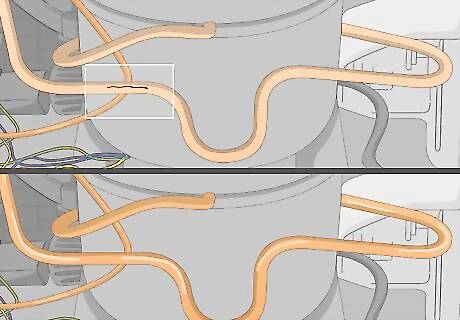
Replace leaky pipes near your compressor if you want to replace the entire pipe. You can replace an entire pipe if you have access to both sides of the threading. Order a replacement pipe from your refrigerator’s manufacturer and ask them if you need to take any precautionary steps to replace a certain pipe. Unplug your fridge and follow your manufacturer’s instructions before unscrewing the pipe and adding your replacement. You may need to use plumber’s tape to cover the threading on your replacement pipes and keep the fittings tight. If you see water, check your water lines. These are the pipes running from the frame of your fridge to the supply lines. You may need to use a wrench or channel locks to loosen a bolt on a pipe’s connection. Any pipe that runs into the frame of your fridge will require a licensed specialist to replace.
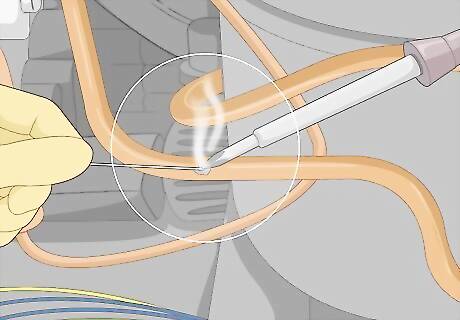
Solder aluminum and copper pipes to fill in small holes and leaks. While it’s almost always easier to replace an entire piece, you can fill in minor holes and leaks by soldering an aluminum or copper plate over it. Purchase a small aluminum or copper strip, some flux, a clamp and a soldering tool. Lock your plate over the hole with a clamp and apply flux to the joint around the aluminum plate. Use a your soldering tool to heat the joint and solder the 2 pieces together.Warning: It can be difficult to solder a pipe if you don’t have professional experience. Consult a fridge repair company if you’re not confident when it comes to fixing pipes. Let your pipe cool for at least 12 hours after you heat it. You cannot solder any pipes with flammable materials inside them. Freon is a flammable gas, so always check with your manufacturer if you aren’t sure about which pipe you’re soldering.
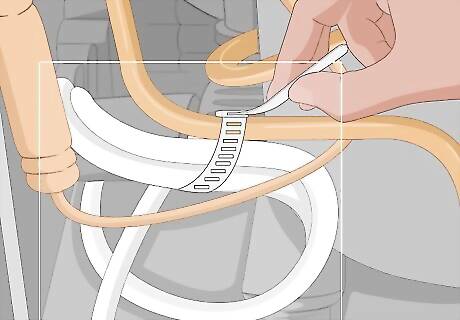
Repair your leak or damaged parts before adding Freon to prevent additional problems. If you add Freon without repairing any leaks or damaged parts, your refrigerator will simply continue to leak and any Freon that you add won’t help. Once you’ve identified the problem with your fridge, address it first before adding any Freon.
Adding More Freon to your Fridge
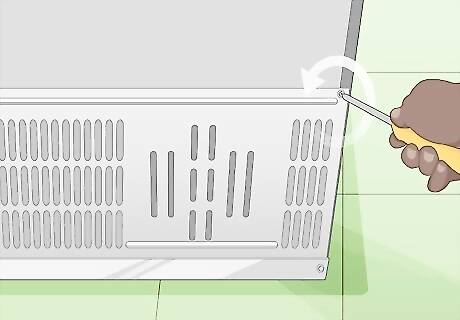
Unplug your refrigerator and remove the screws on the back panel. Pull your refrigerator out a little bit and unplug it. Turn it around so that you have access to the back panel, which is always at the very bottom of the fridge. Unscrew the bolts and screws with a wrench or screwdriver. Slide the panel off and set it aside. If you have a lot of food that will go bad quickly or can melt, fill a cooler with ice and store it in there to keep it cool.
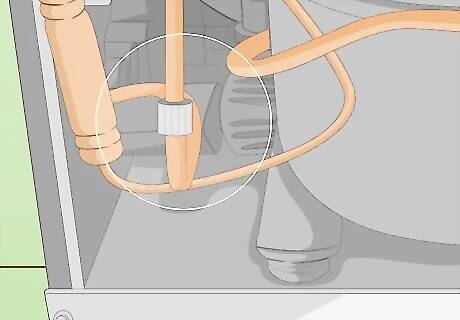
Find the Freon pipe by looking for the compressor tank. The compressor tank is the large tank on the bottom of your fridge behind the panel. It compresses the hot air and cools it before sending it back into the fridge. Your Freon line will attach directly to your tank and feed into the fridge. If there are multiple pipes, consult your fridge’s manual to determine which one is the Freon line. The arrangement of the mechanical parts is different on every fridge. The location of your Freon lines will depend on your particular fridge’s make and model. On some fridges, the Freon line will be added to the suction line. On other models, it will have a dedicated pipe. The Freon line is almost always made out of copper.
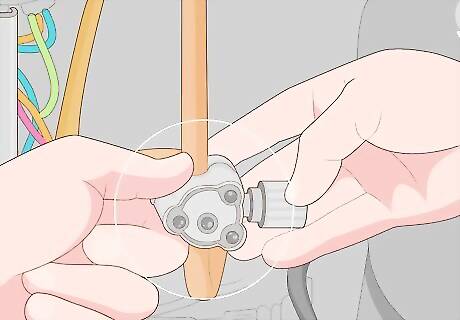
Fit a bullet-piercing valve around the Freon line near your compressor. The bullet-piercing valve comes in 2 parts. Unlock the 3 nuts with an Allen wrench and wrap it around your pipe near the compressor. You may need to adjust the size by using an adaptor to connect the 2 separate pieces. The bullet-piercing valve will puncture the pipe and run the contents through the valve. This will give you access to the pipe without removing it.Warning: The valve must be completely tight on the pipe. If your connection is loose, you’ll bleed air and Freon over time, which can be a health hazard. Consult a repair specialist if you accidentally damage the valve or install it incorrectly. The bullet-piercing valve comes with 2 adaptors. Use the adaptor that fits your tube size. Buy a bullet-piercing valve from a hardware store or refrigerator repair company. Tighten the valve with an Allen wrench.
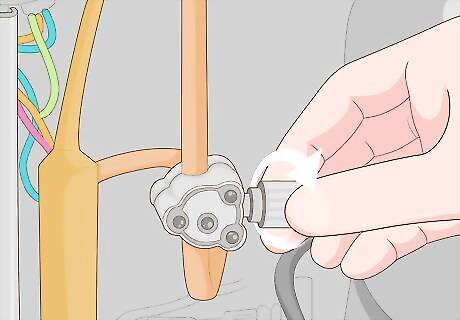
Unscrew the cap on the side of the bullet-piercing valve and add the conversion valve. There is a cap on the side of your bullet-piercing valve to access the pipe without opening it. Unscrew the cap by hand by twisting it counterclockwise until it loosens. You should not need to use any tools to get the cap off. Screw the conversion valve on to the opening where the cap used to be. The valve looks like the air valve on a car tire.
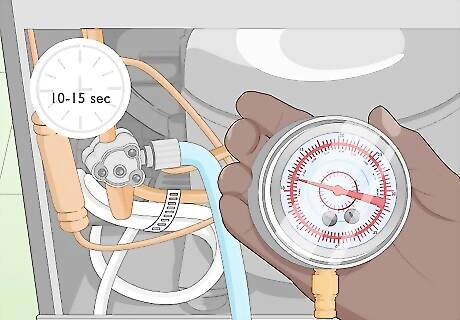
Plug in your fridge and attach the gauge to get a reading. Plug your fridge back in to activate the compressor. Wait 10-15 seconds and then latch the air compressor gauge on to the adaptor to get a pressure and Freon reading. You’ll need to use a compressor gauge designed specifically for Freon refrigerators. Buy or rent one from a refrigerator repair company or hardware store. The compressor gauge has to be able to read pressure and Freon levels. It should have 2 gauges on it to provide 2 different readings. If the Freon level is in the blue section of the gauge, you have plenty of Freon.
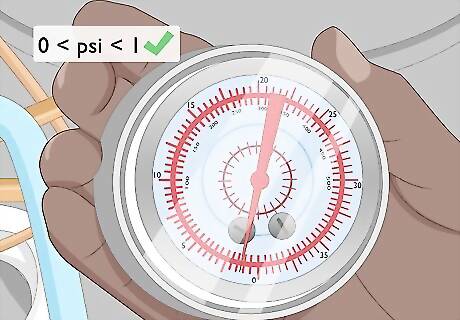
Check to make sure that pressure gauge reads under 0 psi. Counterintuitively, the pressure in your system should read 0 psi. This is because the Freon line is sucking air in to compress it. So if the fridge is working as intended, there should be little or no pressure in the suction or Freon line. Check the pressure gauge by looking to see if the needle is resting at or near 0 psi. If the needle is higher than 0 but under 1 psi, you’re fine. If the pressure inside of your system is higher than 1 psi, bleed some of the air out by opening the valve without attaching anything to it. Do this for 4-10 seconds and retest your valve.
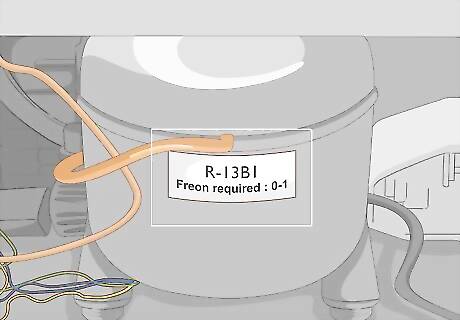
Determine how much Freon you need to add by referencing the label inside your fridge. The label on the inside of your fridge or freezer will tell you how much Freon the unit needs. Every make and model is different, so you need to cross-reference the reading on the gauge with the information on your label. If the gauge reports a number underneath the threshold for your fridge, you need to add Freon. If the Freon reading is within the range listed on your fridge’s label, consult a refrigerator repair specialist. The problem isn’t your Freon lines or supply. This is the same label that you checked to determine whether or not your refrigerator uses Freon. The label is sometimes on the back of the refrigerator.
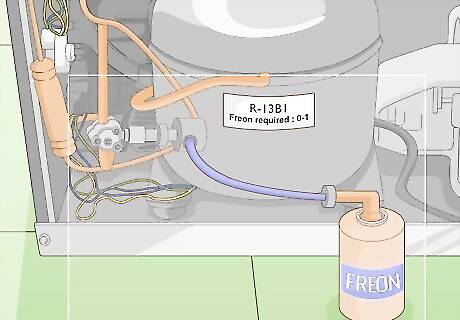
Connect your Freon tank to the recharge hose and plug the hose into the adaptor. Purchase a replacement tank filled with the same kind of Freon listed on your label. The Freon will come with a hose to connect it to the adaptor on your bullet-piercing valve. Screw the Freon on to the valve using the hose by twisting each fitting clockwise until it’s tight. Open the valve on the top of the tank by turning it counterclockwise to release the Freon. You need to use the same kind of Freon listed on the label of your refrigerator. The possible versions include R-12, R-13B1, R-22, R-410A, R-502, and R-503. Some Freon tanks come with gauges so that you can tell how much Freon you’re releasing. If your tank doesn’t have one, you’ll have to use trial and error to get your fridge’s Freon levels within the appropriate range.
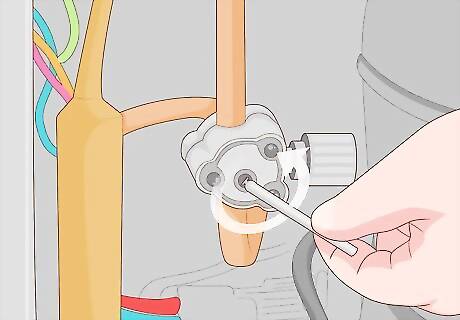
Close the bullet-piercing valve and remove the adaptor. Screw the cap on top of your Freon tank clockwise until it’s tight. Then, remove the hose from the adaptor and unscrew the adaptor. Put the cap back on to the adaptor valve to close it. Screw your back panel back in to close up the back of your fridge. You cannot remove the bullet-piercing valve once you’ve installed it. If you do, there will be a hole in your suction line or Freon supply.


Comments
0 comment