
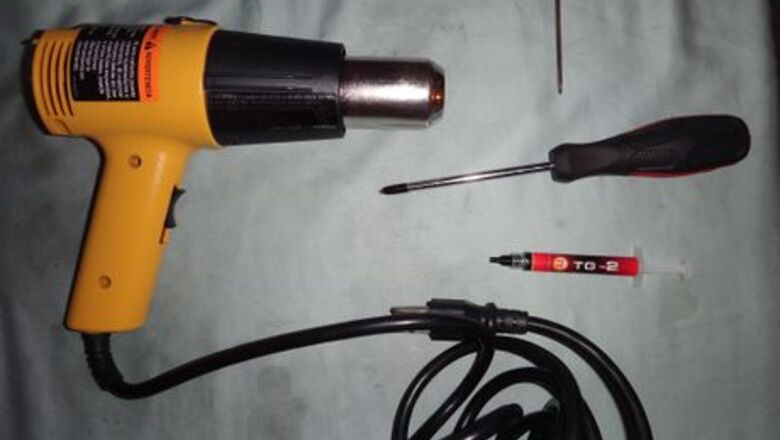
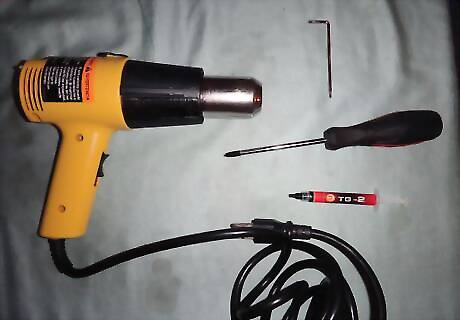
Gather your supplies. There are some simple necessary tools that you will need: A Philips head screwdriver A heat gun (300 °C) Thermal Paste T8 Torx screwdriver

Remove HD Drive. On the side of the unit you will find a panel with the warranty sticker. Once off you will see it is held in place by a blue screw. Remove this screw. Use the pull tab on the hard drive to remove it out of the unit by sliding it forward and then pulling straight out.Pic3.jpg
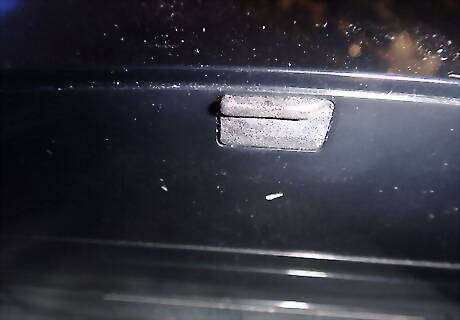
Remove the next warranty sticker/tab. At the top of the unit there is a rubber tab covered by another warranty sticker. (Yes, you will be removing the warranty sticker and voiding your warranty. You’ve been warned.) Under this cover should be a screw. Remove this screw and the top will slide off.
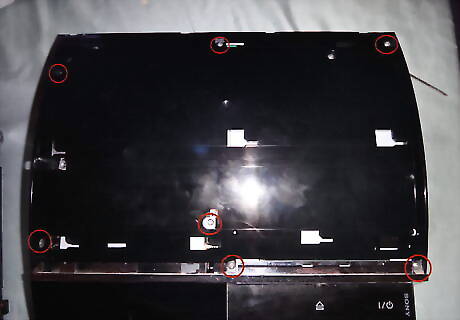
Remove the screws. Now with the outer shell removed your unit should look like the image above. Remove the screws from the highlighted areas. Now the top support is free. Be cautious as there is a ribbon cable that connects it to the main unit! Remove this part from back to front and then disconnect the mentioned cable. You can now set this part aside
Disconnect the Blu-ray player. Now you should start to see the inner workings of your PS3. On the right hand side of the unit is the Blu-ray player with a wire running to the front center as shown. Unplug this wire and gently lift the player. Underneath the player is a ribbon cable. Gently reach under and disconnect this cable and set the Blu-ray player aside.

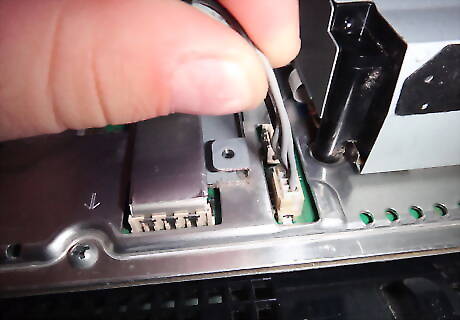
Unscrew the antenna wiring. Behind where the Blu-ray player used to be you will find a chip, which must be unscrewed. This chip has a wire which runs down the center of the assembly and plugs into another chip. Unplug it from this chip and set it aside.Pic10.jpg
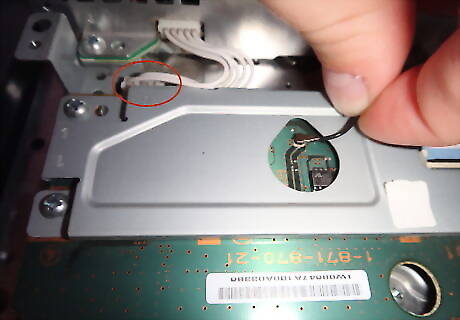
Release the power supply. Above the chip that you just unplugged the wire from is the power supply. A set of wire plugs is just between these components and must be unplugged. After removing the 4 screws that hold the power supply down, lift the component straight up. Pins run up into the power supply and you don’t want to damage them. Now you can unplug the back cables from the power supply and set it aside.
Remove the chip. Unplug the ribbon cable from the chip that was in front of the power supply. Four screws hold this chip to the rest of the unit. Remove them and set the chip aside.
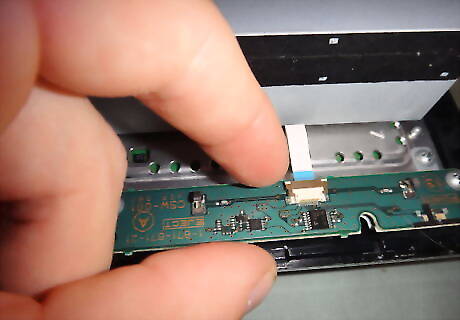
Unplug the tiny ribbon cable. At the front of the unit where the power button normally is found, is a tiny ribbon cable that arches over the metal plate on the motherboard, which we will soon be removing. Be sure to unplug this cable by flicking the tab (closest to the front) forward and lifting the cable out.
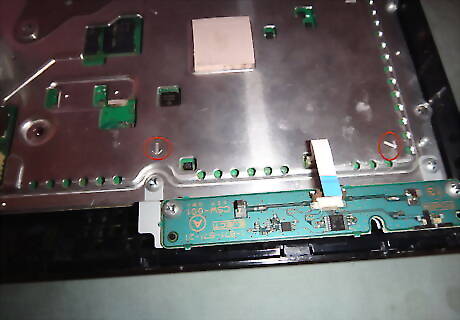
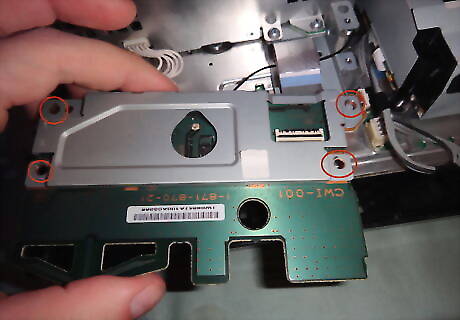
Remove the next set of screws. On the plate that is connected to the motherboard are arrows pointing to screws. Remove these screws. Pic16.jpg Four more screws attach two plates to the motherboard. Remove these screws as well and set the plates aside. Be careful from here on out, as the plate will not be attached to the motherboard directly. Pic17.jpg
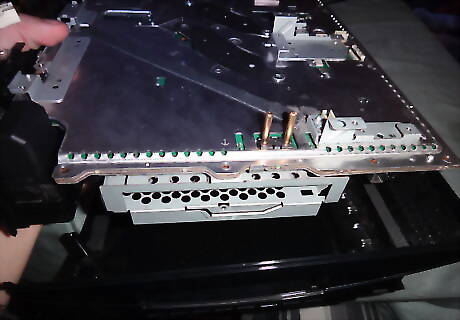
Remove the motherboard. The motherboard and fan assembly should now freely lift out of what remains of the casing, careful though as these come as 2 separate parts.
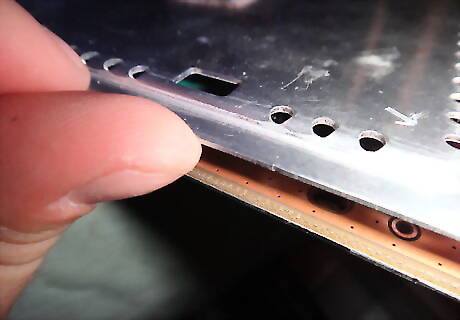
Remove the top plate. Lift the top plate from the front and it will slip out of the back. Set the top plate aside.
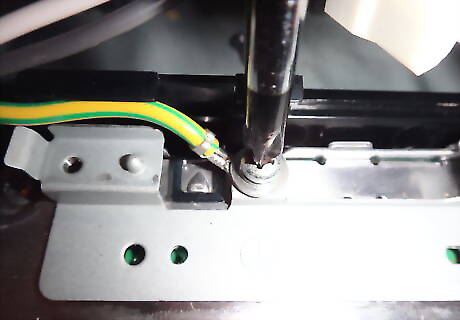
Remove the back plate. Unscrew the ground wire from the frame. Now gently pull the back plate away from the main unit and set it aside. Flip the unit over and you will see a little green battery attached to the bottom plate. Unplug this from the motherboard that is underneath. Opposite the battery is the plug-in for the fan running into the motherboard. Unplug this as well.Pic23.jpg The HD bay can be seen jutting out from the bottom of the bottom plate. Unscrew this and set it aside.Pic25.jpg The ports for the inputs are attached to the bottom assembly as well. Go ahead and remove those and set them aside. The bottom plate should now lift away from the motherboard and take the fan and heat sinks with it. Set it down with the fans on the top side as you will be working on it shortly.
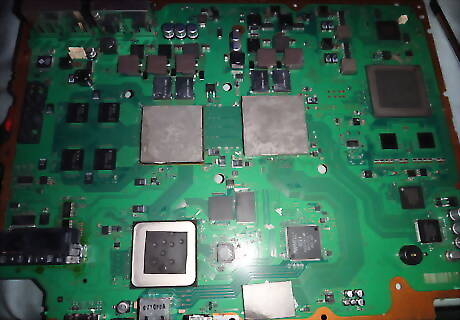
Clean the CPU and GPU. You can now see your CPU and GPU (the two big squares in the center of the motherboard) with the old thermal paste on them. Using a paper towel gently rub the paste off of their surface, being careful not to scratch them. Before: After:
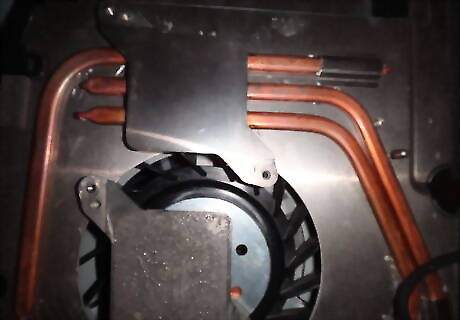
Clean the heat sinks, too. Do the same for the heat sinks that make contact with the CPU and GPU that are on the back plate that we set aside. Before:Pic30.jpg After:Pic31.jpg
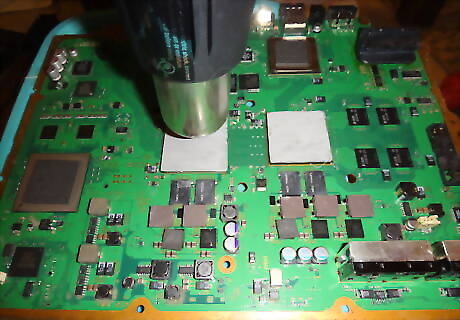
Reflow the CPU and GPU. Place the motherboard with the CPU and GPU face up and as level as you can manage. Using the heat gun, apply heat to the CPU and GPU. You want your heat gun to get to roughly 300º C and wave it around 3–4 inches (7.6–10.2 cm) off the surface of each component. You are looking to melt the solder inside these components so the point is to get them really hot. DO NOT MOVE THE BOARD now that it is hot. Doing so will ruin your PlayStation past the capability of this repair. Let it sit for 15-20 minutes as it cools and the solder solidifies.
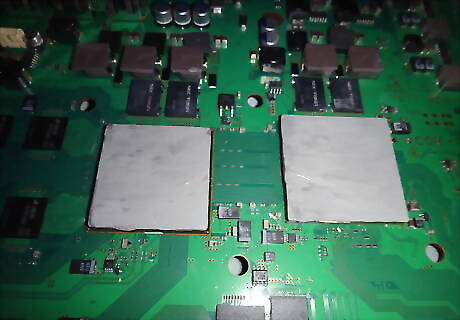
Reapply thermal paste. Apply the thermal paste to the heads of the GPU and CPU. Spread the paste evenly on the surface with some sort of scraper, anything will do. (Note previously we put the paste on and then heated the GPU and CPU. This isn’t good practice, so it's not recommended, but it worked out anyway in this example.)
Reassemble the PS3. That’s it! You’re done. Now all that is left is to do is to follow the assembly steps backwards and test it out. In our trials we were unsuccessful with the first try but the second reflow did the trick. Good luck!


Comments
0 comment