
Getting Tested by Your Eye Doctor
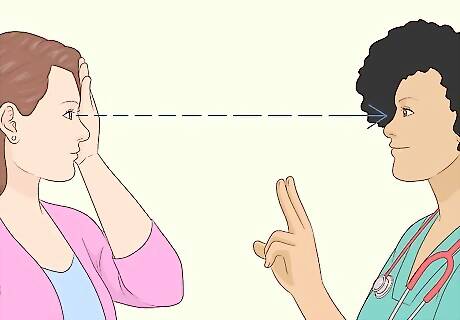
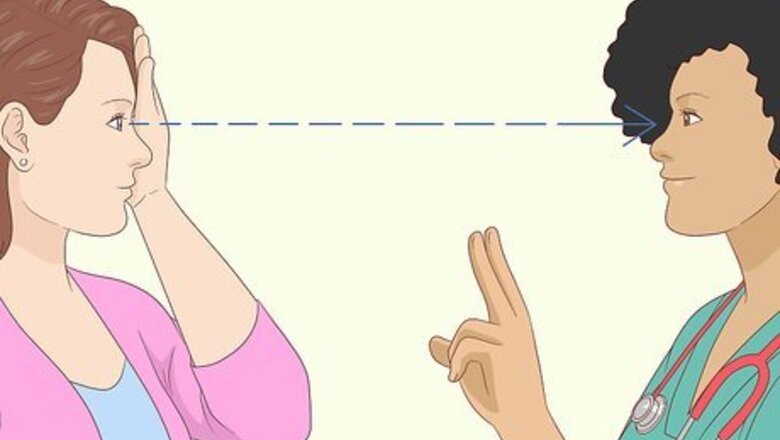
Start with a simple Confrontational Visual Field Exam. For this peripheral vision test, your eye doctor will sit right across from you and ask you to cover one eye. You'll be asked to stare straight ahead while they slowly bring one of their hands from one side into your peripheral vision. Say “OK” or “I see it” when you detect their hand moving. This is a standard test during most eye exams. You may be asked to repeat the test several times with each eye. Your eye doctor may also ask you to count their fingers to test how well you can see with your peripheral vision. Make sure you keep staring straight ahead. You're only cheating yourself if you try peeking to the side a little in order to catch an earlier glimpse of their hand.
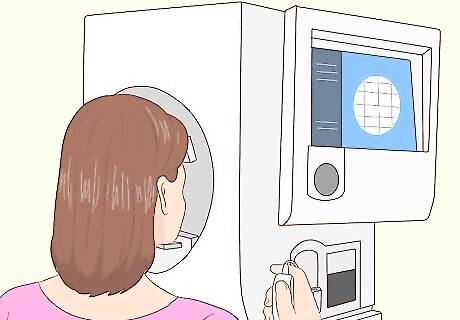
Participate in an Automated Perimetry Exam. If your eye doctor wants to further test your peripheral vision, they may ask you to place your chin on a chin-rest and stare straight into a cone- or dome-shaped contraption. There will be an object or marking in the center of the cone/dome for you to stare at. The machine will create flashes of light that you should be able to glimpse in your peripheral vision, and there will be a button for you to press every time you do see one of them. Only press the button when you detect a flash of light. Pretending to see things that you don't probably won't help you “do better” on the test, and may just mask vision issues that need to be addressed.
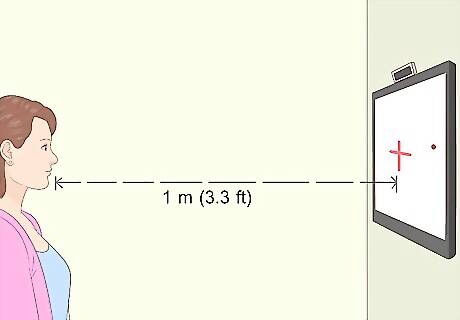
Map your peripheral vision with a Target Screen Exam. This test may be used if your eye doctor wants a more detailed analysis of your peripheral vision. You'll sit about 1 metre (3.3 ft) from a screen with a target in the center of it. You'll stare straight at the target and verbally tell your doctor every time you detect movement elsewhere on the screen. In the process, the machine that conducts the test will create a map of your peripheral vision. This will allow your doctor to identify any weak spots, gaps, or areas of concern.
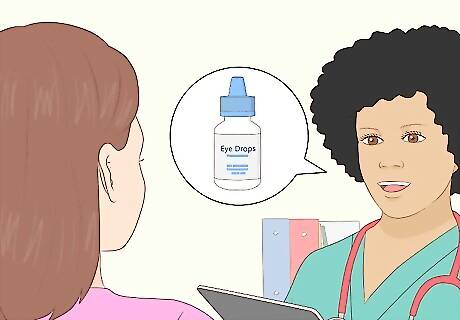
Discuss your results and any recommended treatments. In most cases, problems with peripheral vision are caused by underlying conditions such as glaucoma. If you are diagnosed with glaucoma, you'll probably be treated with prescription eye drops and possibly laser surgery. In some cases, wearing eyeglasses with prism lenses can slightly improve peripheral vision. Especially if your peripheral vision has been affected by an injury, undergoing regular eye exercises with a physical therapist may help as well.
Testing Your Peripheral Vision at Home
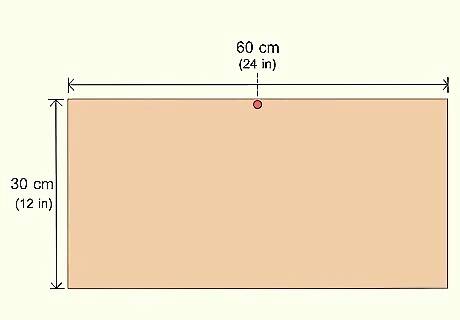
Prepare a 60 by 30 cm (24 by 12 in) piece of cardboard for use. The sheet of cardboard can be larger than these dimensions, but not smaller. If it is larger, use a ruler and pencil to draw a 60 by 30 cm (24 by 12 in) rectangle on it. Along one of the long edges of this 60 x 30 rectangle, stick a pushpin at the halfway point (so it's 30 cm (12 in) from each end). You can also use a piece of rigid foam board instead of cardboard.
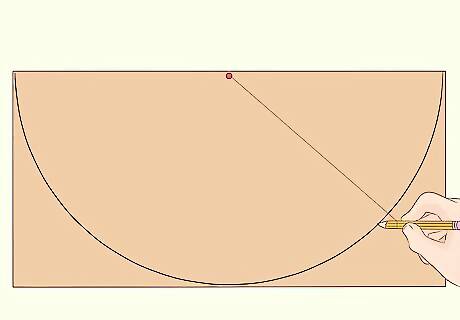
Draw a large half-circle within the 60 by 30 cm (24 by 12 in) rectangle. Tie one end of a piece of string to the pushpin, and the other end to a pencil placed at the midpoint of the opposite long edge of the cardboard. Keep the string pulled tight and move the pencil back and forth over the cardboard sheet. The string will guide it to make a half-circle shape.
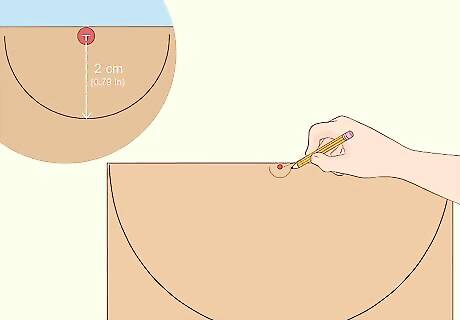
Draw a smaller half-circle with a 2 cm (0.79 in) radius. Wind the string around the pencil until the distance between the pencil and pushpin is reduced to 2 cm (0.79 in). Trace a second, much smaller half-circle onto the board. This smaller circle will become the cut-out for your nose.
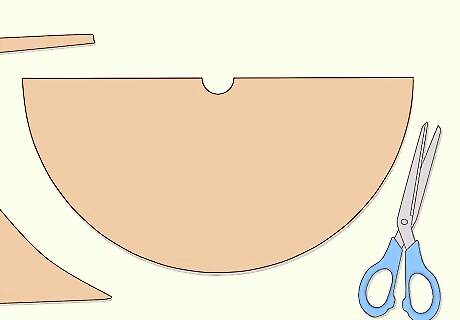
Cut your cardboard into the shape of a rainbow. Use sturdy scissors or a utility knife to cut along both the larger and smaller half-circles. It doesn't have to be perfect, but take your time to ensure a smooth curve to your rainbow-shaped board. If this is part of a child's science project, an adult should supervise this task or do it themselves. Scissors and especially utility knives can be very dangerous.
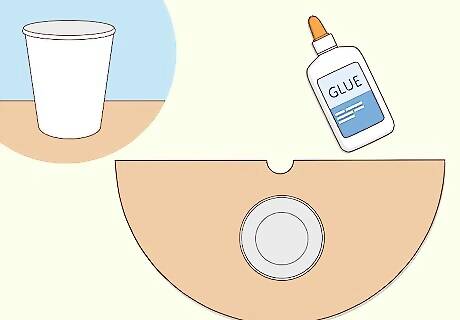
Tape a cup to the underside of the board to serve as a handle. Pick a spot roughly halfway between where the pushpin and pencil were when you started tracing. Use double-sided tape or glue to attach the bottom of a disposable plastic cup to what will be the underside of your board. You'll hold the cup with both hands to keep the board in position while taking the test.
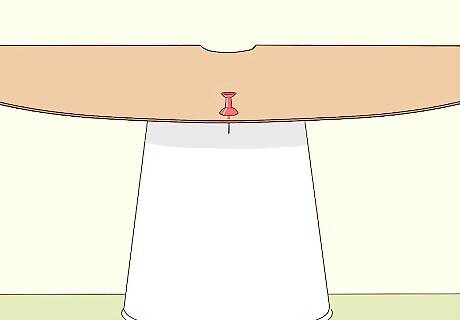
Insert a pushpin into the apex of the rainbow shape. Stick the pushpin you used earlier back into the cardboard, this time just short of the spot where you originally placed the pencil to start tracing. This will serve as your focal point while you take the test. The pushpin might stick all the way through the cardboard, so be careful not to prick your finger on it while testing!
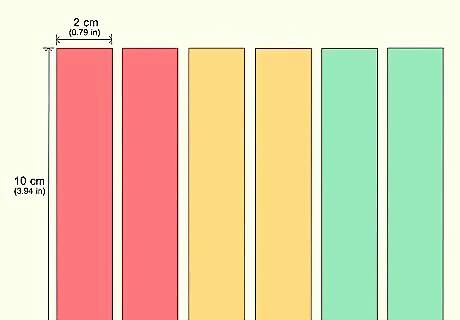
Cut 6 rectangular strips from red, yellow, and green construction paper. Each strip should be 10 by 2 cm (3.94 by 0.79 in). Use rigid construction paper, or use markers to color strips of a rigid white paper (like index cards). You can use a different combination of easy-to-distinguish colors, but red, yellow, and green are the ideal combination.
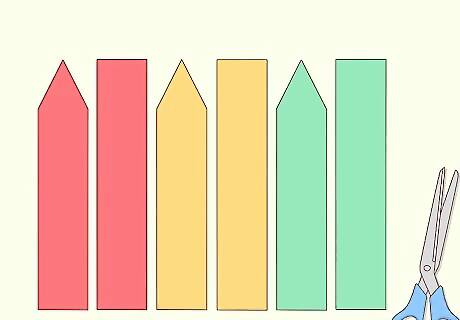
Use scissors to give half of the colored strips a pointed end. Take 3 of the strips (one of each color) and trim off two of the corners on one of the short sides of each. This will create a triangular shape at one end of each of them. When your friend uses one of these triangular strips during the test, make sure they hold it with the pointed end up.
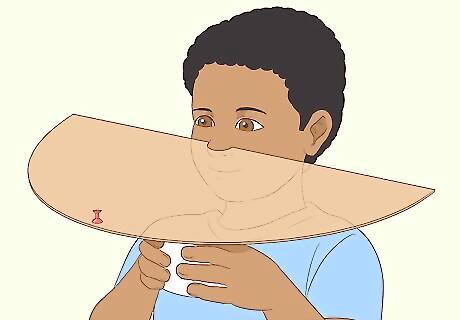
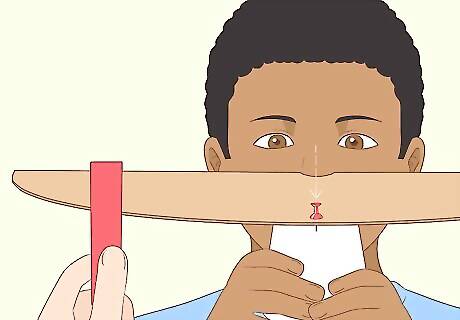
Hold the board to your face with your nose in the small cutout. Use the handle (the attached cup) to hold the board just below eye level. The bridge of your nose should remain in contact with the small cardboard cutout. Keep the board steady and level in front of you during the test.
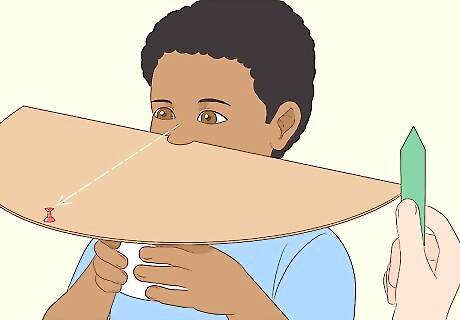
Stare at the pushpin while a partner holds up a colored paper strip. Focus your eyes on the pushpin that's stuck in the cardboard, and don't look away from that spot. While you do this, have a friend hold up one of the colored strips at one of the far ends of the board—that is, at either “end of the rainbow.” Your friend needs to remain as still as possible during the test. It may be easiest for them to sit or stand directly across from you, past the pushpin. But keep your focus on the pushpin, not them. The paper strip should be beyond your field of vision when at the starting point. If you can detect it being there, make sure you're staring straight ahead and that your partner is holding the paper strip in the corner of the board.
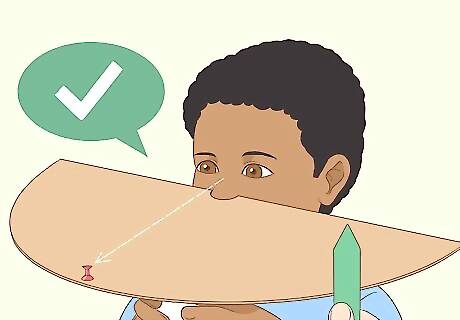
Tell your helper when you first notice movement. Have your friend slowly slide the paper strip along the curved edge of the board. As soon as you're able to detect movement in your peripheral vision, let your friend know by saying “OK” or something similar. They should pause for a moment, then continue sliding the paper strip. If you want to keep a record of your results, have your friend quickly mark this point on the underside of the board with a pencil before proceeding further. Because of how peripheral vision functions—relying more on the rods in your eyes that are sensitive to movement, rather than the color-sensitive cones—you should notice that something is moving before you can make out its shape or color.
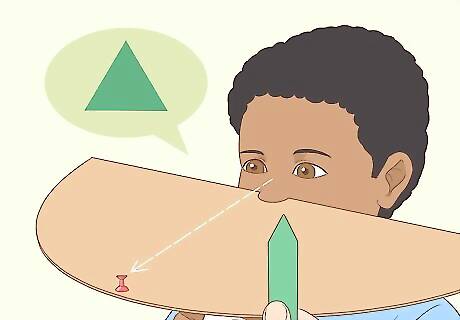
Continue the test until you detect color and shape as well. As your friend continues to move the paper strip into your field of vision, indicate when you can see more details. For instance, say “red” and then “triangle” when you see that they are using the red strip of paper with the triangular top. If desired, they can mark these spots with pencil on the underside of the board as well.
Repeat the test on the other side and with the other strips. You can do the test as many times as you like, but consider doing it 3 times on each side to test your left and right peripheral vision. For a more accurate test regarding your perception of color and shape, have your friend use one strip of each color on each side, in random order. For instance: red triangle to your right; yellow rectangle to your left; yellow triangle to your right; green triangle to your left; red rectangle to your right; green rectangle to your left.
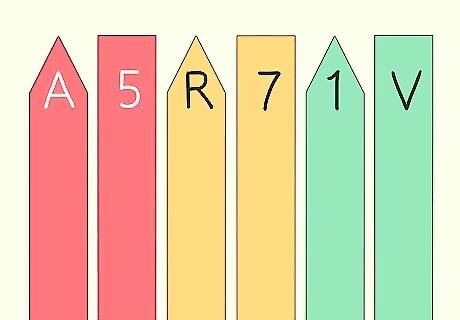
Change the conditions of the test slightly, if desired. For example, you can reduce the light level in the room, give your eyes a few minutes to adjust, and repeat the test to see how your results compare. Or, you can write random letters or numbers on the strips and tell your friend as soon as you can read them.


Comments
0 comment