
Charging Your Fitbit Ionic
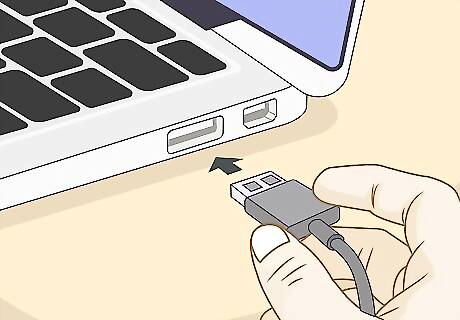
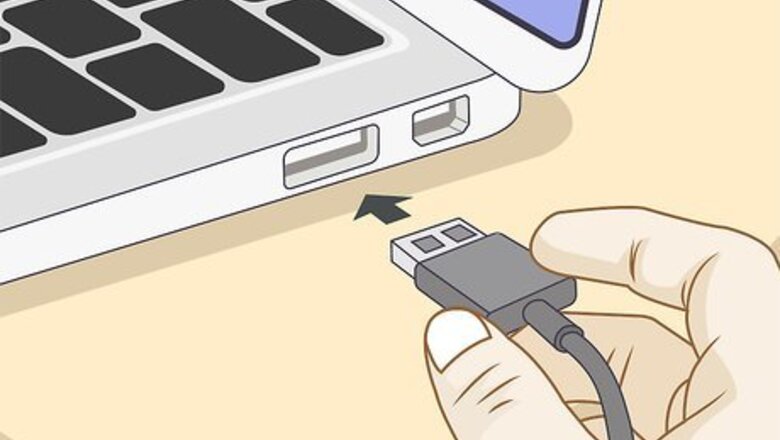
Connect the charging cable into a low-energy charging device. This can be a USB port on your computer, UL-certified USB wall charger, or another charging device, like a charging bank. To charge an empty battery to full capacity should take about 2 hours. You can tap the watch's screen or press any button to check your Ionic's battery level.
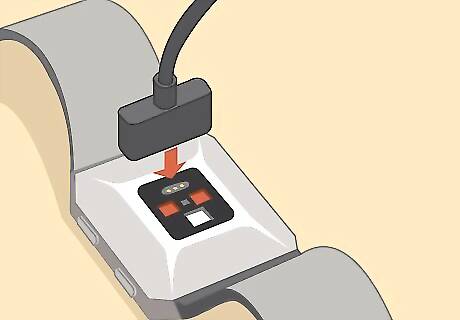
Plug the other end of the charging cable to the watch's charging port. It'll connect magnetically to ensure a complete connection.
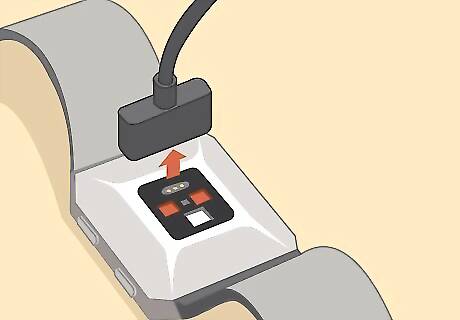
Disconnect a fully charged battery. You can either give the watch 2 hours to charge, or you can tap/press the watch to monitor its battery life. A fully charged battery should last about 5 days, but heavy use may decrease that battery life-span.
Setting Up Your Fitbit Ionic
Get the Fitbit app from the Google Play Store Android Google Play (Android) or App Store iPhone App Store Icon (iOS). The app is free to get, but you'll need to have a Fitbit account in order to use the app with your watch.
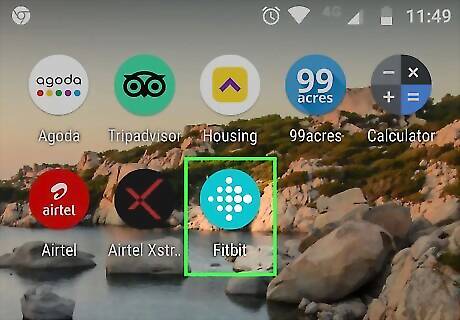
Open the Fitbit app. This app icon looks like a bunch of dots in the shape of a diamond that you'll find on one of your Home screens, in the app drawer, or by searching.
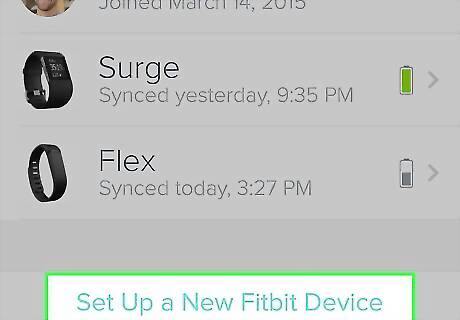
Log in. You'll need to tap the Today tab (which looks like the Fitbit logo), then tap your profile picture, and Set Up a Device. If you don't have a Fitbit account already, tap Join Fitbit and answer a series of questions to create a new account.
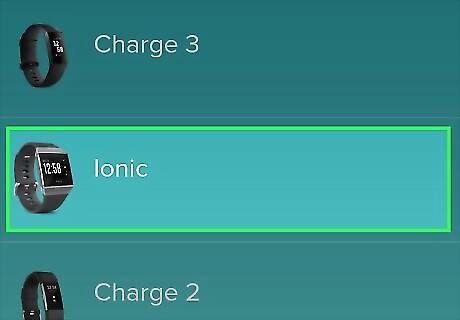
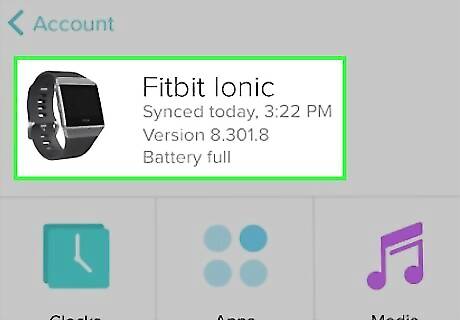
Follow the on-screen prompts to set up your Fitbit. You'll be prompted to choose which model you are using, so tap Ionic. During set up, your Ionic might attempt to connect to Wi-Fi. It can connect to open, WEP, WPA personal, and WPA2 personal networks, but cannot connect to 5GHz, WPA enterprise, or public Wi-Fi networks that require more information than just a password to connect, like a public hotspot that requires a username. If your Ionic doesn't automatically detect your Wi-Fi, go to the Today tab in your app, tap your profile picture, then tap your watch tile; tap Wi-Fi Settings > Add network. Wi-Fi will not work on your watch if it is below 25% battery.
Tracking Your Sleep and Activity
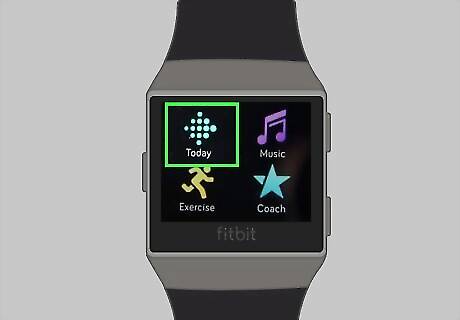
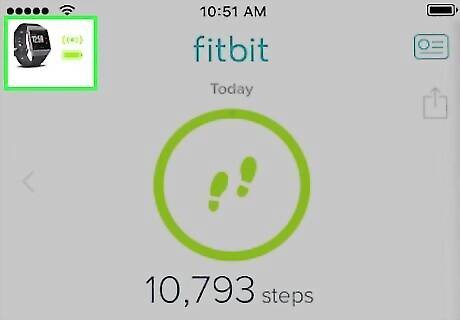
Open Fitbit Today on your watch. This app logo looks like a bunch of blue dots forming the shape of a diamond; you can find it if you swipe up on the watch's clock face. You'll immediately see your current statistics for your Core stats, Hourly steps, Heart rate, Exercise, Cycle track (if applicable), Sleep, Water, Food, Weight, and Badges.
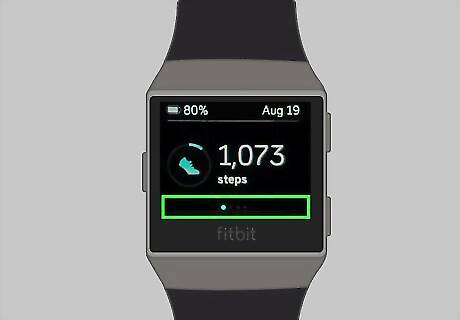
Swipe left or right on any statistic to see more. Tap the plus icon (+) next to Water and Weight to add information. If you want to remove some of the information displayed here, tap Settings at the bottom of the screen. To reorder and reorganize the stats, tap and drag a row up or down.
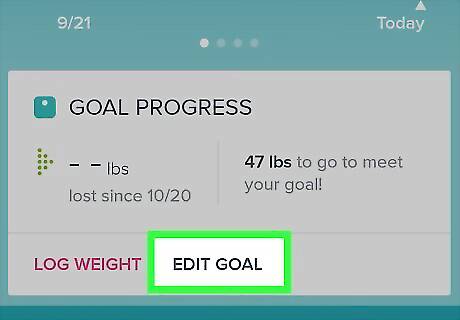
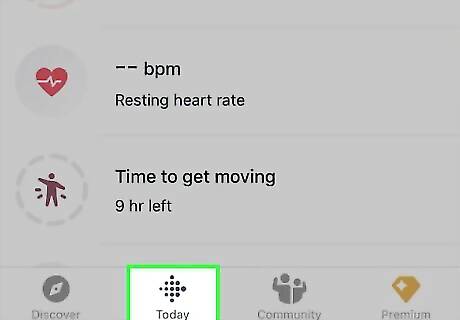
Edit your goals in the Fitbit app on your phone or tablet. If you want to change the goals that are displayed here (for example, your goal steps taken in Core stats), you'll need to open the Fitbit app on your mobile phone or tablet, tap the Today tab, and your profile picture. Then find the Goals section and tap on the goal you want to adjust (the steps taken goal is 10,000 by default). To set a bedtime alarm, open the Fitbit app on your phone or tablet, then tap the Today tab. Tap the sleep tile (it has the icon of a crescent moon and a "z"), and tap the gear icon in the top right corner of your screen. You can then turn on the bedtime reminder and set the time and frequency.
Using Fitbit Coach
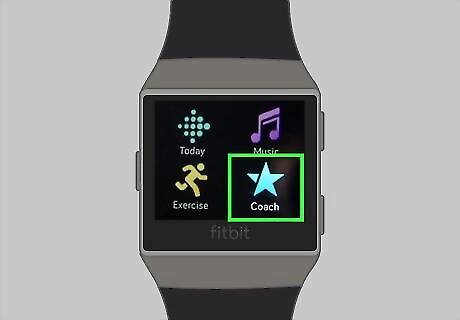
Open the Fitbit Coach app on your watch. This is the large icon of a star that you'll find if you swipe left from the Home screen that is the clock.
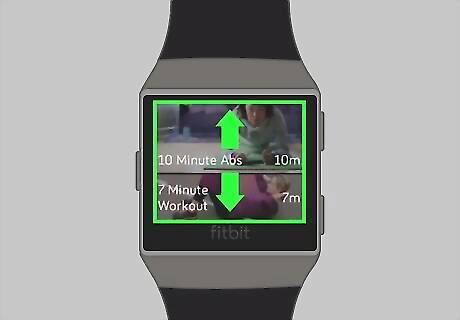
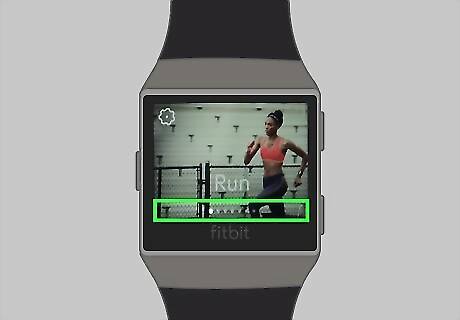
Swipe down and up to find a workout. You should see an image preview of the workouts as you swipe through.

Tap a workout you want to learn more about. You'll see more details of the workout here. If you don't like it, you can press the Back button (large button on the left side of the watch face).
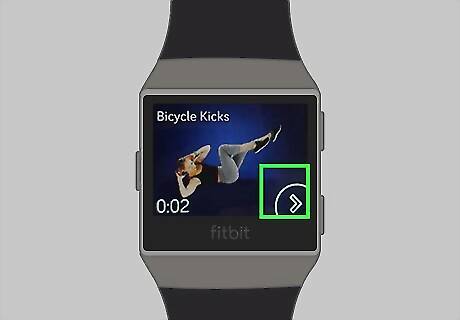
Tap the play icon to start. If you want to preview the workout instead, tap the three-line menu icon in the top right corner of your screen. When the workout is finished, you will be prompted to share your activity with your friends. You can also bypass the Fitness Coach app and open the Exercise app if you want to create your own workout that isn't in the Coach app.
Using the Relax App
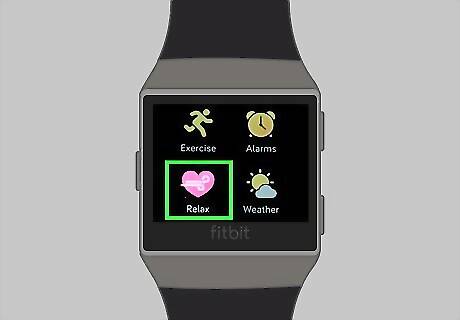
Open the Relax app on your Ionic. This looks like the icon of a heart that you should find when you swipe up from the clock face. You might see your current heart rate displayed on your clock face.
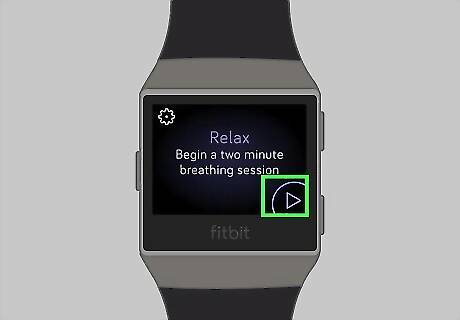
Tap the play icon Android 7 Play. This will start the default 2-minute session. If you want to use the 5-minute session, tap the gear icon before tapping the play icon.
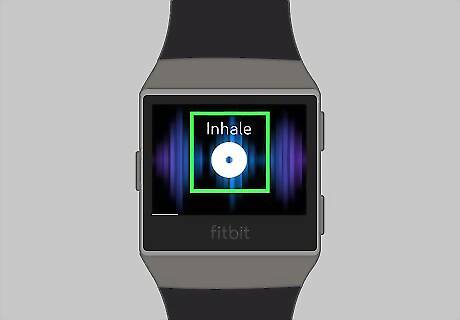
Follow the on-screen prompts. You'll be asked to breathe along with the prompts, and, at the end, you'll see how in-sync your breathing was with the app. You'll also see the stats for your heart rate before and after your session as well as your history using the app.
Tracking Exercise
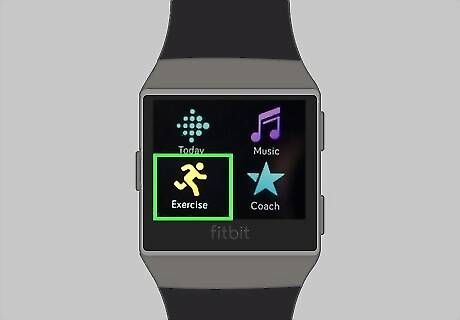
Open the Exercise app. This app icon looks like a running man that you'll find when you swipe down from the clock face.
Swipe left or right to find an exercise. Tap More if you don't see the exercise you want, but you might need to add it in the mobile app or dashboard first.
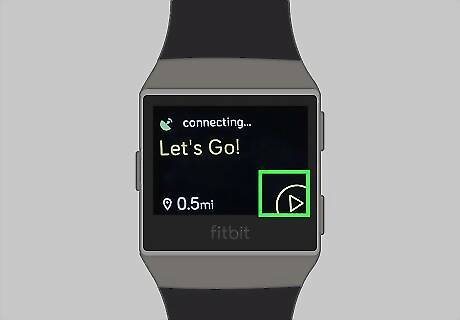
Tap the play icon Android 7 Play to start the exercise. If you don't see the play icon, tap the exercise tile to see its details. Tap the flag icon if you want to set goals to the exercise before you begin it.
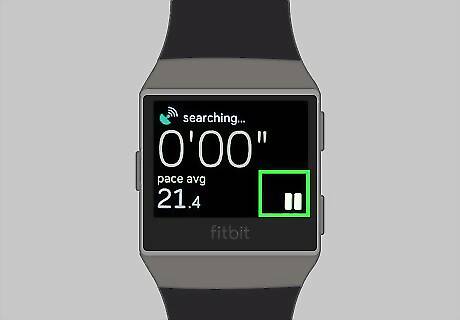
Tap the pause icon Android 7 Pause to pause or stop the exercise. You'll see more options appear when you pause the workout.
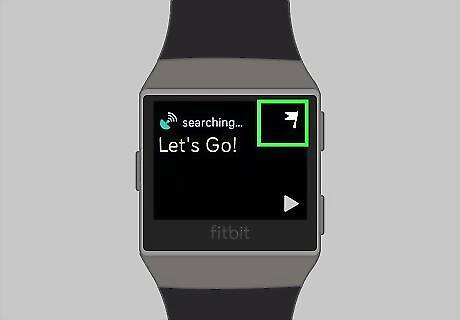
Tap the flag icon to finish your workout. If you're not done with your workout, you can tap the play icon instead to continue. If you tap the flag icon, you'll be asked to confirm if you want to end the workout. You can either confirm to end the workout or decline so you can continue your exercise.
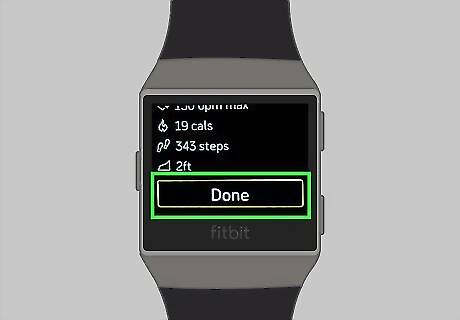
Tap Done. When you confirm that you're finished with the exercise, you'll see a summary screen of your stats during your workout, like your heart rate. Sync your watch to keep an up-to-date activity tracker on your mobile app or Fitbit.com dashboard.
Using Fitbit Pay
Tap the Today tab in the Fitbit app on your phone or tablet. You'll see this bunch of dots that look like a diamond near the bottom of your screen. This might already be active or default if you open the app. You'll only be able to pay with your watch if the merchant accepts NFC payments.
Tap your profile picture. You'll see this in the top left corner of your screen.
Tap the Ionic tile. You'll want to activate your cardless payment method on your watch, so make sure you select it when prompted.
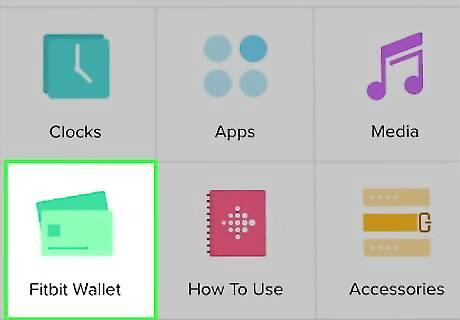
Tap the Wallet tile. You'll see this with an icon of green rectangles in a grid of tiles. You might be prompted to enter your 4-digit PIN or set one up.
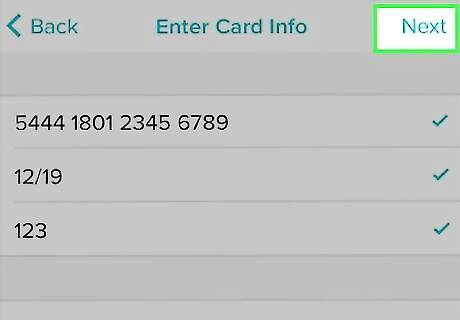
Follow the on-screen instructions to add a card. You'll need to enter the card number, its expiration date, and CVC code along with your billing information. Tap Agree to accept the Terms and Conditions to continue.
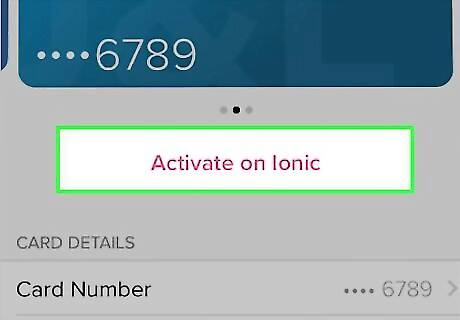
Tap Activate on Ionic. You'll need to tap this to be able to use your entered card with your watch. To switch which card is active, you can tap Activate on Ionic from the wallet tile in your app at any time.
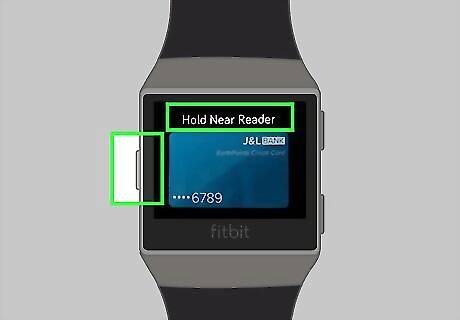
Press and hold the left button on the Ionic and hold it near the card reader. You'll be able to tell if the merchant accepts NFC payments if their payment terminal displays the NFC icon (wireless signals beaming toward a card). You should feel a pulse and see a checkmark on the Ionic screen that indicates an NFC payment has been processed.


Comments
0 comment