
- Navigate to the Socials tab from either the Home or pause menu.
- Shift over to the "Invitations" tab.
- Select the "✔" next to any friend requests you want to accept.

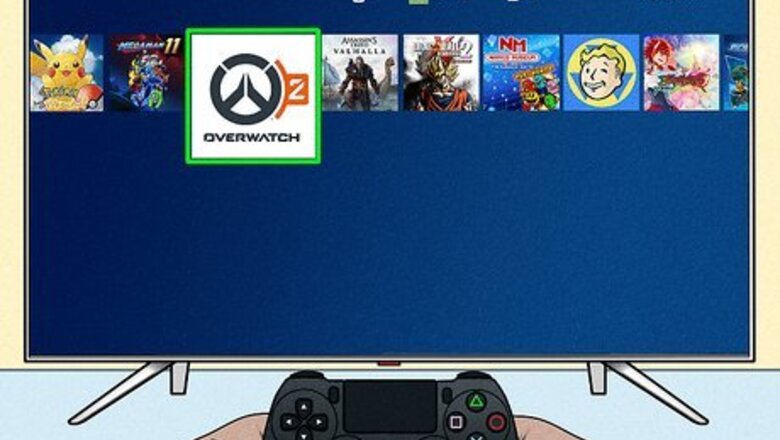
Open Overwatch 2. Boot up the game to get started.

Navigate to the Home menu. Before you begin playing a match, stop at the Home menu.

Navigate to the Socials tab. Scroll through the options on the Home page and select Socials. You can also find this option from the pause menu when in-game.

Shift to the Invitations tab. Flick through the tabs atop the screen until you arrive at the Invitations tab, which should be the last option listed. On console, use the bumpers to navigate through the options. PC players can simply use their mouse to click on the appropriate tab.
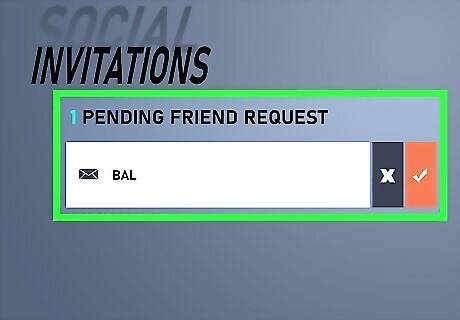
View your Pending Friend Requests. If you have received any friend requests, they will appear on this page. You'll see the user's Overwatch name.

Select the checkmark icon ✔. Each friend request will have an X and an ✔ button next to it. Hover over the checkmark and press the appropriate button: Xbox - A PS4 - X PC - click with your mouse To decline a friend request, select the "X" button instead.


Comments
0 comment