views
- Run Disk Cleanup in any version of Windows, then make sure "Thumbnails" is checked to remove the thumbnail cache.
- You can manually delete the thumbnail cache by first showing Hidden Items in the File Explorer, and deleting any files that begin with the word "thumbcache".
- Empty your Recycle Bin to fully delete the thumbnail cache from your system.
Using Disk Cleanup (All Windows Versions)
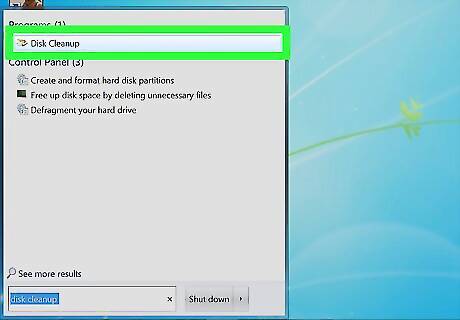
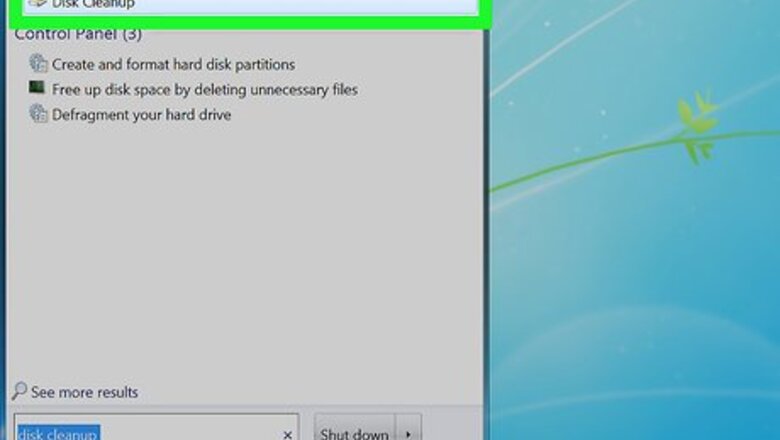
Open Disk Cleanup. Click the Start Windows Start button, type disk cleanup, and then select the matching result. The Disk Cleanup application will open.
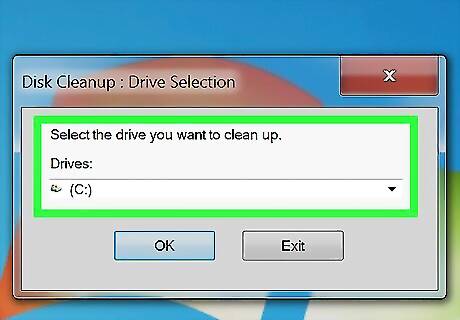
Select the current hard drive that Windows is installed on, if prompted.
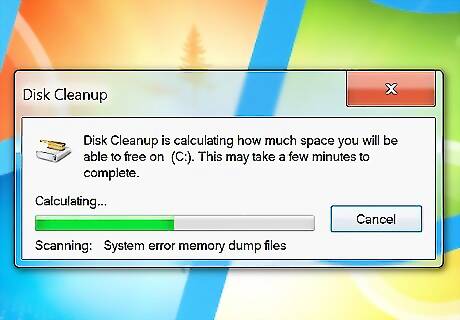
Wait for Disk Cleanup to analyze your computer. Your computer will be assessed for what type of files can be removed and the amounts of each file type on your computer.
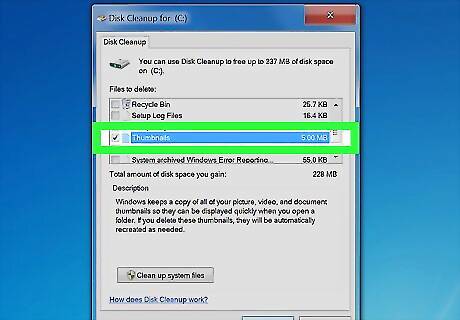
Opt to remove the thumbnail cache. Check the "Thumbnails" checkbox in the list.
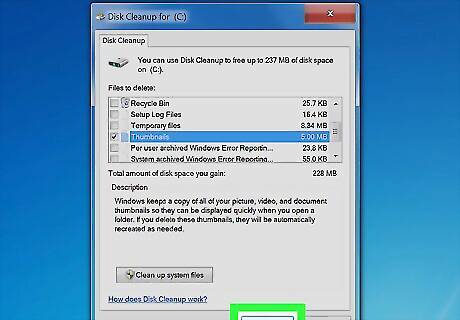
Initiate Disk Cleanup. Click the OK button at the bottom.
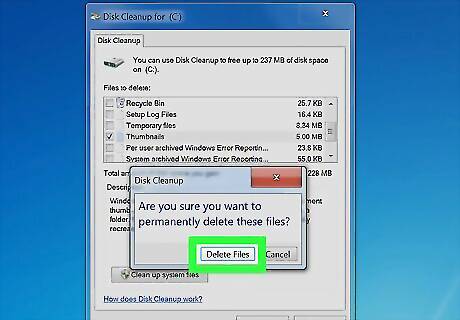
Confirm the warning. Click Delete Files in the warning message. Doing so will initiate the file cleanup process.
Manually Clearing in Windows 10 and 8
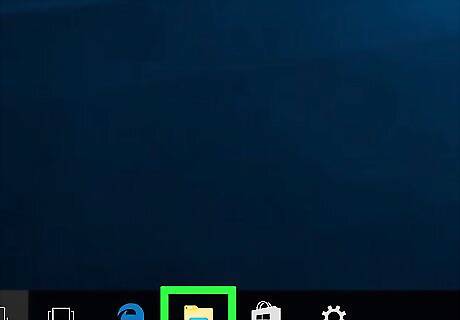
Open File Explorer. Click the File Explorer Windows File Explorer taskbar icon. It looks like a file folder.
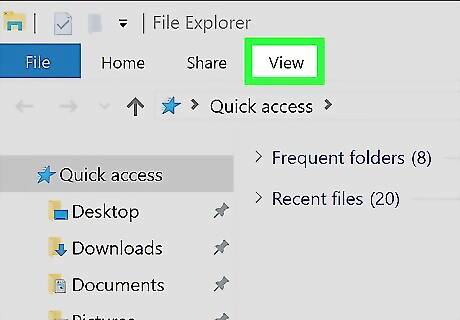
Go to the View tab at the top of the ribbon.
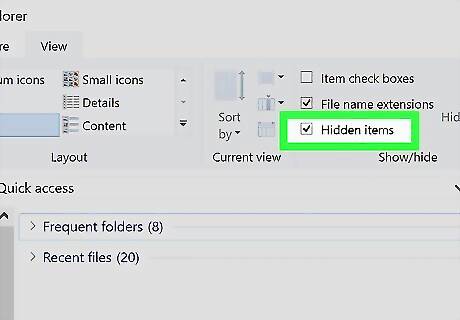
Show hidden files and folders. Check the box next to "Hidden items". It'll be in the "Show/hide" portion of the ribbon. You may also want to enable item checkboxes for easier file selection.
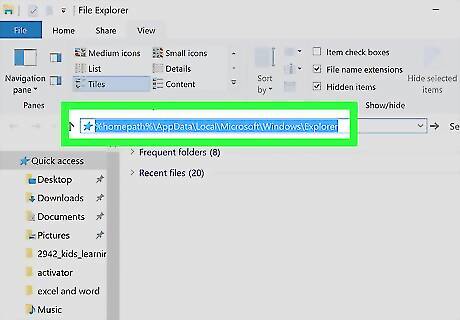
Go to %homepath%\AppData\Local\Microsoft\Windows\Explorer using the address bar. Click the address bar, copy and paste the code, and then hit the ↵ Enter keyboard key.
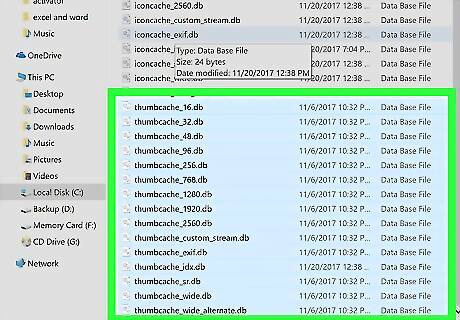
Select all files with names that begin with "thumbcache". Check the boxes next to any file that begins with the word "thumbcache". If you don't have checkboxes enabled, press and hold the Ctrl key while clicking on multiple file listings.
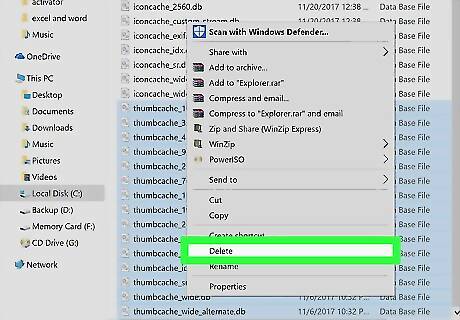
Delete the files. Right-click anywhere over a highlighted file and click Delete. Alternatively, click the Home tab in the ribbon and then choose the "Delete" option.
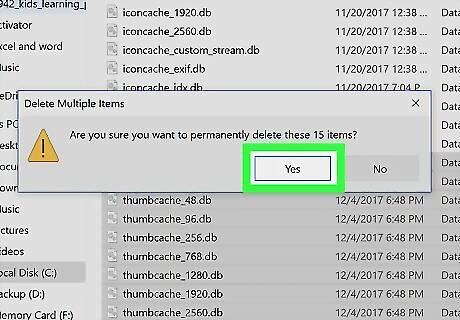
Confirm the warning message, if prompted. Click the Yes button.
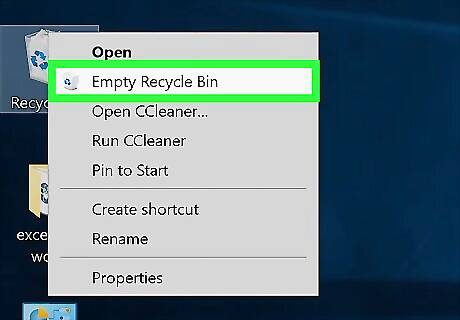
Empty the Recycle Bin. If you've set your deleted files to go to the Recycle Bin before being permanently deleted, you'll need to empty the Recycle Bin to permanently delete the thumbnail cache.
Manually Clearing in Windows XP
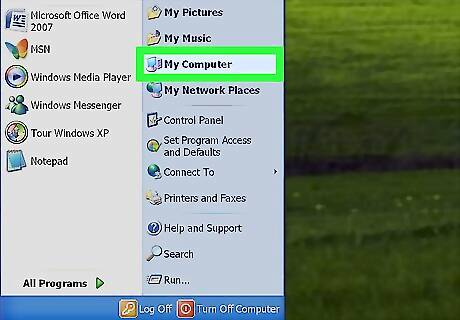
Show all hidden files and folders. Open Windows Explorer. Click the start button at the bottom-left and then click "My Computer".Clear the Thumbnail Cache in Windows Step 15Bullet1.jpg Click the "Tools" menu at the top of the window.Clear the Thumbnail Cache in Windows Step 15Bullet2.jpg Go to the View tab.Clear the Thumbnail Cache in Windows Step 15Bullet3.jpg Enable viewing of hidden items. Click the radio button next to "Show hidden files and folders".Clear the Thumbnail Cache in Windows Step 15Bullet4.jpg Show protected operating system files. Uncheck the box next to "Hide protected operating system files".Clear the Thumbnail Cache in Windows Step 15Bullet5.jpg Confirm the warning prompt. Click the Yes button.Clear the Thumbnail Cache in Windows Step 15Bullet6.jpg Save your changes. Click the OK button to close the Folder Options box and save your new file viewing settings.Clear the Thumbnail Cache in Windows Step 15Bullet7.jpg
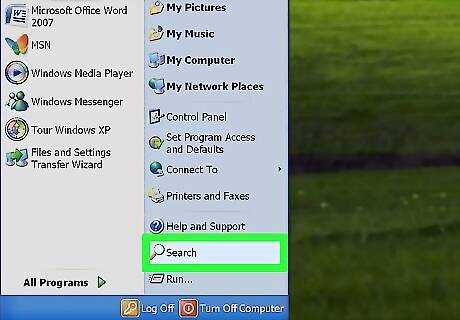
Launch the search feature. Click the start button at the bottom-left and click "Search". It has a magnifying glass icon to the left of it.
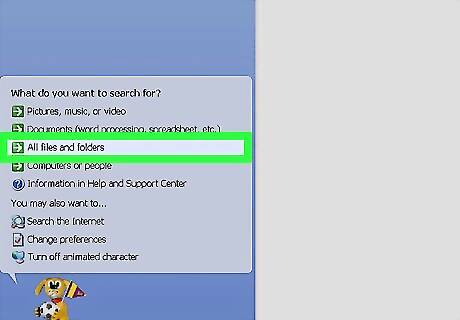
Click the "All files and folders" option. This is under the "Search Companion" section in the left pane.
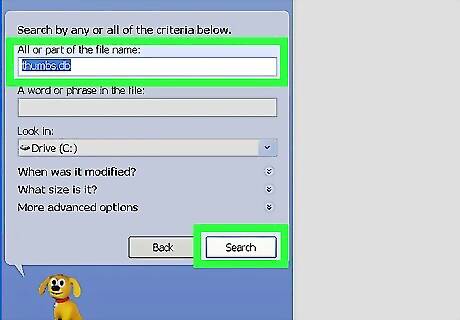
Search for Thumbs.db. Type Thumbs.db and click the Search button to begin the file search.
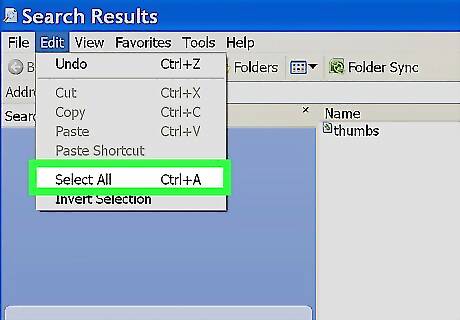
Select all items. Click the "Edit" menu at the top and then click "Select All".
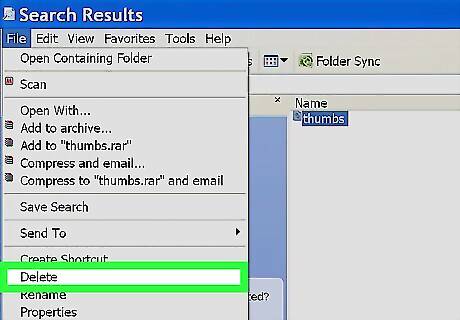
Delete all of the selected files. Click on the "File" menu at the top-left and click "Delete". The files will be sent to the Recycle Bin based on your deletion settings. Make sure to check it and empty it if the files have been moved there.








Comments
0 comment