views
Altering the Length and Tying the Waist

Wear form-fitting clothes as a base layer. If you are wearing your kimono in the summer, you only need to wear a single layer of form-fitting clothes underneath. If your kimono is light or see-through, wear white or skin-colored clothing so that they don’t show through. Otherwise, you can wear whatever color you’d like. If you are wearing a kimono in the winter and you would like an extra layer, you can put on a wrap called a juban that is made of cotton.
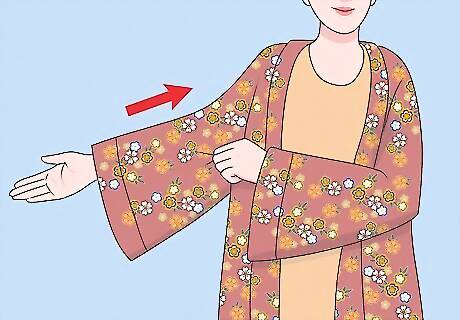
Put the kimono on and slide your arms through the sleeves. Make sure the opening of the kimono is in the front. Set the kimono on your shoulders and put your hands through the sleeves. Do not wrap the kimono around your waist yet, because it won’t be the right length.
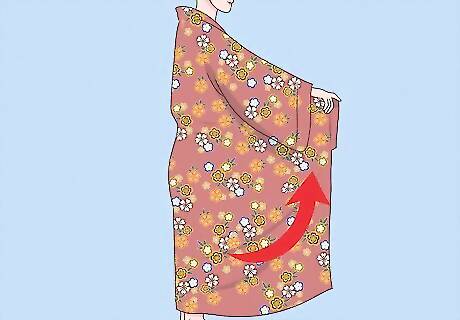
Lift the fabric of the kimono until the bottom is just above your ankles. Kimonos are almost always too long, since you need extra fabric up top. Grab the kimono right about where your hands naturally hang. Lift the fabric up until it stops above your ankles so that you can walk in it. Keep the sides even so that your kimono doesn’t end up looking unbalanced.
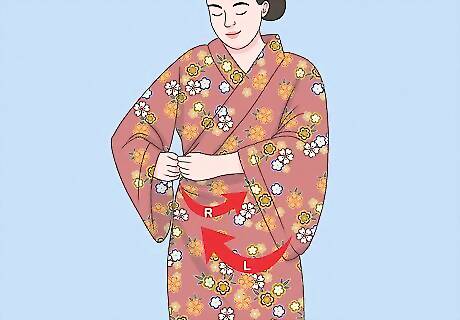
Wrap the fabric pieces over your hips with the left on top of the right. Keep the fabric bunched in your hands so it is at the right length. Take the fabric in your right hand and wrap it over yourself so that your hand touches your left hip. Do the same with the fabric in your left hand but on the opposite side. Kimonos are always wrapped left over right except for the dead for funerals.
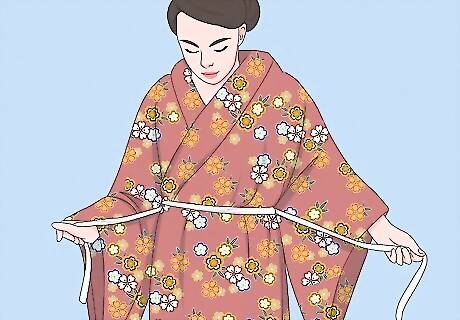
Wind the koshi himo belt beneath the bunched up fabric. Wrap the belt around your waist from front to back and cross the loose ends behind you. Then, bring the loose ends back up toward your front. Keep the bunched fabric under the belt so that it will hold.

Tie the koshi himo belt in a bow on your right hip. Take the loose ends of the belt and bring them over to your right side. Tie a bow similar to how you would tie your shoes. Tie it tightly enough that it holds up the loose fabric on your waist. Make sure the kimono is still at the proper length above your ankles.
Adjusting the Top of Your Kimono

Reach your hands into the neck of the kimono and pull the fabric down. Make sure the excess fabric of the kimono is now above the waist that you have created for yourself. Use your hands to flatten out the front and back of your kimono and pull the excess fabric out over your waist tie. Make sure the top of your kimono now covers your koshi himo belt. Keep your hands flat to make this easier. Some kimonos have small openings at the armpit to make this step easier.
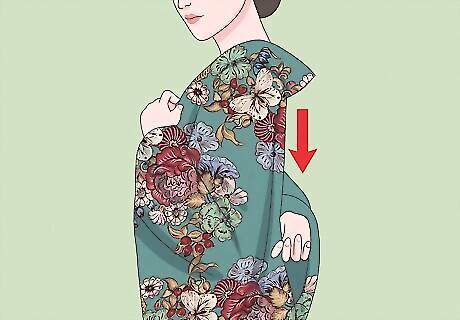
Hold the front collar with one hand and pull the back of the kimono neck. Make sure the folds on your collar meet in the front. Hold them together with your right hand. Reach your left hand to the back of your kimono and pull it down until your collar reaches just underneath of your neck. Leave the excess room at the back of your kimono. As a general rule, the opening at the back of your neck should be big enough to fit your fist. If it isn’t, open the front of your collar more and adjust your kimono.
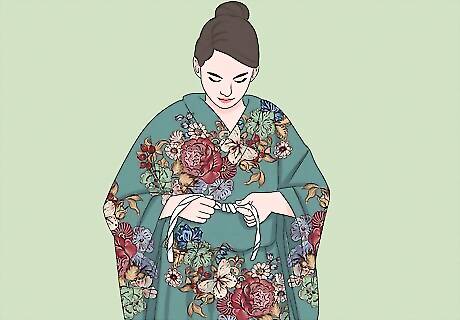
Tie the second koshi himo belt in a bow beneath your bust. Wrap the other koshi himo belt just below your bust line from front to back, then bring the loose ends up to your front so it is wrapped around twice. Tie a tight bow on the right side of your torso to keep the top part of your kimono in place. Make sure you can still breathe when the knot is tied.
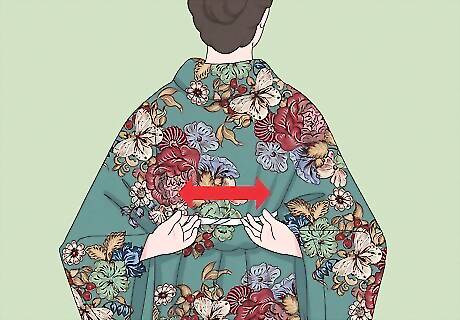
Adjust the back of your kimono until it is not bunched up anymore. Pull any bunched fabric out from underneath of the tie at your bust line. Straighten out the front and back of your kimono and make sure the fabric is as flat as it can be. Look in a mirror or have a friend check the back of your kimono for fabric bunches. Pull bunched fabric toward your sides so that it can sit under your arms. It will be harder to see this way.

Tie an obi (kimono sash) to finish the look, tie an obi sash Wrap it underneath your bust line twice and tie this one in the front. Make sure your kimono is not bunched up underneath of it.


Comments
0 comment