views
Cropping an Image
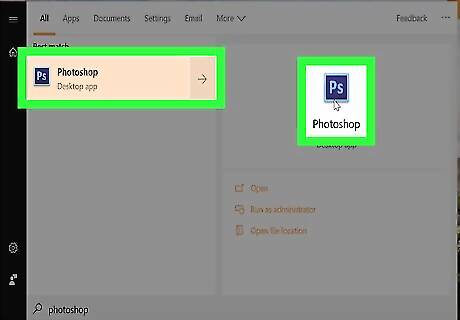
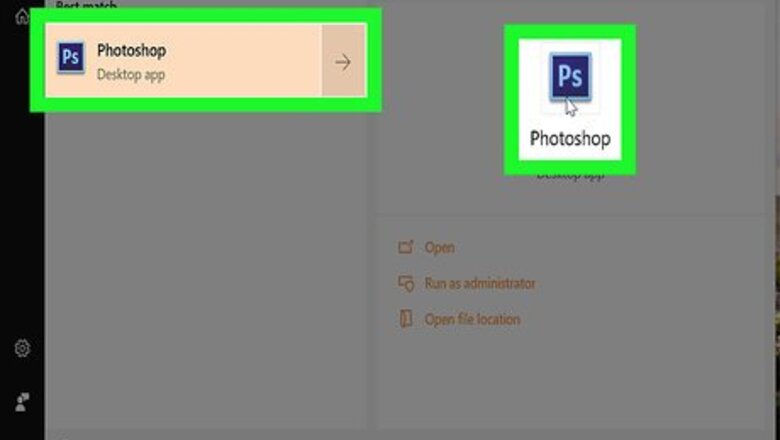
Open Photoshop. It has a blue square icon that says "Ps" in the middle. Photoshop is available with a subscription from https://www.adobe.com/products/photoshop.html.
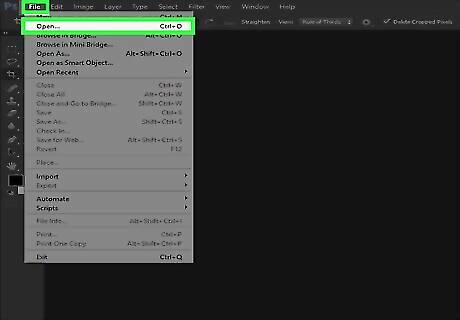
Open the photo that you want to edit. Use the following steps to open an image: Click File in the menu bar at the top of the screen. Click Open Select an image and then click Open.
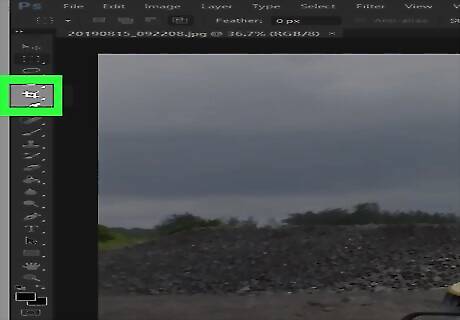
Click the Crop tool. It's the icon that resembles two angled lines forming a square.
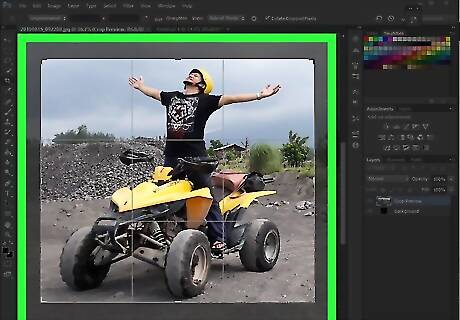
Click and drag over the subject of your image. This displays a rectangle around the area you selected. The dark area outside the rectangle is the area that will be removed from the photo when it is cropped. You can adjust the cropping area by clicking and dragging the edges of the rectangle around the area you selected.
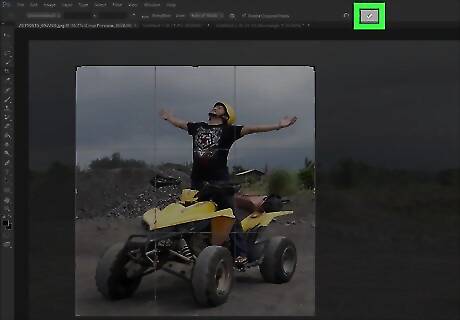
Click the checkmark icon. It's in the center above Photoshop. This crops your image.
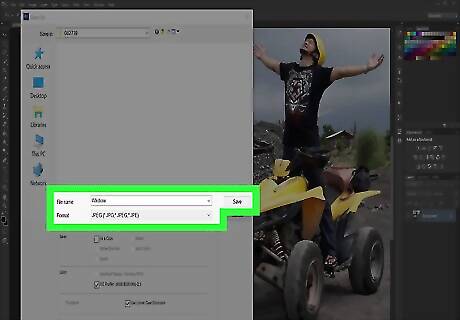
Save the image. Once you are happy with how the image looks, use the following steps to save the image: Click File Click Save As. Type a name for the image (consider giving the edited image a different file name from the original). Select an image format next to "Save as type" (JPEG, PNG, and GIF are common file types. Click Save.
Removing Red Eyes
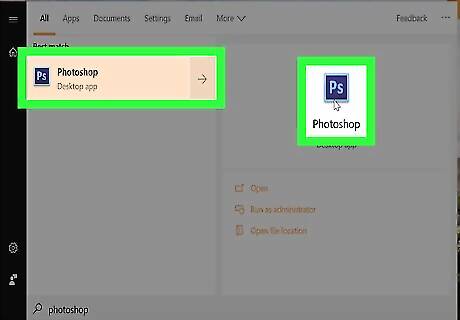
Open Photoshop. It has a blue square icon that says "Ps" in the middle. Photoshop is available with a subscription from https://www.adobe.com/products/photoshop.html.
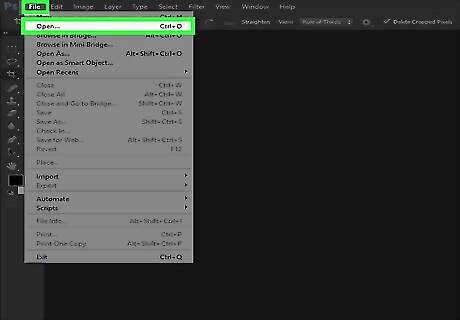
Open the photo that you want to edit. Use the following steps to open an image: Click File in the menu bar at the top of the screen. Click Open Select an image and then click Open.
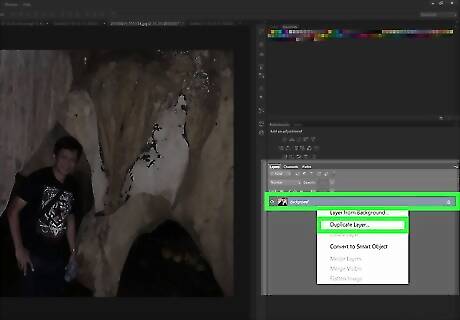
Duplicate the background layer (optional). When editing photos in Photoshop, it's a good idea to duplicate the background layer. That way if you mess up the image, you can delete the layer and start again with the original. Use the following steps to duplicate the background layer. Right-click the background layer in the Layers panel (If you don't see the Layers panel on-screen, click Window in the menu bar and click Layers). Click Duplicate layer.
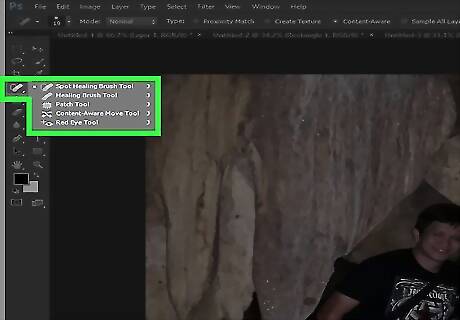
Click and hold the spot healing tool. It's in the toolbar to the left. It resembles a rectangular double-ended brush. Clicking and holding the tool displays a pop-out menu with more tools.
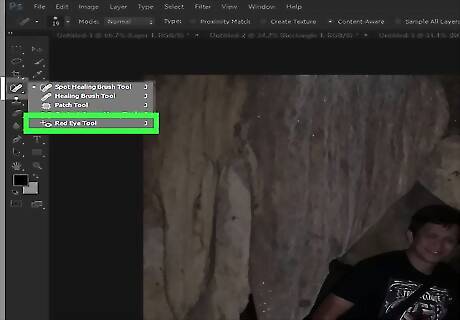
Click the red-eye tools. It's in the menu that appears when you click and hold the spot healing tool. It has an icon that resembles an eyeball with a Plus sign (+) next to it.
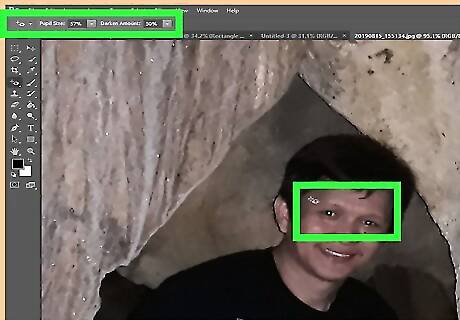
Click and drag over one eye, and then the other. Use the red-eye tool to click and drag over the entire eye. Photoshop will automatically remove the recolor the red parts of the eye. If the eye ends up looking fuzzy, too dark or too light, you adjust the pupil size and darken amount in the upper-right corner.
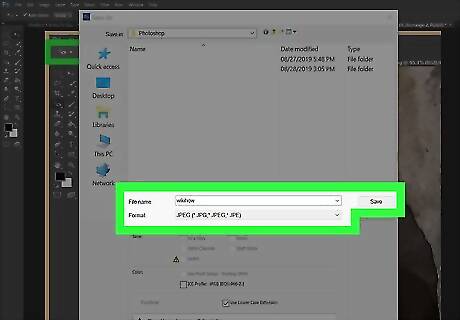
Save the image. Once you are happy with how the image looks, use the following steps to save the image: Click File Click Save As. Type a name for the image (consider giving the edited image a different file name from the original). Select an image format next to "Save as type" (JPEG, PNG, and GIF are common file types. Click Save.
Using the Spot Healing Tool
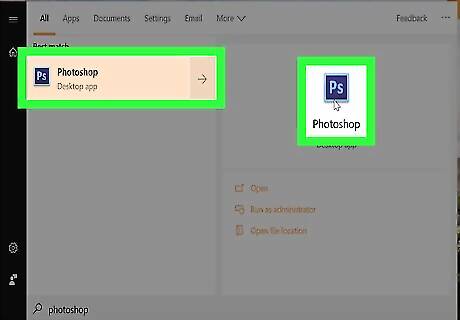
Open Photoshop. It has a blue square icon that says "Ps" in the middle. Photoshop is available with a subscription from https://www.adobe.com/products/photoshop.html. The spot healing tool can be used to remove unsightly blemishes or spots of an image.
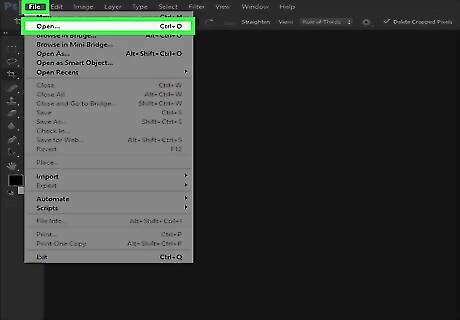
Open the photo that you want to edit. Use the following steps to open an image: Click File in the menu bar at the top of the screen. Click Open Select an image and then click Open.
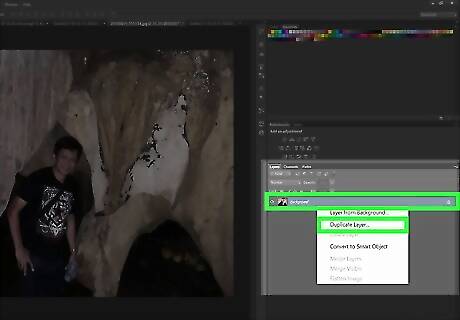
Duplicate the background layer (optional). When editing photos in Photoshop, it's a good idea to duplicate the background layer. That way if you mess up the image, you can delete the layer and start again with the original. Use the following steps to duplicate the background layer. Right-click the background layer in the Layers panel (If you don't see the Layers panel on-screen, click Window in the menu bar and click Layers). Click Duplicate layer.
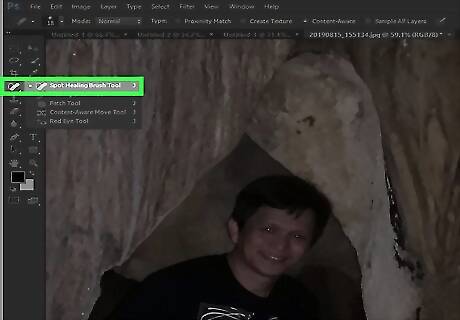
Click on the spot healing tool. It's in the toolbar to the left. It resembles a rectangular double-ended brush.
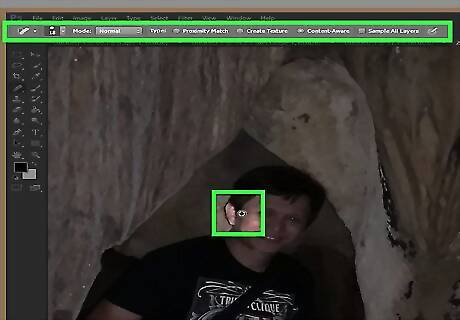
Click a part of the image that needs healing. This removes spots and blemishes by blending over them with the color and texture around the spot. You can adjust the size of the brush by pressing [ and ] on your keyboard. You can click and drag to heal a larger part of the image, though this tends to leave a blurry streak on the image.
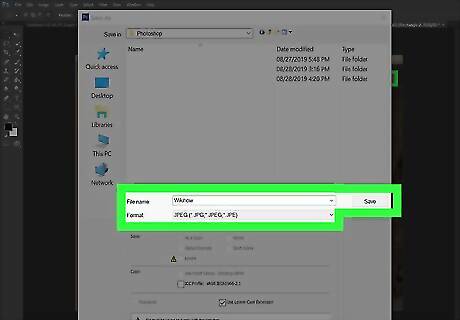
Save the image. Once you are happy with how the image looks, use the following steps to save the image: Click File Click Save As. Type a name for the image (consider giving the edited image a different file name from the original). Select an image format next to "Save as type" (JPEG, PNG, and GIF are common file types. Click Save.
Using the Brush Tool
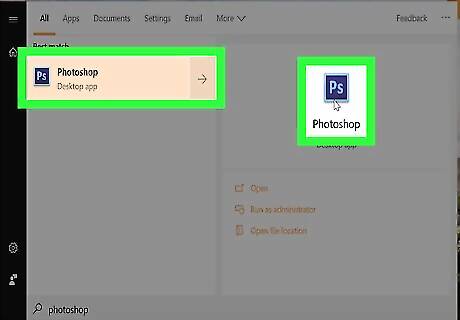
Open Photoshop. It has a blue square icon that says "Ps" in the middle. Photoshop is available with a subscription from https://www.adobe.com/products/photoshop.html.
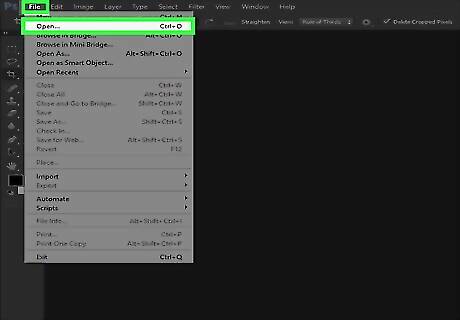
Open the photo that you want to edit. Use the following steps to open an image: Click File in the menu bar at the top of the screen. Click Open Select an image and then click Open.
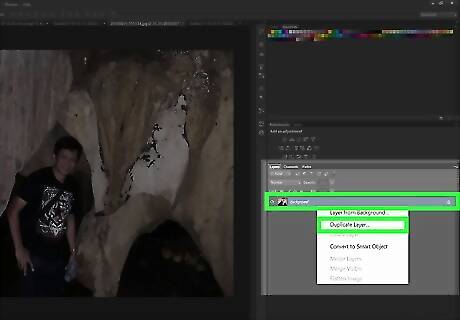
Duplicate the background layer (optional). When editing photos in Photoshop, it's a good idea to duplicate the background layer. That way if you mess up the image, you can delete the layer and start again with the original. Use the following steps to duplicate the background layer. Right-click the background layer in the Layers panel (If you don't see the Layers panel on-screen, click Window in the menu bar and click Layers). Click Duplicate layer.
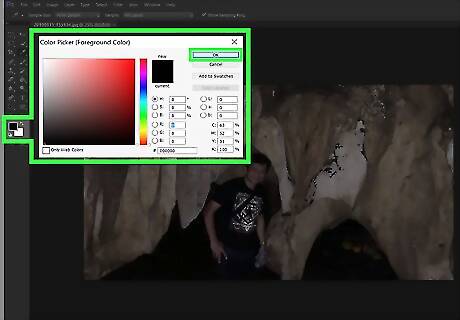
Select a color. To select a color, click the colored square (black by default) below the tools the toolbar to the left. Then click a hue in the rainbow-colored bar. Then click a tint and shade in the larger square on the left. Then click Ok. Click the colored square underneath the first colored square to pick a secondary color or background color. To select a color from within the image, click the eyedropper tool in the toolbar to the left and click the color you want from within the image.
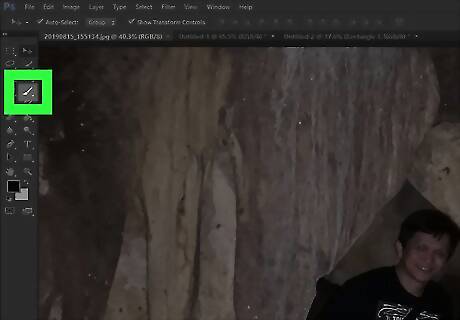
Click the brush tool. It's the icon that resembles a paintbrush in the toolbar to the left. The type of brush you have selected will be displayed in the upper-left corner.
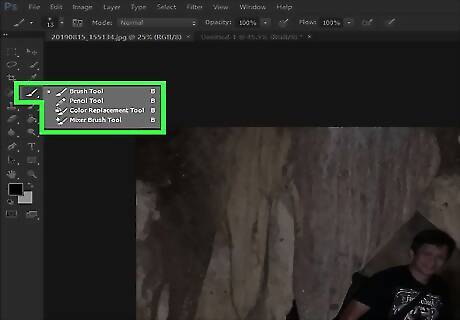
Click the brush type drop-down menu. It's in the upper-left corner next to the brush type you have selected (round dot by default). This displays a drop-down menu with different brush settings.
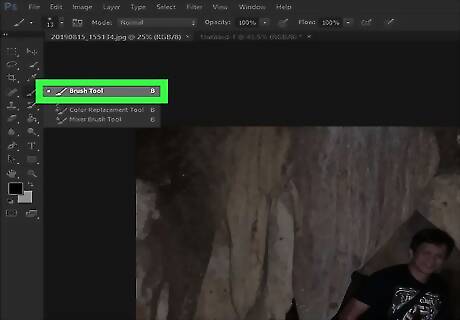
Click a brush type. There are many icons that represent the different brushes you can select. These different brushes are useful for drawing on the image or adding texture. Click a brush you want to use. If you don't see anything you like, you can download, and install more Photoshop brushes.
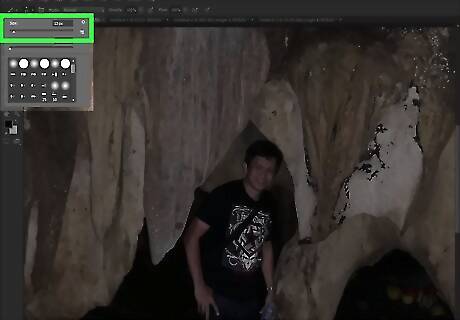
Adjust the brush size. Use the slider bar at the top of the menu below size to adjust the size of the brush. Drag it right to make the brush bigger. Alternatively, you can adjust the size of the brush by pressing [ and ] on your keyboard.
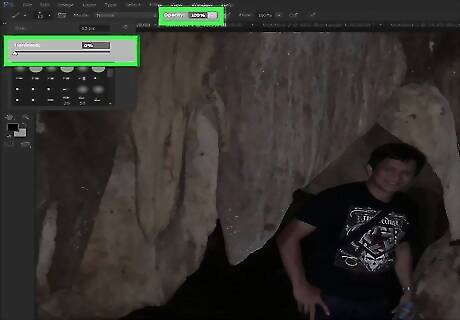
Adjust the hardness of your brush (not available for all brushes). Some brushes have the ability to adjust the hardness of the brush. Use the second slider bar below "Hardness" to adjust the hardness of the brush. Dragging it to the left will add a softer gradient around the edges of the brush. To adjust the opacity of the brush, click Opacity at the top of Photoshop. Drag the slider bar to the right to make the color more solid. Drag it to the left to make the color more transparent.
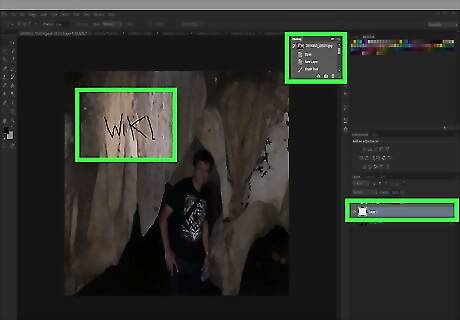
Use the brush to draw on the image. Click once on the image to stamp the select brush on the image. Click and drag to streak the brush over the image. If you make a mistake, press Ctrl+Z to undo once. To undo more steps, click Window in the menu bar at the top, then click History. Click the step you want to go back to in the History panel. When using the brush tool, you may want to consider drawing on a separate layer. To add a new layer, click the small icon that resembles a sheet of paper in the lower-right corner of the Layers panel.
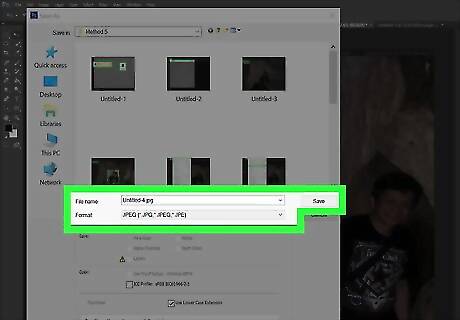
Save the image. Once you are happy with how the image looks, use the following steps to save the image: Click File Click Save As. Type a name for the image (consider giving the edited image a different file name from the original). Select an image format next to "Save as type" (JPEG, PNG, and GIF are common file types. Click Save.
Using the Lasso Tool
Open Photoshop. It has a blue square icon that says "Ps" in the middle. Photoshop is available with a subscription from https://www.adobe.com/products/photoshop.html.
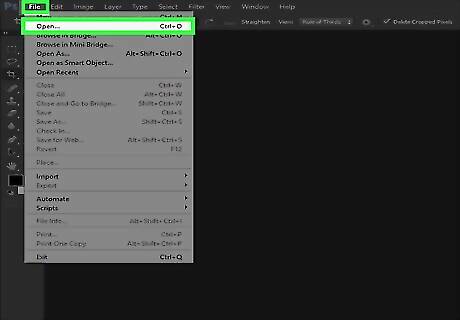
Open the photo that you want to edit. Use the following steps to open an image: Click File in the menu bar at the top of the screen. Click Open Select an image and then click Open.
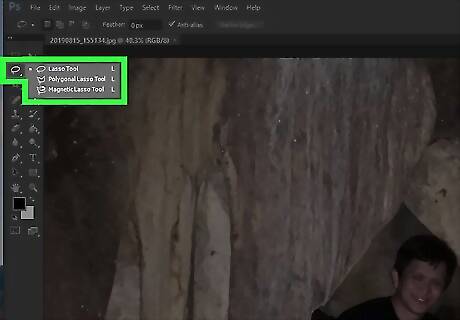
Click the Lasso Tool. It's the icon that resembles a lasso in the toolbar to the left. The lasso tool is used to copy parts of an image that you can paste in another part of the image, or on a separate image. Some versions of Photoshop have the Magnetic Lasso tool, and Polygonal Lasso tool. These make it easier to draw around a shape. Click and hold the lasso tool in the toolbar to access these other versions of the lasso tool.
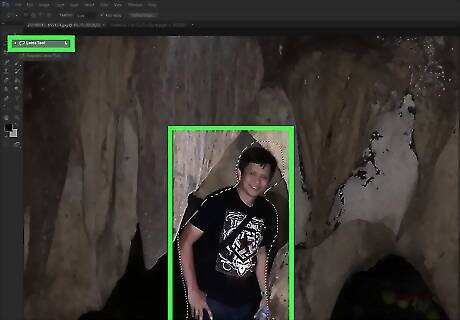
Draw around the shape you want to copy. With the lasso tool selected, click the edge of the shape you want to copy in the image and drag to draw around the shape. You will see it draw a line. Draw a complete line around the shape. Return to the point you started drawing from to complete the shape. You will see a dotted outline around the shape. This is the selection. To add more to the selection, click the icon that resembles two squares joined in the upper-left corner and use the lasso tool to draw more to add to your selection To remove parts of your selection, click the icon that resembles a square with the corner cut out. Then use the lasso tool to draw over parts of your selection that you want to remove. The Magnetic Lasso tool will automatically try to detect the shape you are trying to outline as you draw. To use the Polygonal Lasso tool, click individual spots around the shape to create line segments that outline the shape.
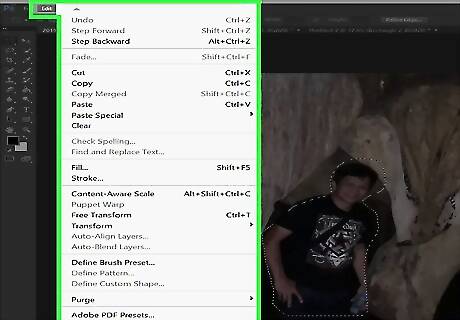
Click Edit. It's in the menu bar at the top of the page.
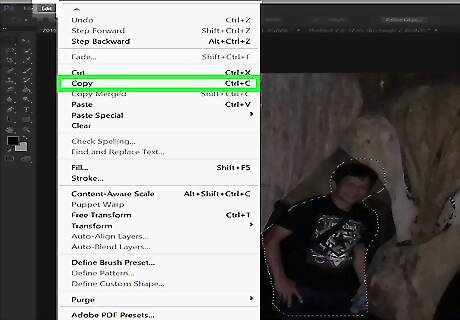
Click Copy. It's in the Edit menu. This copies the selection.
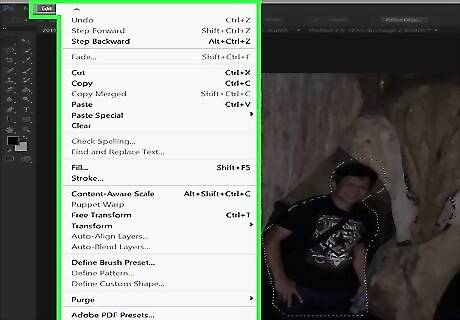
Click Edit. It's in the menu bar at the top of the page.
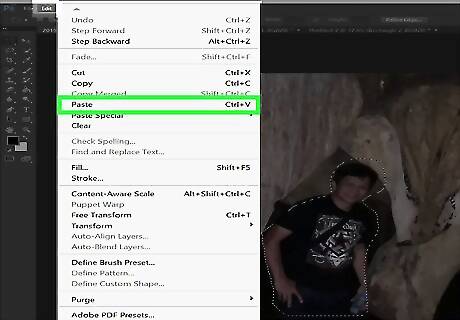
Click Paste. This pastes the copied selection into the image as a separate layer. You can paste the selection in the same image or a separate image. You may need to use the eraser tool to remove parts of the background you accidentally copied around the edges.
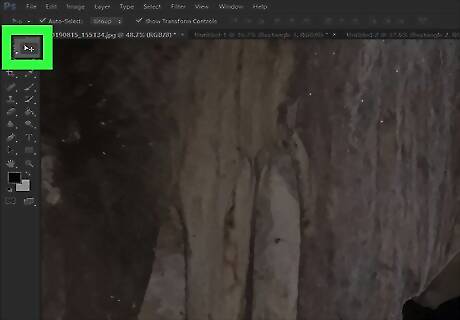
Click the Move tool. It's the icon that resembles a mouse cursor with a cross-arrow next to it. It's the first icon in the toolbar to the left.
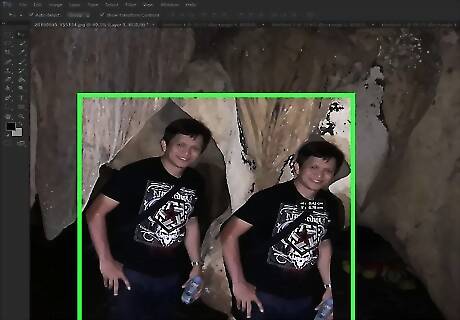
Click and drag on the selection. With the move tool selected. you can move the selection you pasted to any location in the image by clicking it and dragging it. To change the size of the pasted selection, click it with the move tool. Then click the checkbox next to "Show Transform Controls" in the upper-left corner. Then click and drag one of the corners of the box around your selection to change the size of it. Press and hold ⇧ Shift while dragging to keep the selection proportional.
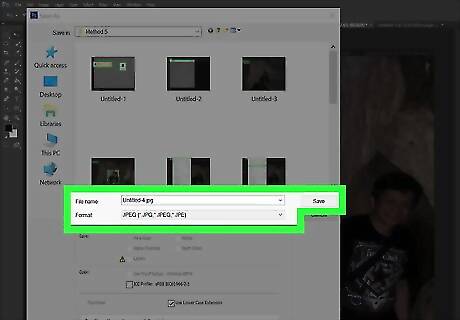
Save the image. Once you are happy with how the image looks, use the following steps to save the image: Click File Click Save As. Type a name for the image (consider giving the edited image a different file name from the original). Select an image format next to "Save as type" (JPEG, PNG, and GIF are common file types. Click Save.
Using Smart Filters
Open Photoshop. It has a blue square icon that says "Ps" in the middle. Photoshop is available with a subscription from https://www.adobe.com/products/photoshop.html.
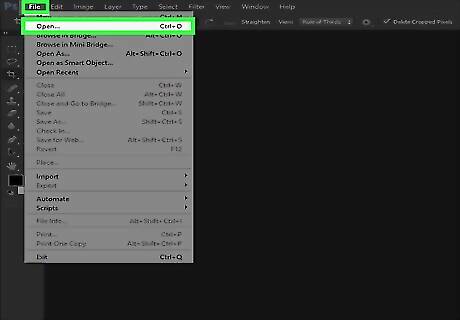
Open the photo that you want to edit. Use the following steps to open an image: Click File in the menu bar at the top of the screen. Click Open Select an image and then click Open.
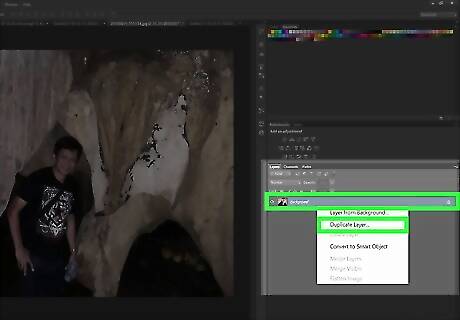
Duplicate the background layer (optional). When editing photos in Photoshop, it's a good idea to duplicate the background layer. That way if you mess up the image, you can delete the layer and start again with the original. Use the following steps to duplicate the background layer. Right-click the background layer in the Layers panel (If you don't see the Layers panel on-screen, click Window in the menu bar and click Layers). Click Duplicate layer.
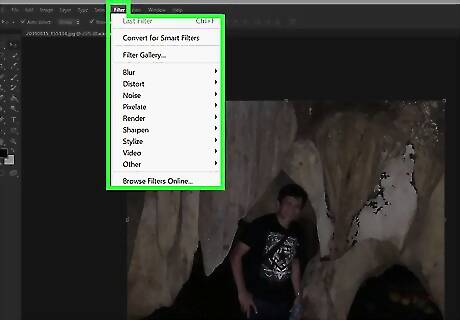
Click Filter. It's in the menu bar at the top of Photoshop.
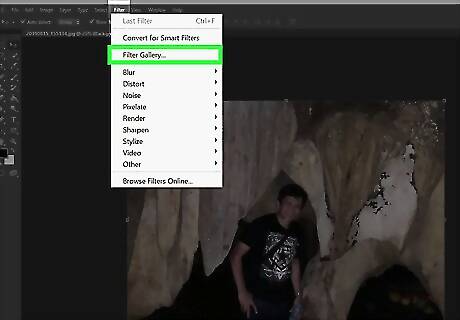
Click Filter Gallery. It's near the top of the Filter menu. This opens the Filter window To see the entire image, you may need to stretch the filter gallery window out depending on the size of your image.
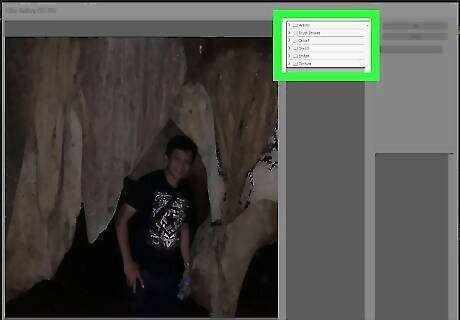
Click a filter category. Filter categories are listed to the right of the image window in the Filter Gallery. Clicking a category displays a list of filters with a thumbnail preview for each filter. Filter categories include; Artistic, Brush Strokes, Distort, Sketch, Stylize, Texture.
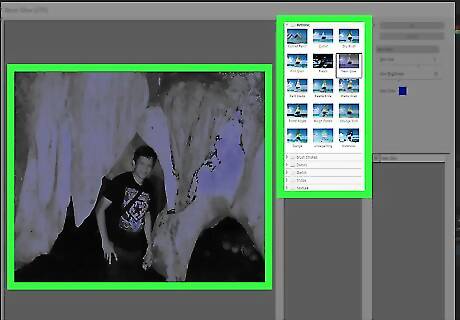
Click a filter. When you see a filter you like, click on it. The image window to the left displays a preview of how the filter will affect your image.
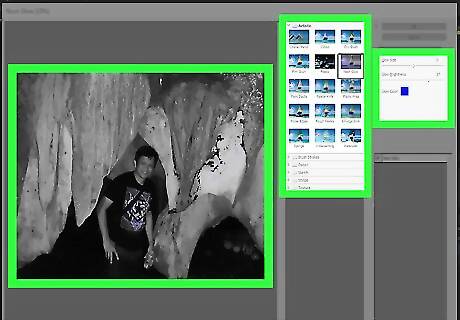
Adjust the filter settings. Each filter has different settings displayed in the window to the right. Experiment by adjusting the slider bars in this window to see how they modify the image.
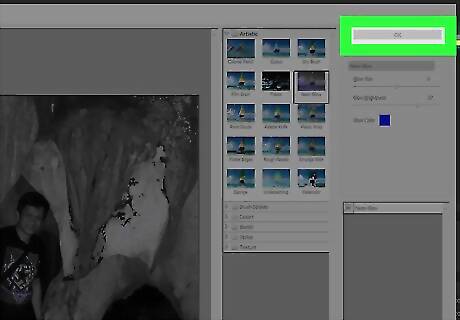
Click Ok. When the like how the image looks, click Ok in the panel to the right to apply the filter. Filters can be applied to an entire image, an image selection, or an individual layer.
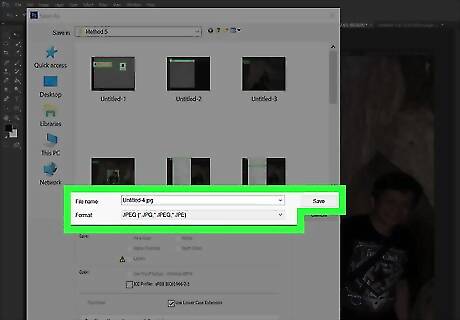
Save the image. Once you are happy with how the image looks, use the following steps to save the image: Click File Click Save As. Type a name for the image (consider giving the edited image a different file name from the original). Select an image format next to "Save as type" (JPEG, PNG, and GIF are common file types. Click Save.
Masking An Image
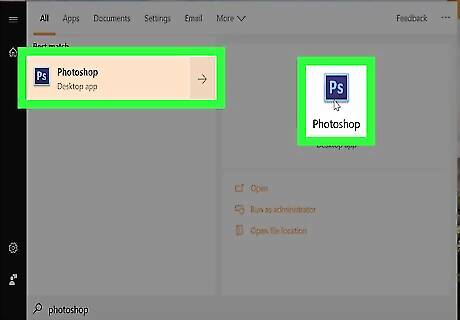
Open Photoshop. It has a blue square icon that says "Ps" in the middle.
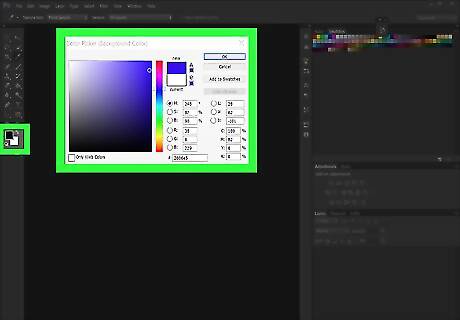
Select a background color. To select a background color, click the colored square behind (white by default) behind the primary-colored square below the tools in the toolbar to the left. Then click a hue in the rainbow-colored bar. Then click a tint and shade in the larger square on the left. Then click Ok. This is the color you will use as the background color of a new image.
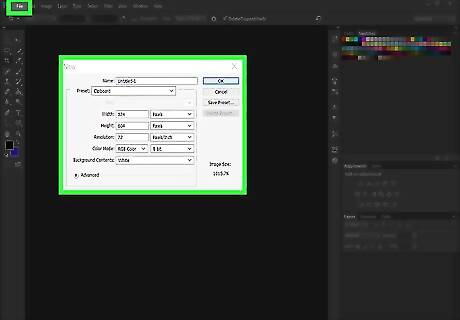
Create a new Photoshop file. Use the following steps to open a new Photoshop image with the background color you selected: Click File. Click New. Type your desired height, and width dimension settings in the boxes. Select your desired resolution next to "Resolution". Select Background Color next to "Background contents. Click Ok.
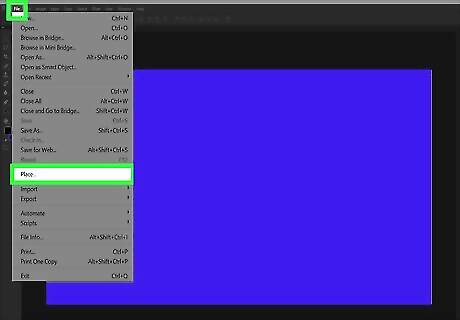
Place a photo on top of the background. Use the following steps to place another photo as a separate layer on top of your background color: Click File Click Place. Select the image you want to import. Click Place.
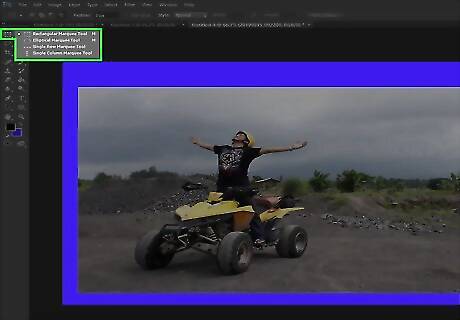
Click and hold the marquee tool. This displays different marquee shapes you can use to create a selection within the image.
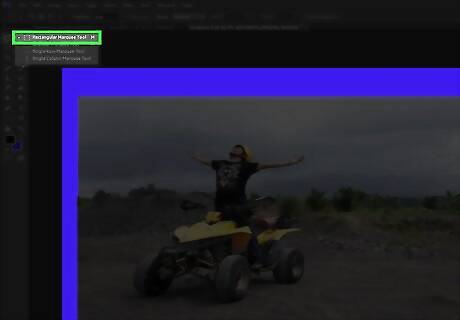
Select a marquee shape. You can select a rectangle or oval marquee. Alternatively, you can use the lasso tool to create a selection of your own shape.
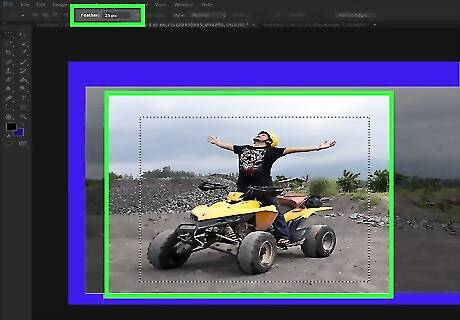
Click and drag inside the image. You will see a dotted outline around the selected part of the image. To create a gradient around the edges of the masked image, type a number next to "Feather" in the upper-left corner. For example, type "25 px" to feather the edges by 25 pixels.
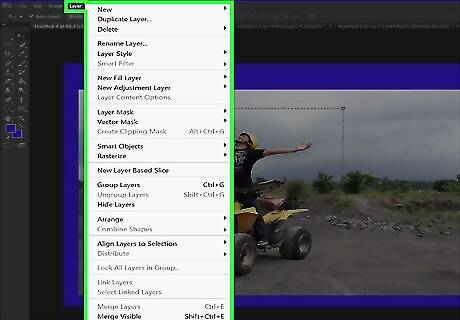
Click Layer. It's in the menu bar at the top of the screen.
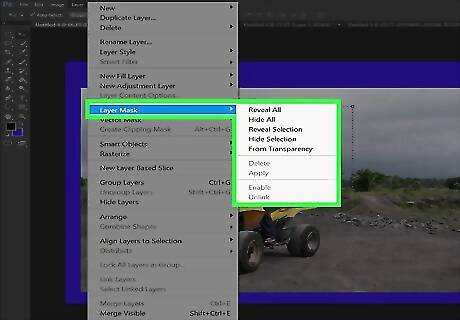
Click Layer Mask. This displays a sub-menu with masking options.
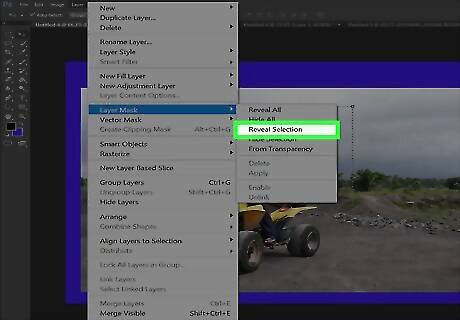
Click Reveal Selection. This creates a mask of your image in the shape that you selected. The background color shows around the masked parts of the image.
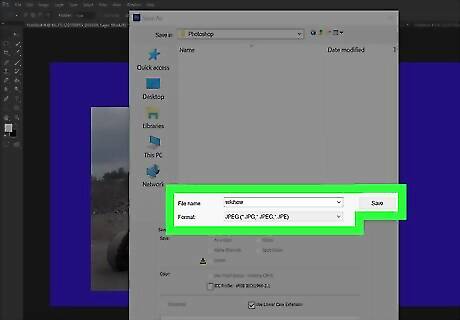
Save the image. Once you are happy with how the image looks, use the following steps to save the image: Click File Click Save As. Type a name for the image (consider giving the edited image a different file name from the original). Select an image format next to "Save as type" (JPEG, PNG, and GIF are common file types. Click Save.




Comments
0 comment