

Steps

Prepare and design your system. The first step in any septic installation is to perform a site survey and do a percolation (soil) test on the area where the POWTS is going to be installed. The system then can be designed based on the findings of the survey and results of the soil test. After this, the appropriate permits and approvals can be applied for. Site survey findings that influence the design include things like: available space topography intended purpose and perceived water use based on the size of the dwelling/building the system will service. location of the well and/or neighboring wells. Soil test findings that influence the design include things like: soil type and layering (sand, clay, rock, and where it is located relative to depth) ability of the soil to drain and filter wastewater.
Wait for approval. Upon receipt of the necessary permits and approvals, the system can be installed. Be sure to perform the following procedures in compliance with any and all laws and applicable plumbing and building codes.
Gravity-Fed System

Assemble the equipment and tools needed for excavation. You will need: Backhoe Laser transit and grade pole 4" Sch. 40 PVC pipe(and fittings if needed) 4" ASTM D2729 perforated pipe 4"ASTM D3034 pipe and fittings 4" Sch. 40 vent caps and test caps PVC primer and glue Saw (either hand saw or cordless reciprocating saw) Hammer drill and bits(to go through wall if necessary) Hydraulic cement (to seal around pipe if going through wall) Shovel Inch-and-a-half washed stone (quantity depends on system size) Tape measures (regular and also at least a 100' tape) Septic fabric (cut roll to 3' long or so) Septic tank and risers (concrete, or plastic if allowed) Con-Seal (for concrete) or silicone caulk (for plastic) to seal risers Septic filter (ex. Zoeller 170 or similar) if required. distribution box (either concrete, or plastic, if running more than two laterals.)
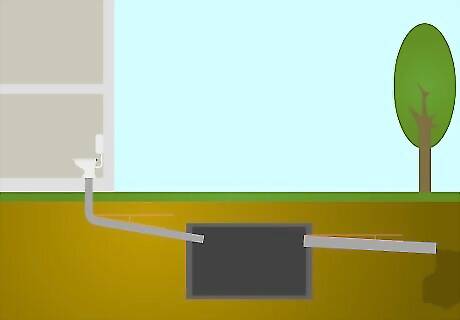
Find where you want to go into the building relative to where you want to place the septic tank. Excavate to at least 2 feet deep and drill a hole through the wall, or go deeper and go under the footing, whichever is desired, or necessary. Plan for the flow to go downhill from here, as this is exactly what a gravity fed system is all about. It does not use a mechanical means other than gravity to discharge the waste from the tank to the drain field. Pipe 4" Sch. 40 going a foot through the wall or under the footing, and to a minimum of five feet outside the building toward the tank. Set it level where it's going through the wall or under the footing, and from there run with about an 1/8" per foot of pitch (slope) toward the septic tank. Go further or all the way into the tank if required. If not, switch to 4" 3034 with the appropriate adapter and pipe toward the tank with 3034. Be sure that the septic tank would be approximately 15 feet or slightly more out from the exterior wall of your house. Be sure to put a test cap on the end going into the building. If going through the wall, seal around the hole with hydraulic cement, inside and out. Don't run too much pitch going out to the tank. If there's too much, the water runs away faster than the solids, and the solids may get left in the pipe. Also, there may not be enough pitch to get to the drain field, depending on the depth your drain field is, and how close it will be to the outlet of the tank.
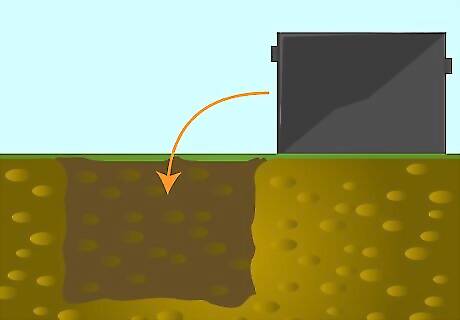
Excavate a hole large enough to set the concrete aerobic tank below ground. Use the laser transit and "shoot" the top of the pipe going out to the tank. Measure the distance from the top of the inlet, to the bottom of the tank. Add this (go up on the grade pole) plus 1 1/2" to the number you shot off the top of the pipe. The grade pole is now set to the depth that you need. Proceed to use this to excavate the hole to the appropriate depth. Lay out and excavate your leech field as it has been determined by the test done in the permit process. When laying out and excavating, remember to maintain a positive flow between the tank and the drain field.
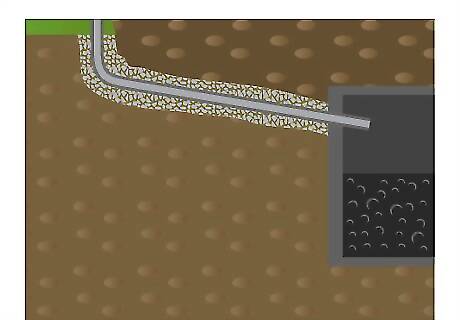
Place (in most jurisdictions) "inch-and-a-half washed drain rock" from a nearby gravel pit around the pipe. This is required to hold the pipe steady. See your local health requirements for the size of embedment needed and the size of gravel. The perforated pipe in a gravity drain field has no slope end to end and has capped ends.
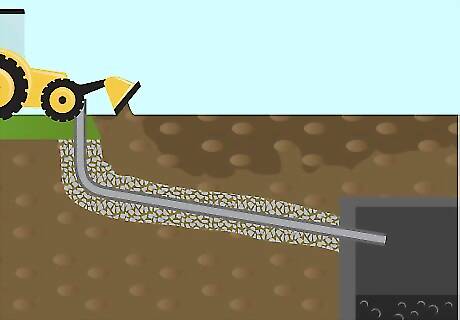
Cover up the pipe and tank once you have a green tag from the health inspector. All areas depending on the rules of the local health department will require a special filter fabric, newspaper, four inches of straw or untreated building paper to cover the drain rock before backfilling.
Alternative Septic Systems
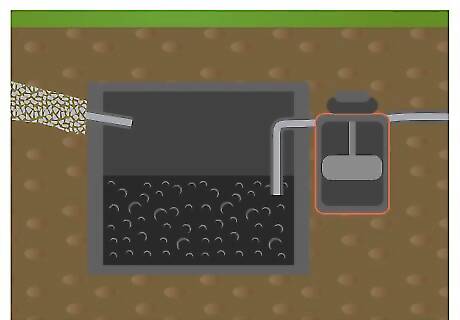
Install a pump chamber after the septic tank. The pump chamber or sometimes known as a pressure tank, or dosing tank contains the electric pump which is utilized to move the effluent from place to place, and eventually into the drain field for final disposal. Set up the pump chamber as you would the septic tank. The pump chamber contains the effluent pump and floats to pump out to the drain field at measured or timed intervals. This is a sealed system. The electrical installation will usually require a licensed electrician to satisfy state regulations. In areas with high ground water, be aware that the pump chamber or additional ATUs may be mostly empty much of the time, and these tanks may have to be protected against flotation by the use of extra weight or other protective structures.
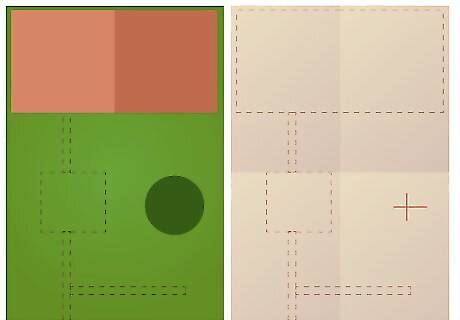
The construction details including the layout of all sewers outside of the home, the location and depth of all tanks, the routing and depth of pressurized effluent lines and other system parts such as the drain field and any additional ATUs must match the septic system plans as approved by the local county health department.

Cover the tank and pressurized lines once the inspector has given his final approval and the system is activated.


Comments
0 comment