views
X
Research source
The "Swiss Seat" is another simple and popular method.
Tying the Leg Loops
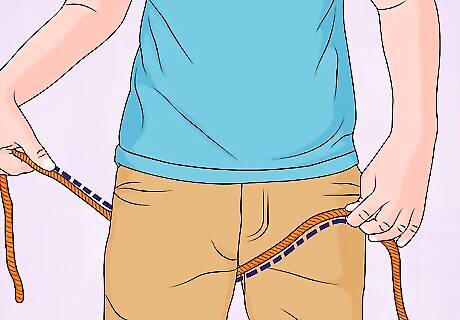
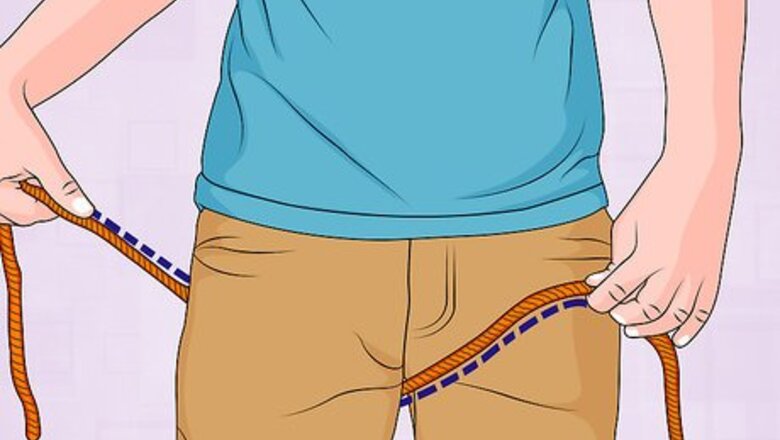
Wrap the rope around your upper thigh. First, wrap the end of the rope around one leg, starting between the legs and winding around the outside of your figure to meet the rest of the rope at the upper thigh. The rope should rest comfortably beneath your rear. Pull the end through so that you have about two feet of slack to tie the knot. Make sure to use a rope that is thick enough to support your weight. If possible, use a dedicated climbing rope that is designed to hold up against the shock of a fall. Consider using climbing webbing.
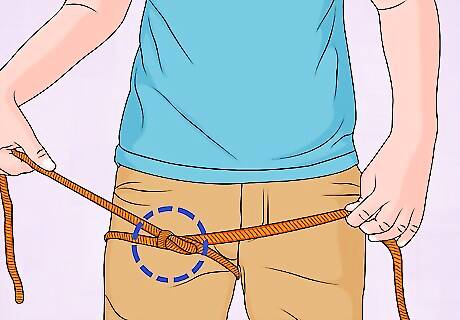
Tie a bowline knot to secure the first leg. If you made the first loop around your right leg, then use your left "steady" hand to form a small loop in the long side of the rope that runs between your legs. Hold the loose end of the rope in your right hand. Then, pull the loose end up toward you through the loop, and wrap it around the base of the loop. Thread the end of the rope back through the loop. Finally, pull the ends in opposite directions to tighten the knot. Think of the loop as a "rabbit's hole," and the long end coming off the loop as a "tree". Imagine that the loose end of the rope, which you're holding in your right hand, is the "rabbit". The rabbit comes up the hole, runs around the tree, and goes back down the hole. The loose short end of the rope serves to secure your leg. The long end will loop around the other leg, and will eventually become the "crosspiece" to which you clip the carabiner.
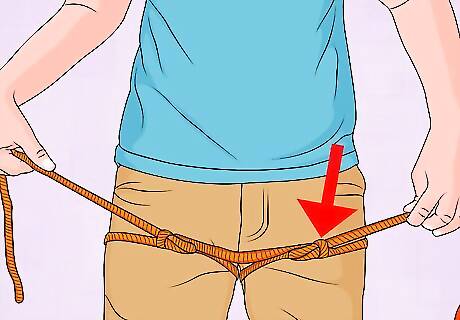
Tie another bowline around your other leg. Wrap the long end of the rope around your other leg, but be sure to leave room for a small "rabbit's hole" loop where the rope goes between your legs. Tie the bowline and tighten the knot. You should now have a sturdy "crosspiece" that runs across the front of your pelvic area. The crosspiece should be about 2 inches long with the knots toward the inside of the leg.
Securing the Harness
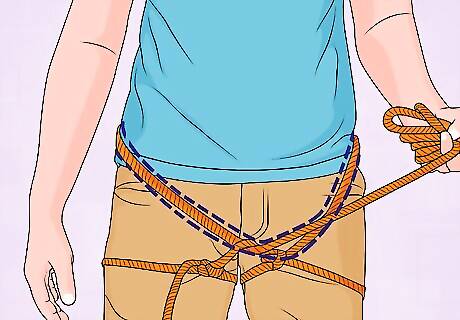
Take the long end around your back and through the crosspiece. Make sure that the rope sits comfortably in the small of your back, above your seat.
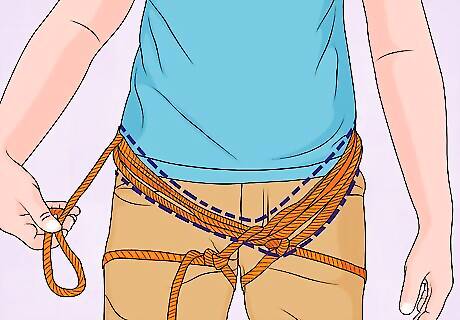
Strengthen the harness. Wrap the rest of the rope around your back and through the crosspiece in the same direction. Continue until you run out of webbing. Three or four wraps of rope around your waist should provide plenty of support. Pull the rope tight, but not so tight that it constricts your movement. Try to keep the rope strands parallel – don't let them cross over and become tangled.
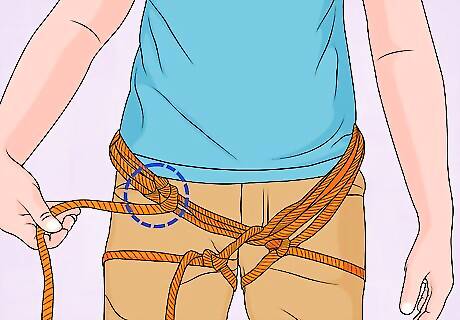
Tie the two ends together with a square knot. Connect the short loose end that protrudes from the first bowline knot to the end of the long length of rope that you've wrapped around your waist.
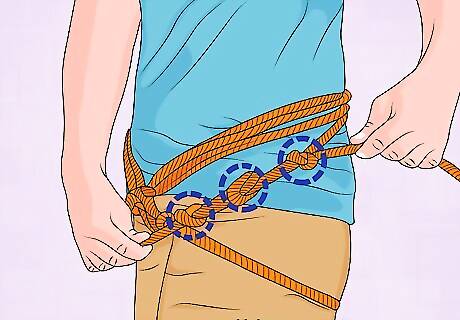
Back up both sides. Tie overhand knots, square knots, fisherman's knots, or another sturdy knot. The goal here is to make your harness extra secure, and to provide a bit of insurance should your other knots come loose.
Using the Harness
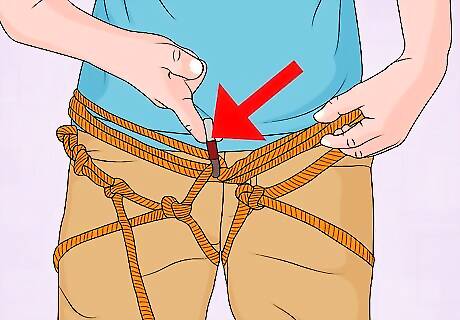
Clip in the carabiner to the crosspiece. Clip it as if someone walked up to you and clipped it down onto your harness – then pull the gate out front. This will make it easy to clip things into your carabiner. If you are rappelling, you want the opening end of the carabiner to lie against you, not the cliff. Be sure to lock the carabiner. If your carabiner does not lock, then you'll need to be especially careful. Consider simply looping the climbing or rappelling rope through the crosspiece – but make sure that there are two "points of contact."
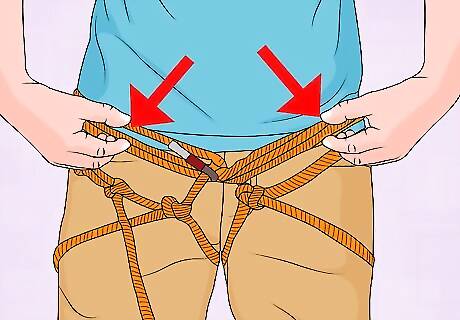
Check that your harness is secure. Pull up on your crosspiece to make sure that it feels strong enough to hold your weight. Make sure that you cannot fit more than two fingers between your thighs and the rope loops. Tug the rope that is coiled around your waist, and ensure that it will not slip off easily. Double-check all of your knots. If you are climbing or rappelling, then the rope should have two "points of contact" with your harness at all times – at least two spans of rope. If you are belaying, then the carabiner should lock through two points of contact. Be thorough! Do not put your full weight onto this harness until you are absolutely sure that it will hold up.
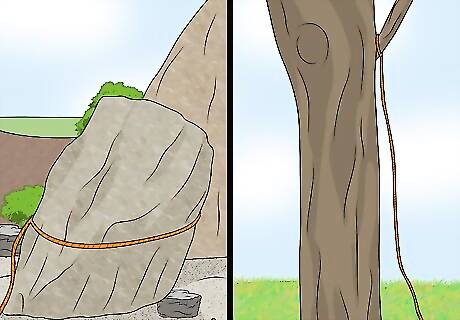
Anchor to something sturdy. Tie the climbing or rappelling rope to something that will hold your full weight without bending or breaking. Look around you for solid anchors: Trees more than eight inches in diameter. Check that the tree is well-rooted: that it is sturdily attached to the ground, and not in loose soil. Rocks: large, sturdy boulders and outcroppings. Do not tie your anchor to porous rock that might flake or chip away. The frame of a vehicle. Make sure that the vehicle is in park with the parking brake on. Chock the wheels by placing rocks, bricks, or wedges to stop them from rolling.


Comments
0 comment