
Modifying a Fitted T-Shirt
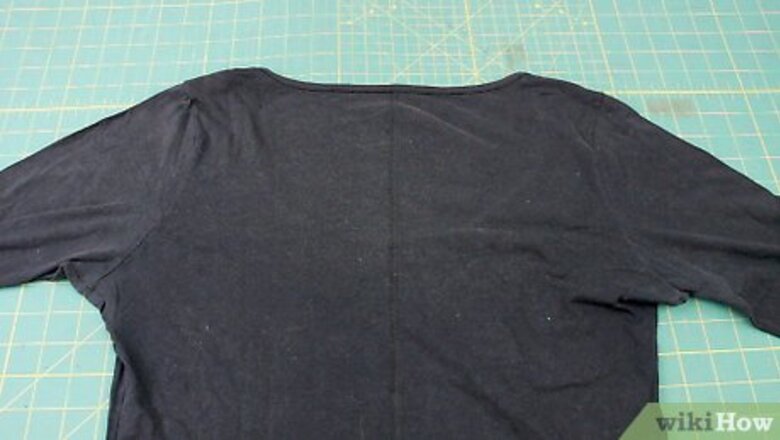
Find a fitted T-shirt that fits you well. The shirt must be fitted, otherwise it will sag around your shoulders when you wear it. It can have long sleeves or short sleeves.
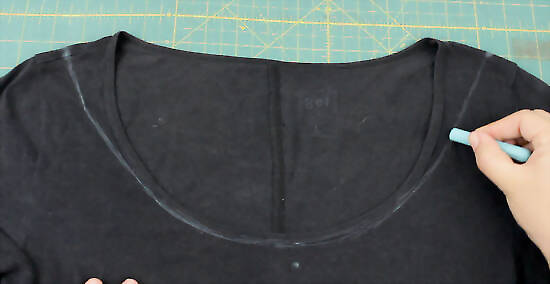
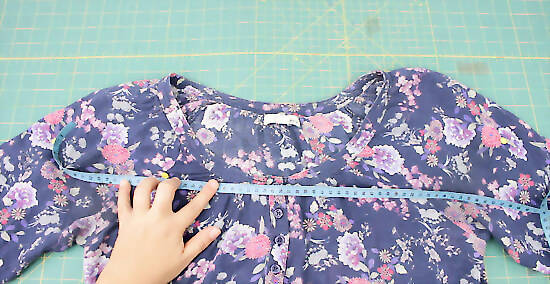
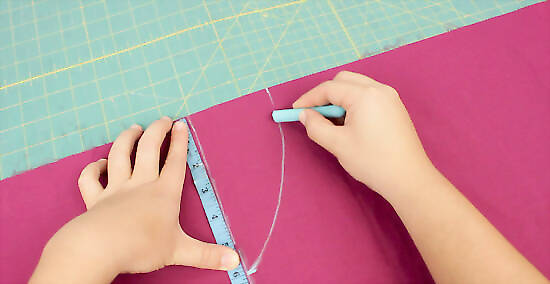
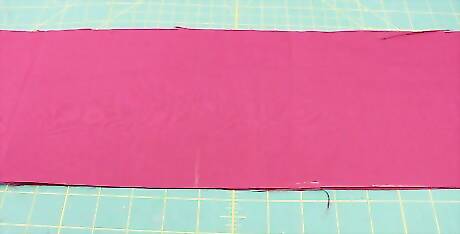
Draw a line across the shirt, 1 inch (2.5 cm) above where you want the hem. Spread the shirt on a flat surface and decide where you want the top hem to be. Use a chalk or pen to draw a line across the shirt, 1 inch (2.5 cm) above that spot. Make sure that you are drawing across the entire shirt, from 1 shoulder to the next. You need that extra 1 inch (2.5 cm) for the hem.
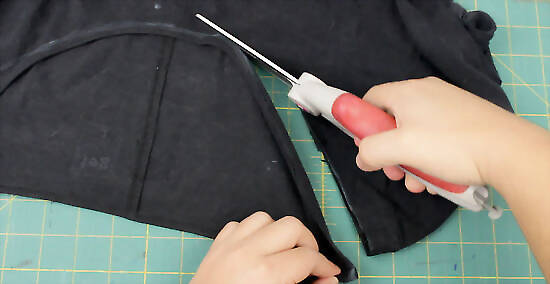
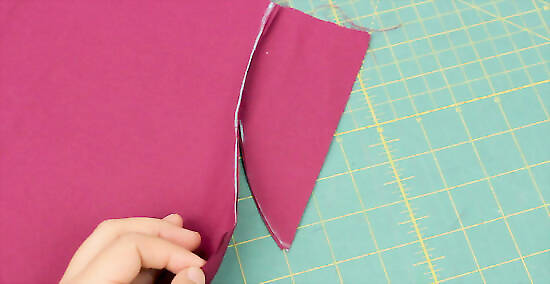
Cut across the line that you drew. Use a sharp pair of fabric scissors to cut straight across the shirt. Make sure that you cut through both layers of fabric.
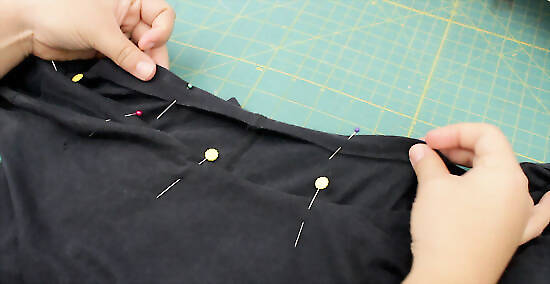
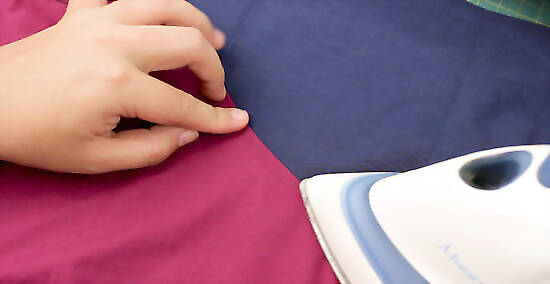
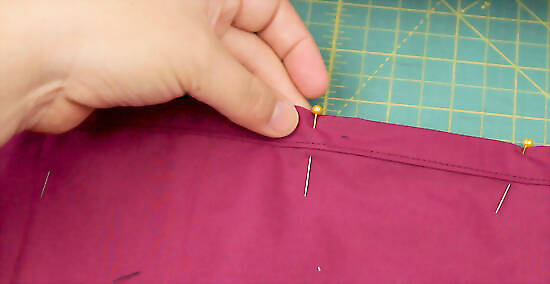
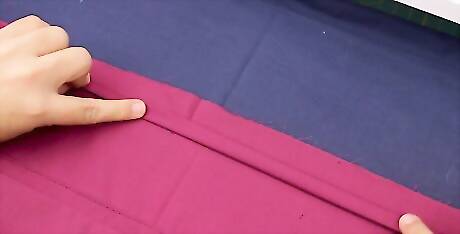
Fold and press the top edge into the shirt by ⁄2 inch (1.3 cm). Fold the top cut edge down by ⁄2 inch (1.3 cm), and press it flat with an iron. Repeat this step 1 more time to get a clean hem. Work your way around the shirt. Use sewing pins to hold the hem down if you have to. Make sure that you are folding the hem inside the shirt.
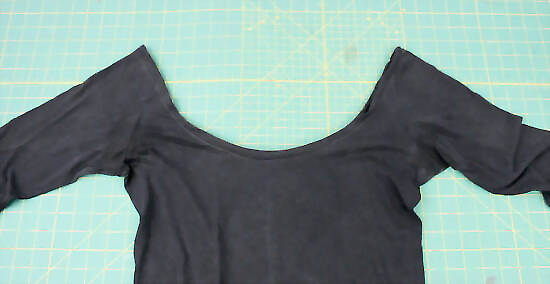
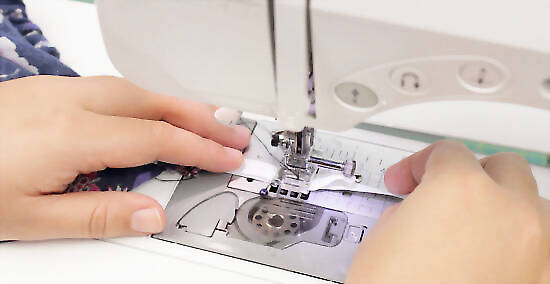
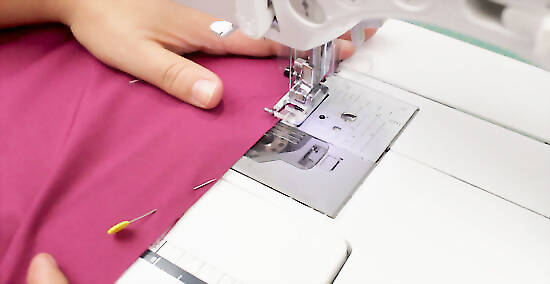
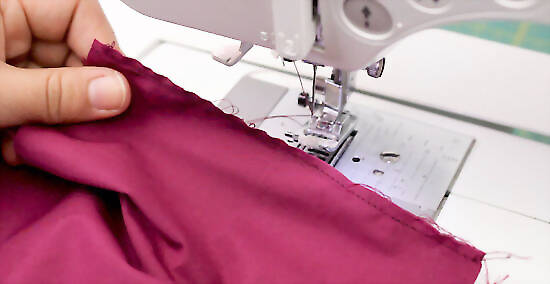
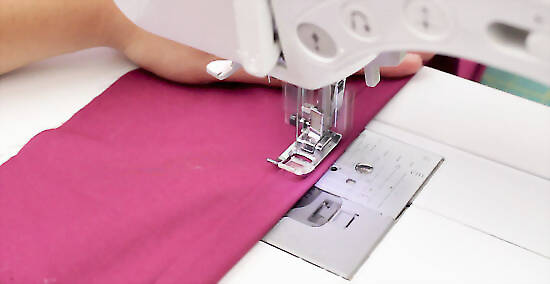
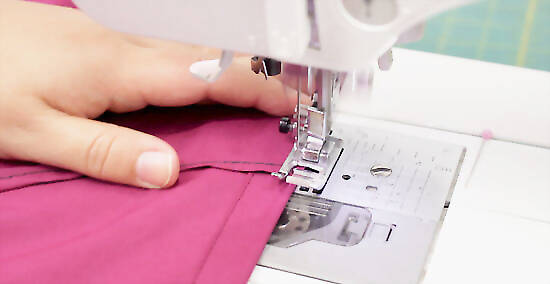
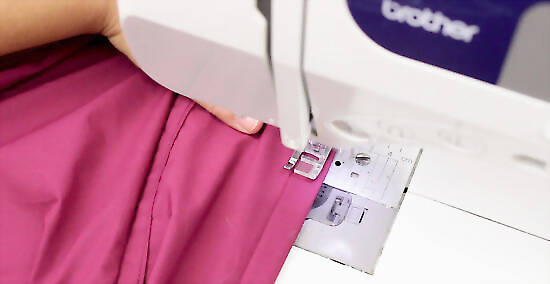
Sew the hem down using a matching thread color. Choose a thread color that matches the fabric. Sew as close as possible to the inside folded edge of your hem. Use a stretch stitch, if possible. You can also use a straight stitch and pull on the fabric as you are sewing it. This will allow the thread to stretch while you are wearing the shirt. Another option is to sew the hem with a zigzag stitch instead. A stretch stitch is a special stitch used for stretchy fabrics. Not all sewing machines have this.
Modifying a Button-Up Blouse
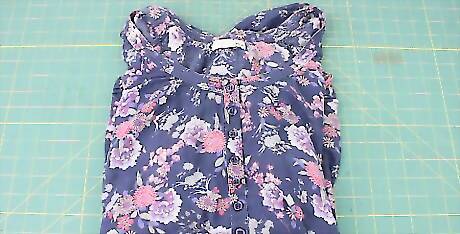
Choose a blouse that is 3 to 4 sizes larger than your normal size. Whether or not the blouse has sleeves is up to you; you won't be altering them. The shirt must be baggy enough so that you can take it on and off without opening the buttons.
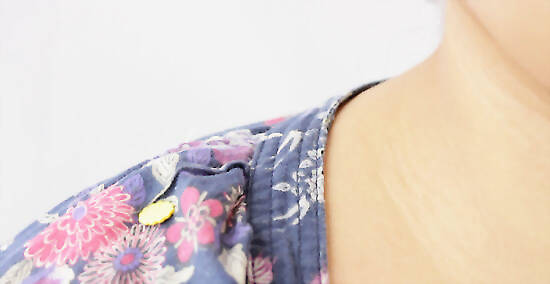
Put the shirt on and mark where you want the top to start. Put the shirt on and close the top few buttons. Insert a sewing pin in the front of the shirt and through each sleeve where you want the top hem to be. Most off the shoulder blouses start just above the armpits. You only need a pin on each sleeve and a pin in the front where the buttons are.
Take the shirt off and adjust your pins. Take the shirt off, close the buttons, and spread it on a flat surface. Use a ruler, measuring tape, or straight edge to ensure that the pins are aligned. If they are not aligned, move the pins up or down until they are. The pins don't need to be in a straight line. They can be curved like a U, but make sure that the 2 outer pins are aligned.
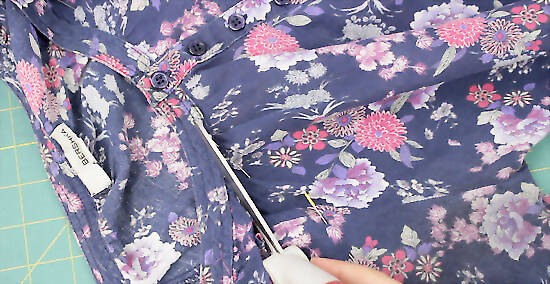
Cut the top of the shirt off, 1 inch (2.5 cm) above your pins. If you need to, use a fabric pen or chalk to draw a cutting line first. Use a pair of fabric scissors to cut through both layers of the shirt, 1 inch (2.5 cm) above your pins. Remove the pins when you are done. If your top hem is curved, cut ⁄2 in (1.3 cm) slits into the cut edge where the curves are.
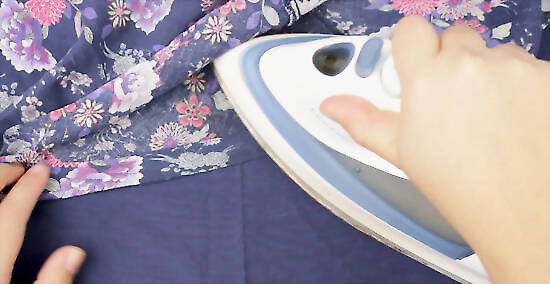
Fold and press the top hem twice by ⁄2 inch (1.3 cm). Fold the top cut edge into the shirt by ⁄2 inch (1.3 cm). Press it flat with an iron, then fold it down by another ⁄2 inch (1.3 cm). Press it flat with an iron once more. This will create a clean, neat hem on the inside of your shirt. Do not open the shirt when you reach the buttons. Pretend that the buttons are not there, and treat the overlapping fabric as a single layer.
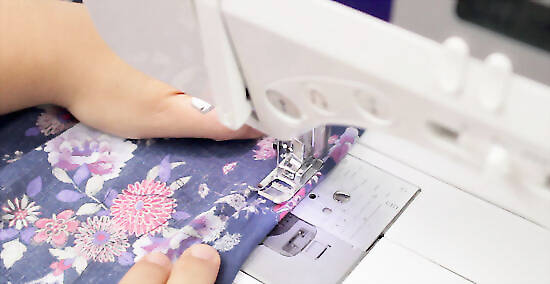
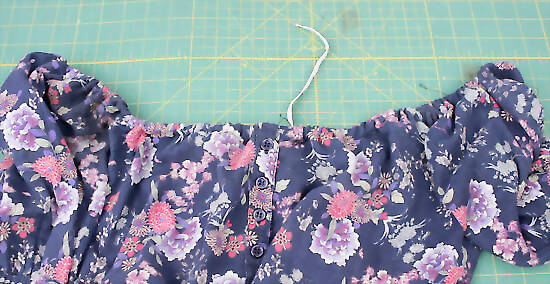
Sew the hem down and leave a 1 in (2.5 cm) gap to insert the elastic. Begin sewing in the back of the shirt, as close as possible to the inside folded edge. Leave a 1 in (2.5 cm) gap between your first and last stitches so that you can insert the elastic. Backstitch when you start and finish sewing. Use a straight stitch and match the thread color to the fabric as best as possible. You need to sew over the buttons in the front of the shirt. The opening in the top of the shirt should be big enough for you to fit through.
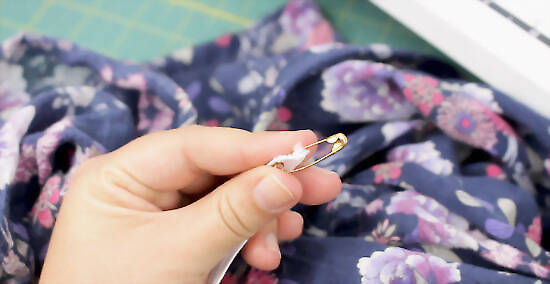
Use a safety pin to insert the elastic through the 1 in (2.5 cm) gap. Cut a piece of elastic that is long enough to wrap around your shoulders. Clip a safety pin to the elastic, then insert it into the 1 in (2.5 cm) gap in the top hem of your shirt. Use the safety pin to pull the elastic through the top hem until it comes out of the gap again. Be careful not to lose the tail end of the elastic inside the hem of the shirt. Hold it tightly, or secure it to the hem with a pin.
Overlap the ends of the elastic, then try the shirt on. Overlap the ends of the elastic by 1 to 2 inches (2.5 to 5.1 cm), then secure them with a safety pin. Try the shirt on and see if you like the fit. Take the shirt off and make the elastic tighter or looser, if needed.
Sew the elastic, then tuck it into the gap. Secure the elastic with a sewing pin and remove the safety pin. Sew across the elastic 3 to 5 times using a zigzag stich on your sewing machine, then remove the sewing pin. Tuck the elastic back into the 1 in (2.5 cm) gap.

Pull on the top hem, then sew across the gap. The top hem will be scrunched up thanks to the elastic. Pull on the top hem until it is straight and the fabric lays smoothly. Sew across the gap as close as possible to the inside folded edge. Use a straight stitch and a matching thread color. Remember to backstitch when you start and finish sewing.
Sewing from Scratch
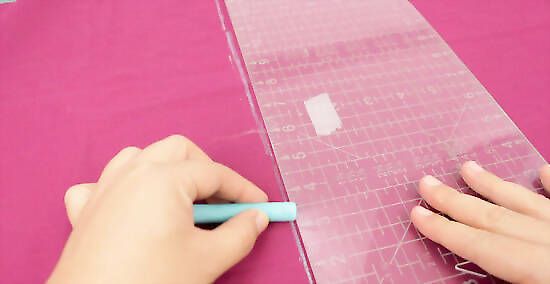
Create your pattern base on a sheet of folded fabric. Fold a sheet of lightweight, woven fabric in half. Draw a rectangle using a piece of chalk or a pen. The rectangle needs to be about 1 inch (2.5 cm) longer than what you want your top to be. The width needs to match your bust circumference. When you sew the 2 rectangles together, your shirt will be twice your bust circumference. This will allow you to gather the shirt with elastic. Great types of fabric for this include cotton and linen. To get your bust circumference: wrap a cloth measuring tape around the widest part of your bust, then record the measurement.
Add curves to the top corners for the armpits. Draw a curve in each top corner. Make the top of the curve 3 inches (7.6 cm) from the corner, and the bottom of the curve 6 inches (15 cm) from the corner. Alternatively, you can trace the armpits from a tank top that fits you onto the corners of the rectangle.
Cut the pattern out of your fabric. Make sure that you use sharp fabric scissors and that you cut through both layers of fabric. There is no need to add seam allowances since your pattern already includes them.
Pin and sew up the sides of the pieces with the right sides facing in. Pin the 2 rectangle pieces with the right sides facing in. Sew along the left and right side edges using a straight stitch and a ⁄4 to ⁄2 in (0.64 to 1.27 cm) seam allowance. Backstitch when you start and finish sewing. Finish the raw edges with a serger or zigzag stitch, if desired. Match the thread color as closely as possible to the fabric. Only sew the straight side edges of the rectangle. Do not sew the curved armpits together.
Hem the armpits. Fold the edges of the armpits down by ⁄4 inch (0.64 cm). Press the fabric with an iron, then fold them by another ⁄4 inch (0.64 cm) and press again. Sew the hems down as close to the inside folded edge as possible. Remember to backstitch when you start and finish sewing. Make sure that you are folding the fabric towards the wrong side, not the right side.
Cut an 8 ⁄2 in (22 cm) wide rectangle that's twice your shoulder circumference. Draw a rectangle on your fabric that is 8 ⁄2 inches (22 cm) tall and twice your shoulder circumference. Cut the rectangle out; you only need 1 piece. This will make a ruffle for your top. The ruffle will act as a decorative element as well as a casing for the elastic. It will also double-up as flowing "sleeves" for the shirt. To get your shoulder circumference: hold a cloth measuring tape behind your back, then wrap it around your shoulders and take the measurement in the front.
Sew the narrow ends of the rectangle together to form a tube. Bring the narrow ends of the rectangle strip together so that the right sides are facing out. Sew them together using a straight stitch and a ⁄2 in (1.3 cm) seam allowance. Finish the seam with a serger or zigzag stitch, if desired. Remember to backstitch when you start and finish sewing.
Hem the bottom edge of the ruffle and shirt. Fold the bottom edge of the ruffle piece by ⁄4 inch (0.64 cm), and press it flat with an iron. Fold the edge by another ⁄4 inch (0.64 cm) and press it again. Sew the hem down as close as possible to the inside folded edge. Repeat this step for the bottom edge of the shirt. Make sure that you are folding the edges towards the wrong side of the fabric.
Pin the ruffle to the top of the shirt, with the back seam in the back. Make sure that the shirt and ruffle are both turned inside out. Tuck the top of the shirt into the ruffle so that the top raw edges are aligned. Make sure that the seam on the ruffle is centered in the back of the shirt. Pin the back of the shirt to the back of the ruffle, and the front of the shirt to the front. The tube is wider than the shirt. The excess material needs to be hanging off to either side of the armpits.
Sew the top of the shirt and ruffle together. Use a straight stitch and a ⁄2 in (1.3 cm) seam allowance. Sew the back side first, then sew the front. Don't sew the excess ruffle material to the armpits. This gap will allow you to insert your arms.
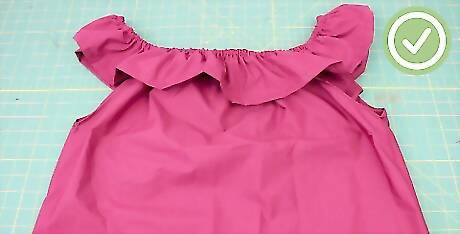
Turn the shirt right-side-out, and fold the top edge of the ruffle down. Turn the shirt right-side-out first. Fold the ruffle down so that it hangs in front of the shirt, also right-side-out. Fold the top, raw edge of the ruffle down by ⁄2 inch (1.3 cm) so that it matches up with the rest of the shirt. The left and right edges of the ruffle should be hanging off to the sides. You won't be sewing them to the shirt.
Sew the top edge of the shirt and ruffle, leaving a gap for the elastic. Start sewing in the back of the shirt, where the back seam of the ruffle is. Sew your way around the top edge of the shirt and ruffle, then stop when you are 1 inch (2.5 cm) from where you started. Sew as close as possible to the inside edge of the hem on the ruffle and shirt.

Use a safety pin to insert an elastic into the top of the shirt. Secure a safety pin to a piece of elastic that's long enough to wrap around your shoulders. Push the elastic through the 1 in (2.5 cm) gap in the top of your shirt. Choose an elastic that is a little bit narrower than your top hem.
Sew the elastic together, then stitch the gap shut. Overlap the ends of the elastic by 1 inch (2.5 cm), making sure that it is tight enough to hold the shirt up around your shoulders. Sew the elastic using a zigzag stitch. Tuck it into the gap, then sew the gap using a straight stitch.


Comments
0 comment