
X
Research source
With Java, you can develop apps for multiple operating systems with minimal work. This wikiHow teaches you the basics of how to get started programming with Java.
Installing What You Need
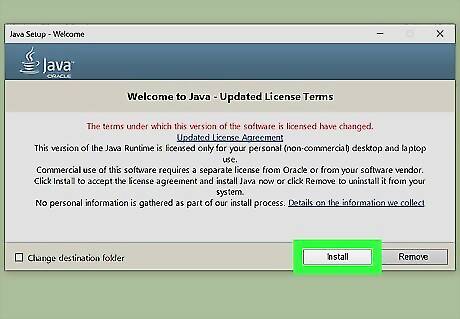
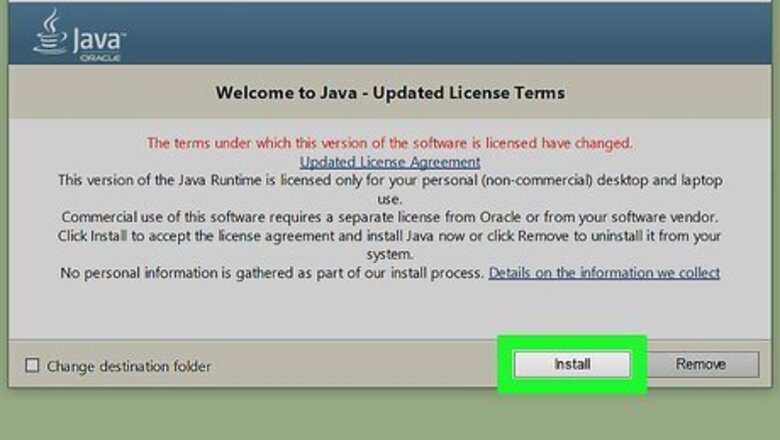
Download and install Java Runtime Environment. Java Runtime Environment is the software layer that is used to run Java applications. It contains the libraries, Java Virtual Machine (JVM), and other components needed to run Java applications. You may already have it installed. If not, used the following steps to download and install the latest version of Java Runtime Environment on your computer: Go to https://www.java.com/en/download/ in a web browser. Click Java Download. Click Agree and start free download. Open the installer file in your web browser or Downloads folder. Follow the instructions to complete the installation.
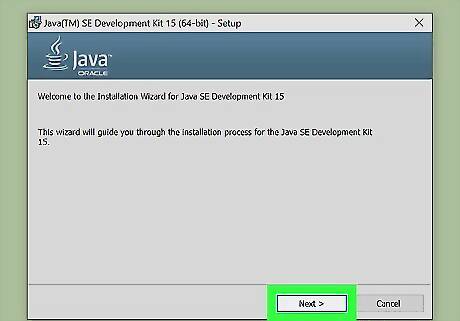
Download and install Java Development Kit. While Java Runtime Environment contains the software needed to run Java applications on your computer, it does not contain the tools needed to write and compile Java code into Java class applications. For that, you will need Java Development Kit. Use the following steps to download and install Java Development Kit: Go to https://www.oracle.com/java/technologies/javase-downloads.html in a web browser. Click Download JDK below the latest version of Java Development Kit. Scroll down and click the file name that is appropriate for your operating system (i.e. Windows Installer, macOS installer) Open the downloaded installer file in your web browser or Downloads folder. Follow the instructions to complete the installation.
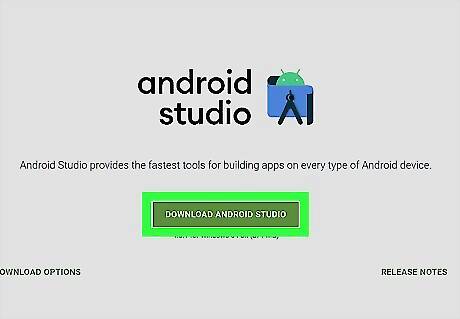
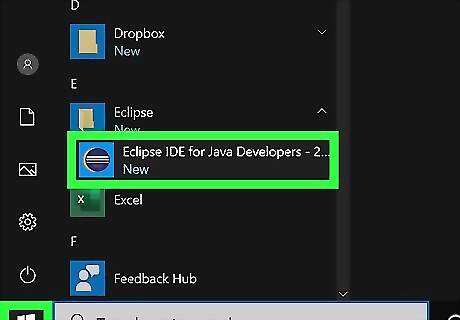
Download and install a Java IDE. IDE stands for Integrated Development Environment. These are programs you can use to compose, debug, and compile code. The two most common IDEs are Eclipse and Netbeans. You can also use Android Studio to develop apps for Android devices in Java. Use one of the following lines to download an install an IDE for Java. Eclipse Netbeans Android Studio
Creating a "Hello World" Program in Java
Open your Java IDE. Open whichever IDE you chose to download. You can open apps in the Windows Start menu, or Applications folder on Mac.
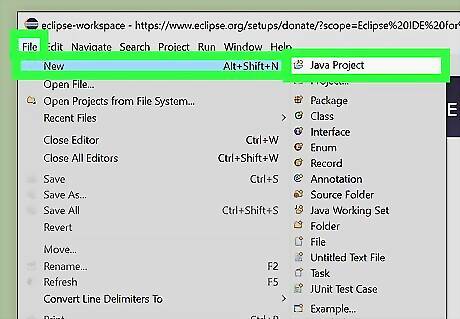
Create a new Java project. You may be given the option to create a new project when you first open your IDE. If not, click File in the menu bar at the top, and then click the option to create a new Java project or new java application.
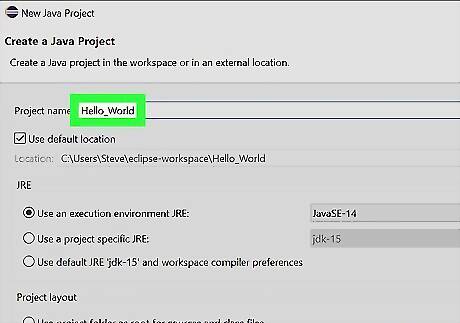
Give your project a name. When you create a new Java application or project, you will then be asked to give your project a name. Use the field at the top to type a name for your project. You can name it something like "Hello" or "Hello_World" or anything you want.
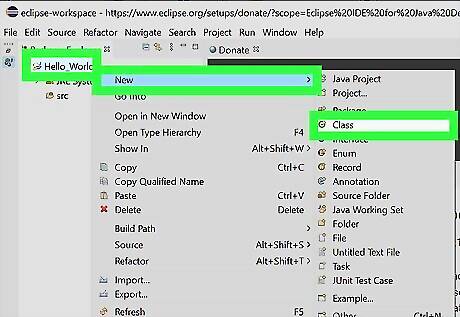
Create a new Java class. When you create a new project in your IDE, locate the Package Explorer panel, which is generally to the left. This is where you can find all the files related to your project. To create a new class for your project, right-click your project name and click New class or click New followed by Class. Type a name for the class in the "Name" field and click Finish. A Java class is like constructor or blueprint for Java objects. A java class can contain one or more objects with their own unique properties called "Members". The code to create a new class looks something like public class Hello { . The keyword "public" is the access modifier. This tells dictates what can access the class or object within the program. The keyword "class" indicates that this is a new class. They keyword "Hello" is the name of the class. Finally, the curly-bracket "{" at the end opens the class. You'll probably notice a closing curly-bracket "}" a couple lines down. All code that is part of this class goes in between these two curly brackets.
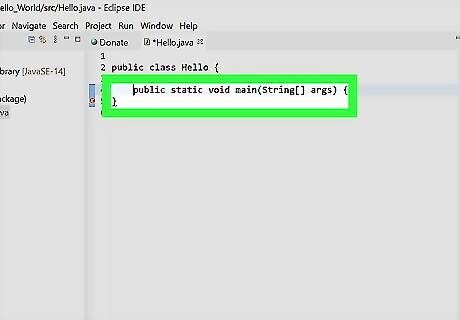
Indent the next line and type public static void main(String[] args) { in the next line. This line is used to create a new member. A member is a feature of a class. A member that contains code with specific instructions is called a "method". Methods can be called and ran at later instances in the code. All Java programs need to have a method called "main". This indicates where the program starts. The keyword "Public" is the access modifier. The keyword "public" again is the access modifier. Since it is set to "public" this means this method can be called anywhere in the program. If it were set to "private", this would mean the method could only be accessed within the class. The keyword "static" indicates that this member can be accessed before any other objects in the class and without referencing any other objects or instances. The keyword "void" is the return value of the method. This indicates that it does not return any values. If it were to return a number, the would be changed to "int" or "float" or "double", depending on the type of value you wanted to return. The keyword "main" is simply the name of the member. All Java programs need to have a method called "main" to indicate where the program starts. Whenever you have any text in between parenthesis (i.e. String[] args{}), it is called an argument. An argument can be many things like an integer, double, float or string. This line of code is indicating that the method is an expecting an argument of type array (a list of objects) which contains strings. Indenting when you code isn't necessarily required, but it helps keep your code organized and indicates which lines of code are part of which class, member, or method. Indent each line of code any time you create a new class, member, or method. Or after each instance of a new curly-bracket
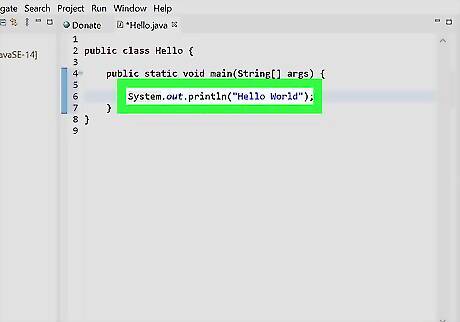
Indent the next line and type System.out.println("Hello World");. This line is used to print the words "Hello World" as a string. The keyword "System" indicates that this part of the System class. The keyword "out" indicates that this is an output. The keyword "printlin" tells the program to print something in the output panel, terminal, or command line. Since "Hello World" is in parenthesis, this is an example of an argument. In this case, the argument is a string that says "Hello World".
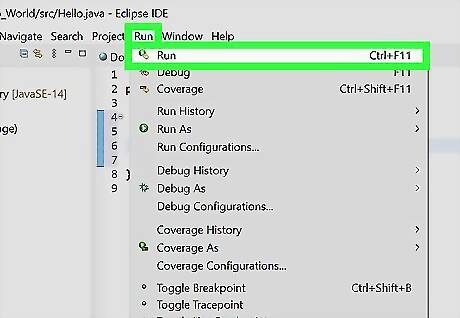
Test your program. Testing in an integral part of programming. This is how you make sure your program is working properly. To test in Eclipse or Netbeans, simply click the green 'Play' triangle at the top of the screen. You should see it say "Hello World" in the output panel at the bottom of the screen. If it does not, you'll need to do some troubleshooting to fix the problem. Your entire code should look something like this: public class MyProgram { public static void main(String[] args) { System.out.println("Hello World"); } } Check the syntax for all the code and make sure it is enter properly. Make sure the keywords are in the proper order and spelled correctly, including the capitalization. Make sure that each open curly-bracket for each class and method has a corresponding closing curly-bracket at after the method or class. Google any error message you receive and see if there is a fix. Sometimes it may be a problem with the system. You may need to delete a file, or even reinstall Java.


Comments
0 comment