views
Preparing for Your Home Theater
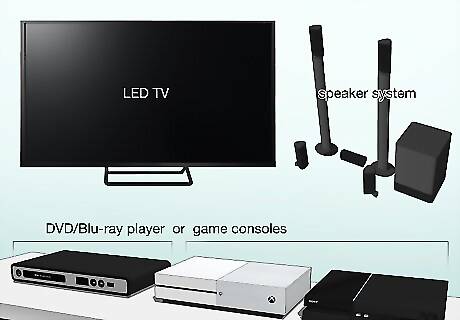
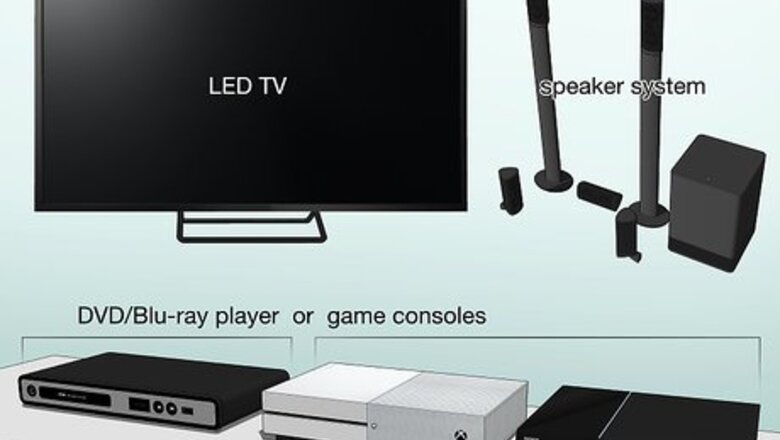
Know which components you need to buy. The average home theater setup includes speakers, a receiver, some form of video input (e.g., a DVD player or a game console), and a television. Before you even start shopping for components like speakers and receivers, take stock of what you have. For example, if you have a decent set of modern speakers and a TV with which they're compatible, you really only need the receiver (mandatory) and the video input (optional). It's generally advisable to use products which are all roughly the same age (e.g., you'll want a modern TV to match modern speakers).
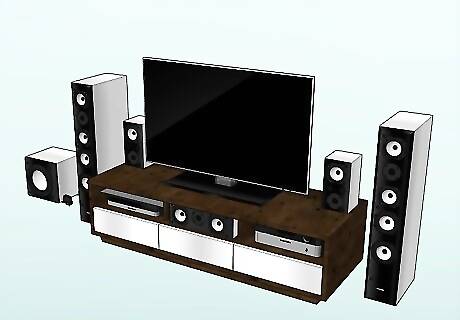
Consider buying an all-in-one home theater package. Several companies make packages which include speakers and a receiver, making it easy to match a TV screen to the whole package. If you're not worried about having specific types of equipment, you might want to go with an all-in-one option. All-in-one packages rarely come with televisions, so you'll still need to buy a new one or adjust the one that you have. While you can't expect the same level of sound quality from an all-in-one package as you might expect from individually purchased components, all-in-one home theater systems are perfect for beginners.
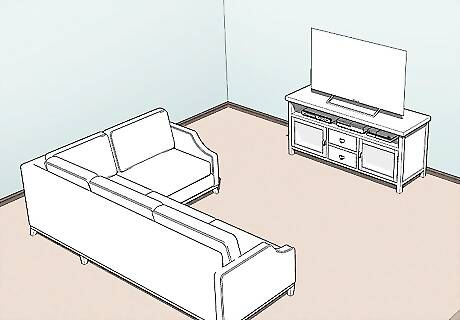
Determine where you want to set up your home theater. It's easy to get carried away while buying equipment only to realize that your TV and/or speakers are too big for your living room! Before you purchase any equipment, figure out the general dimensions of the room in which you want to set up your home theater, then block out where you want to place the various pieces of the home theater. You may discover halfway through staging your home theater that your selected room is too small to accommodate your preferred components.
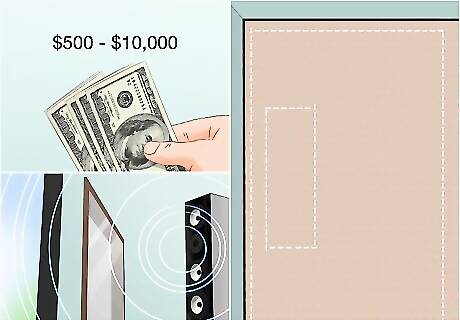
Think about your home theater's limits. There are several factors which may stunt your home theater's overall size and depth: Budget - Home theater setups can cost anywhere from sub-$500 to well over $10,000. Establishing a hard budget before you purchase anything will help narrow your search. Noise - Setting up a home theater's speakers will vary wildly depending on how close your neighbors are; additionally, your home's acoustics will play a part in determining which speakers best fit your needs. Space - As mentioned in the last step, your home's size will limit things like TV screen size, speaker strength, and more.
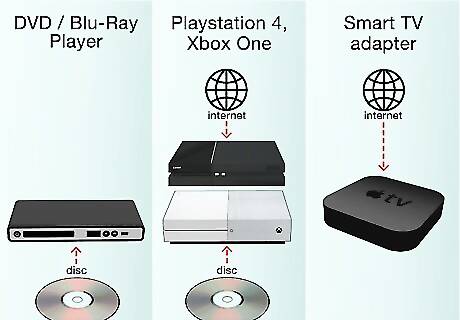
Decide on a video input system. A video input system is optional, but recommended unless you have a cable box. Common video input sources include the following: DVD player or Blu-Ray player - While somewhat outdated, nothing beats the simplicity of a DVD player if you're not quite ready to start downloading all of your movies. Game console - Consoles such as the Xbox One and the PlayStation 4 have evolved into all-in-one entertainment systems, allowing you to game, watch TV, stream content, rent or buy digital movies, and play DVDs. Smart TV adapter - Things like the Amazon Fire TV Stick, Chromecast, and Apple TV allow you to turn your TV into a smart TV, thus negating a DVD player or cable box. The only downside here is that your existing DVD collection (if applicable) will not be usable with a smart TV adapter.
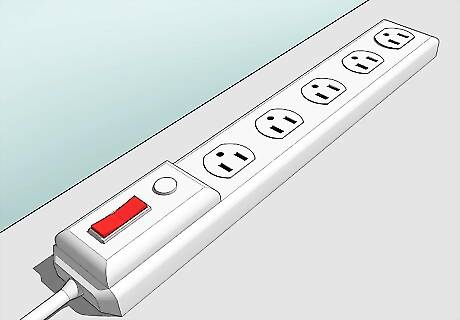
Purchase and plug in power strips. You'll need several electrical outlets for your TV and other components, so make sure that you have plenty of power strips in your preferred area. Once you've set up your electrical outlets in your staging area, you're free to move onto the next part. The power strips should go in the same general location as your TV. Depending on the location of your room's electrical outlets, you may need to use an extension cord as well.
Choosing and Installing a TV
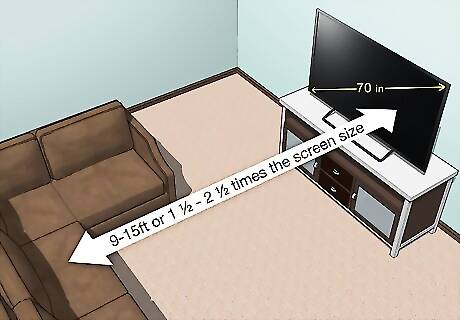
Choose the right size TV for your room. While it is often tempting to get the very biggest screen you can, choosing a TV is more of a science than simply using the "bigger is better" concept. You should choose your TV based on the size of the room and how far away people are from the screen to get the maximum enjoyment for the maximum amount of people. In general, you should be sitting 1 ½ - 2 ½ times the screen size away from the TV; for example, if you want a 70" TV screen, you should have between 9 and 15 feet of room between the TV and your closest couch. TV sizes are measured diagonally, from the top-left corner of the screen to the bottom-right corner of the screen. Projectors allow you to adjust the size of the screen as long as you have a large blank wall on which to project the video. You generally need 12-15 feet between the projector and the wall to get the best results.
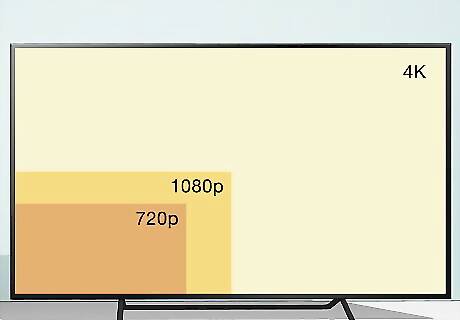
Select a high-resolution TV. Resolution is one of the key factors when trying to improve your TV's picture. The more pixels, the higher the resolution. This is why 2160p, also known as "4K Ultra HD", is more expensive than 1080p (also known as "Full HD") or 720p. The “p” stands for the number of pixels on the vertical edge (going downward) of the screen. More pixels give the picture better clarity and color. Some systems are labeled with an “i.” such as 1080i. This stands for “interlaced” pixels, which broadcast slightly differently. While most TV manufacturers have moved past 1080i, you should know that the picture quality is roughly the same, though 1080p has “won” the battle with consumers. Certain video inputs, such as the Xbox One, do not support 1080i and will instead default to 720p on such TVs.
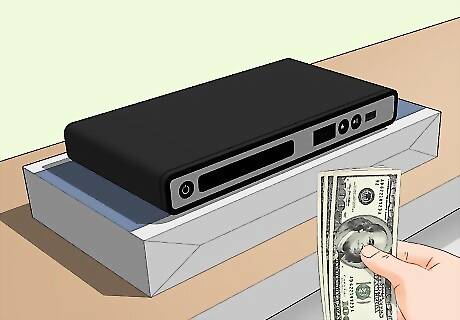
Purchase a video source. As mentioned in the previous section, something like a DVD player or a gaming console will provide your home theater setup with a source of entertainment. Feel free to skip this step if you already have a video source, or if you're going to use a cable box instead. Ideally, you'll choose an entertainment system (e.g., a console) or a Blu-Ray player for your TV; DVD players and VCR boxes are relatively outdated at this point.
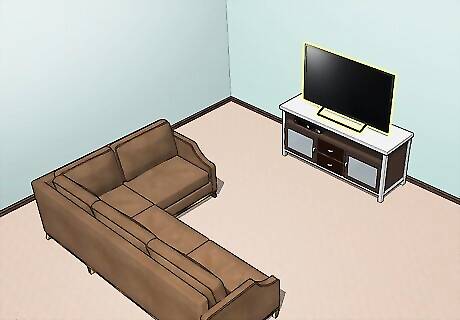
Place your TV in its proper location in the room. If you have an entertainment center, place your TV in its slot and feed the power cable out the back of the unit. Leave plenty of space between your entertainment center and the wall until you've finished setting up the entire entertainment center. If you plan on mounting your TV, hold off on doing so until you've purchased and set up the speakers and other components.
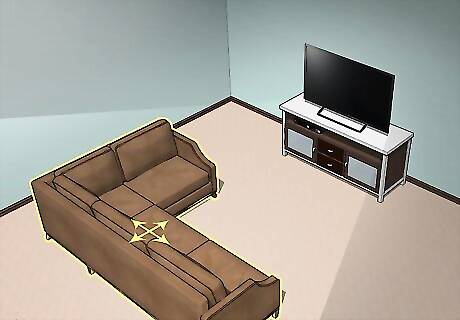
Adjust your seating to fit the TV's position. Based on the angle and height at which your TV is set up, move any seating (e.g., couch(es) or chairs) so that it points toward the TV area. This seating will also serve as a reference for the point toward which your speakers will aim. If you plan on using full surround sound, leave a few feet between the back of your couch and the wall (if possible) for the speakers to sit.
Choosing and Installing the Speakers
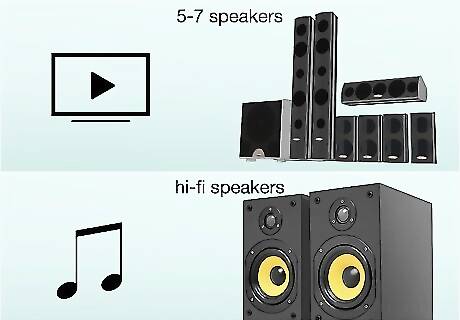
Consider whether you prefer watching movies, listening to music, or a bit of both. All home theater systems can handle both movies and music, but if you exclusively watch movies then you might want to pass on 4 high-end speaker boxes. Ask yourself if you spend more time with your iPod or plopped in front of the TV. Movies and TV - Most movies are multi-track (sounds come from many different speakers), meaning 5 or 7 smaller speakers will create a more immersive movie watching experience than 2-3 expensive, large speakers. This helps you create realistic surround sound. Music - Speaker quality is more important than quantity. Invest in a good receiver and purchase 2 hi-fi speakers to get the best quality sound you can.
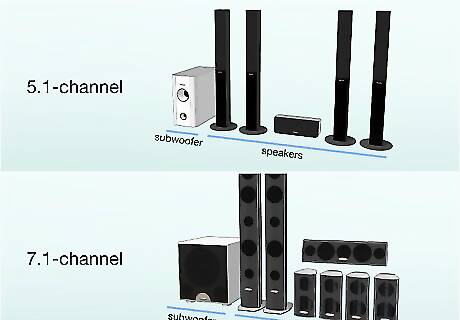
Understand the notation for bundled sound systems. You will often see phrases like "5.1-channel surround sound", but there are few explanations for what this means. The first number, 5, tells you how many speakers are included in the package, and the second number, .1, indicates how many subwoofers are included. 5.1-channel and 7.1-channel are the two most popular speaker packages, offering a subwoofer, two speakers in front of you, two behind you, one in the center, and one on either side (for 7.1).
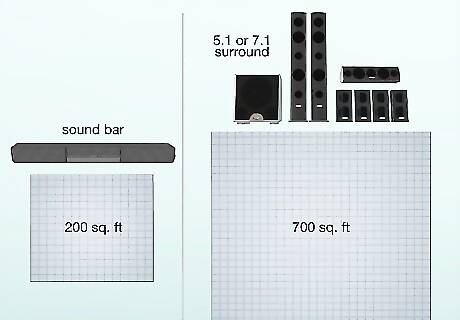
Determine the best number of speakers to buy. Base your decision on the size of your room – small rooms (200 sq. ft) might only need a sound bar while large rooms (700+ sq. ft) might need a large 5 or 7 piece speaker set. Again, consider also the proximity of neighbors and your home's ambient noise levels. You don't need a 7.1 stereo system if you're renting in a small complex, but you might need one for a larger home in a noisy or sparsely populated area.
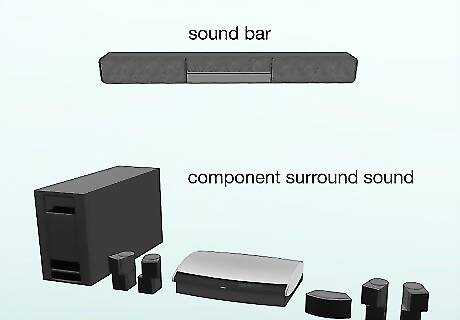
Look into alternative types of speakers. There are a couple of non-traditional ways in which you can receive audio from your home theater: Sound bar - Sound bars often have two main speakers and one subwoofer, making them 2.1 stereo systems. While they lack the depth of true surround sound, they fit in with smaller home theaters or areas in which you can't make much noise. Component surround sound - Often sold as pre-matched package deals, these speakers are ideal for people who want surround sound but lack the technological know-how for setting it up with 5, 6, or 7 distinct speakers. These systems are also often wireless.
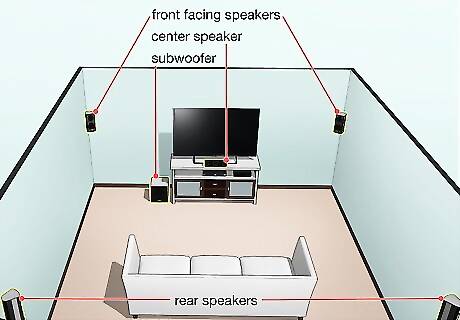
Consider building your own surround sound system with 5 speakers, a receiver, and a subwoofer. If you want to take full control of your home theater system and get the best sound, you should consider building your own system. This is best for people who already have a few pieces, like a nice TV, speakers, or Blu-Ray player, but want to expand. To do so you'll need the following components, or parts: Two raised, front facing speakers Two rear speakers at the back of the room One subwoofer, usually tucked in the corner One small center speaker (optional) Two side speakers (optional)
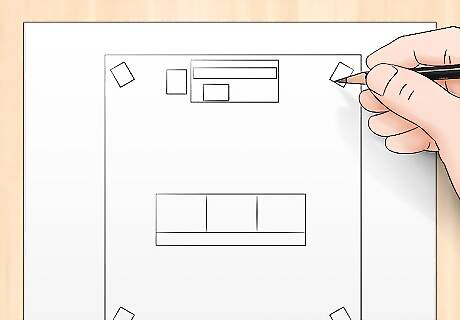
Draft a floor plan for your room to find the center. You want the speakers to “meet” at your "main couch" to deliver the most realistic surround sound. Once you've bought the speakers and receiver, you need to figure out where to put them: Make a simple drawing of your room highlighting where you are sitting and where your TV is placed. Make notes of your furniture, doors, and windows so that you can accurately plan out your system.
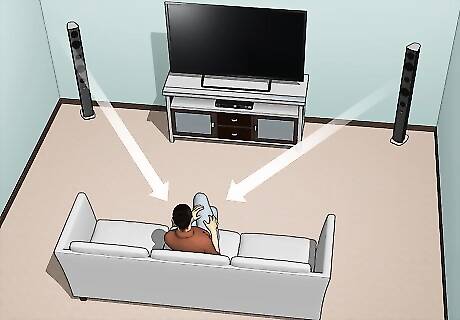
Place your two front speakers at ear height, angled towards your seating location. One speaker goes on either side of the TV and they both point inwards. If you are looking at the speakers from your couch they'll be at a roughly 45-degree angle to you. If you were to draw lines coming from the speakers, they should meet at ear level in the center of the room.
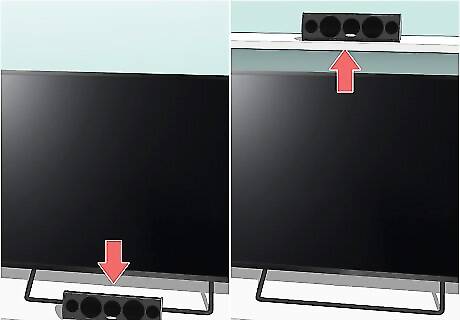
Place your center channel speaker above or below the TV. This speaker is usually smaller and is designed to deliver crisp dialog right to the viewers. It should be front and center so that it clearly broadcasts to the entire room. Many people mount this speaker just above the TV if they have room. This is where you'll place a soundbar if applicable to you.
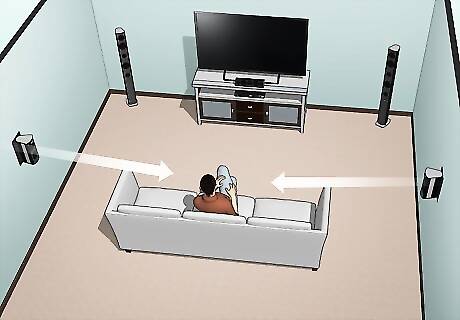
Place side speakers in-line and above the viewers. Side facing speakers should be parallel to the viewer, offering sound from the right and left. If you cannot fit them in line with the couch, place them slightly behind the viewer and angle them towards the couch. They should always be 2 feet or more above the viewer, pointing downward.
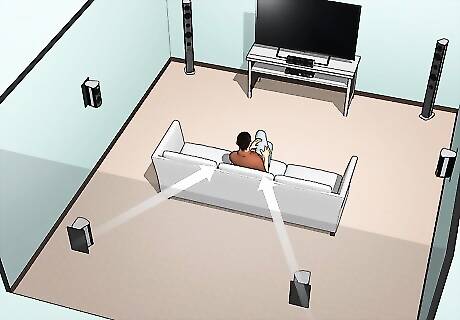
Place the rear speakers side by side along the center of the back wall. This allows them to work together to grab your attention. There are also alternate set-up ideas, such as separating the back speakers and pointing them inward, that help provide the feel of surround sound if you don't have dedicated side speakers. If you are using only 5 speakers, prioritize side-facing speakers before rear speakers.
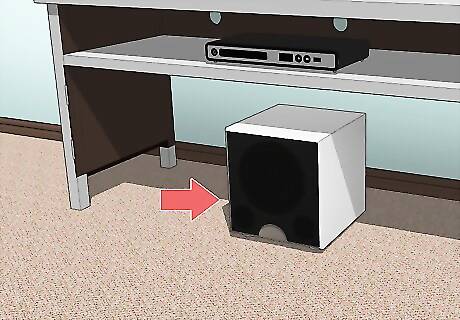
Put your subwoofer along the front wall, preferably in the middle. The subwoofer brings the big, gut-trembling bass notes and works best up against a wall. Try to fit it near the middle of the wall if you can, but it can be to the side if the TV is in the way.
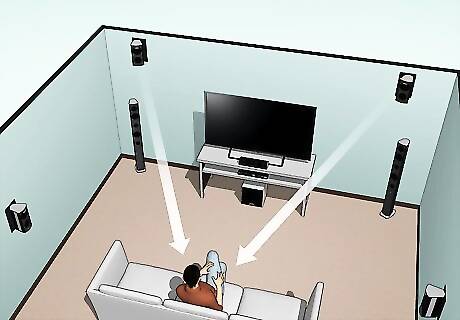
Add any additional speakers up high, in the front. Very complex systems, like 9.1 surround sound, come with extra speakers meant to add sound from up top, like in a movie theater. Mount these above your two front speakers, angled in and pointing down at the viewer.
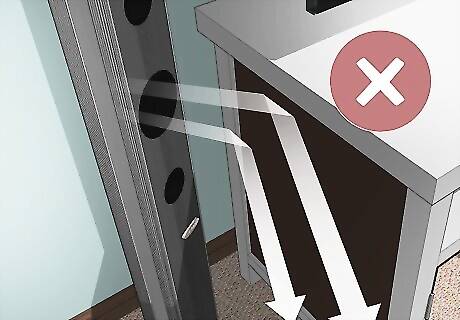
Clear the path to the speakers. If you can't see the speakers from where you are sitting, the sound is being blocked off. Reorganize your furniture and speaker position to get the maximum sound possible. Bare walls and floors cause sound to bounce around, so you can improve your acoustics with rugs or furniture along the walls.
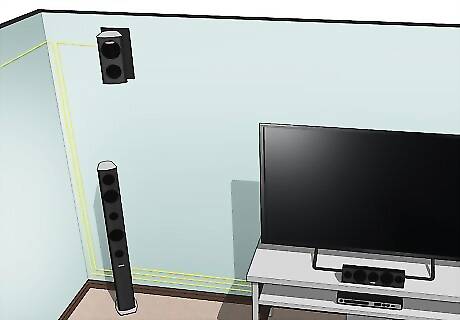
Lay the speakers' wires out in straight lines. Each of your speakers' wires should be able to reach the TV without changing the location or angle of the speakers themselves. If this doesn't work, you may need to buy longer cables for your speakers.
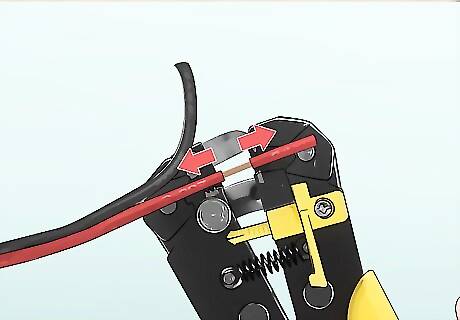
Strip your speakers' wires if necessary. Though many modern speakers have auxiliary plug-ins similar to a headphone jack, some speakers still use speaker wire and clamps to connect the base speakers to the outer speakers. If this is the case for you, you'll need a set of wire strippers to remove about an inch from each end of a speaker wire. Make sure that your speaker wire is not attached to anything when you do this.
Choosing and Installing a Receiver
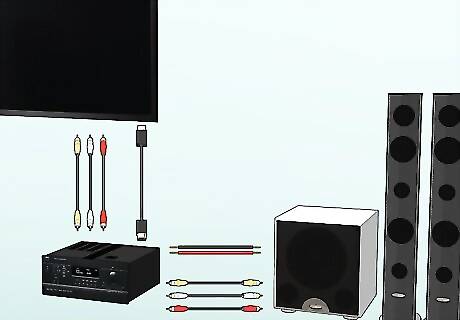
Understand what a receiver does. A receiver acts as a hub for all of your components (e.g., speakers, video inputs, the TV, and so on) so that your TV can consistently use the connected components without having to switch inputs. Receivers aren't strictly necessary if you only plan on using one input, but they will help organize your
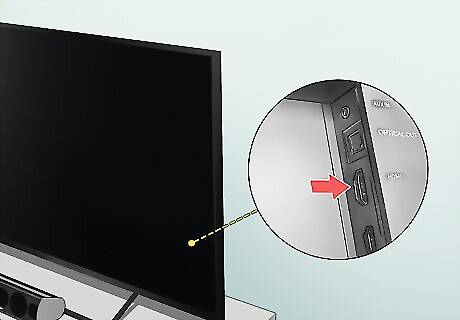
Determine your TV's ideal video input. Any TV with which you'll be using a receiver will most likely use HDMI to send audio and video to your TV, but some TVs also permit DisplayPort inputs. HDMI inputs resemble trapezoids, while DisplayPort inputs look like HDMI ports with one straightened corner. Both HDMI and DisplayPort are comparable to one another, so it may come down to the type of cable that you have on-hand.
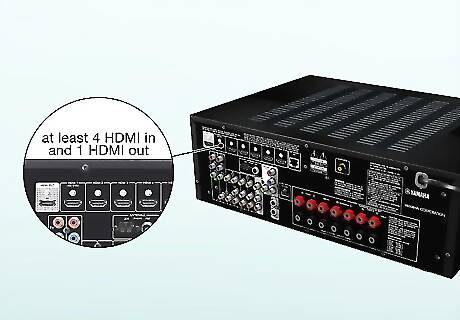
Look for a receiver which will accommodate all of your inputs. Receivers come in many different shapes and sizes; you'll want one with enough audio and video (e.g., HDMI) inputs to handle each of your connected components, as well as at least one optical audio input for your speakers. A good rule of thumb for receivers is that you should have one HDMI port per connected item. This means that if you have a set of speakers, an Xbox, a Blu-Ray player, and your TV, you should allow for at least 4 HDMI input ports and at least one HDMI output port.
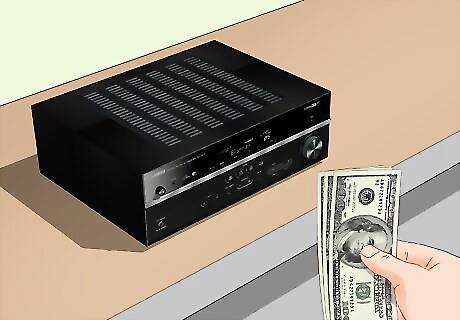
Buy your receiver. Make sure that you're buying a home theater receiver which handles both video and audio, not an audio receiver. Again, the size of receiver that you buy will depend on the number of components that you have to hook up to it. Don't feel like you need to buy a huge, expensive receiver with more inputs and outputs than you need.
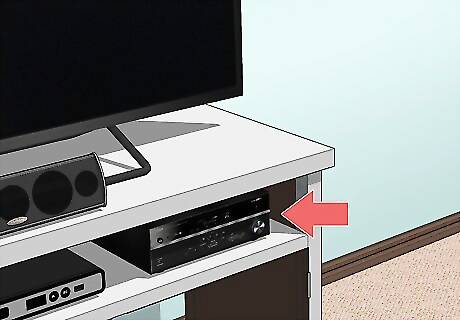
Place your receiver under your TV. Since most of your other non-audio components will go here as well, placing the receiver below the TV ensures that each of your components will be able to reach the receiver without stretching.
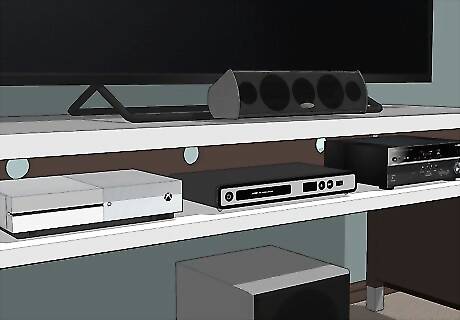
Place any other components below the TV. Components include other video input options, so make sure that they're evenly spaced and not overcrowded. Once you've placed all of the necessary items below the TV, you can finally proceed to hooking up everything. Overcrowding your components can lead to overheating, which can be the death of things like game consoles and DVD players.
Connecting Your Home Theater System
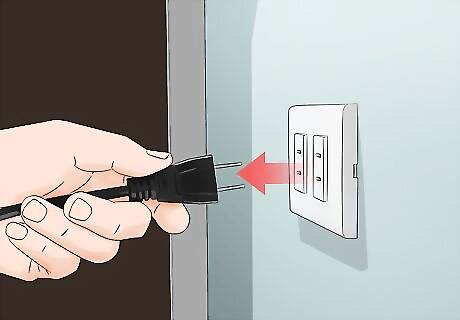
Turn off and unplug everything. Reduce the risk of electric shock by unplugging any currently powered items. In particular, make sure your TV and speakers are off.
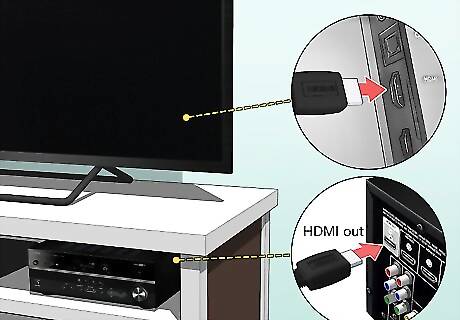
Connect your receiver to your TV. Using an HDMI cable or an HDMI-to-DisplayPort adapter cable, plug an HDMI end into an "HDMI Out" port on the back of the receiver, then plug the other end of the cable into the appropriate input on the back of your TV. All HDMI cables are built identically, so do not be fooled into buying a $50 cable when a $5 HDMI will work exactly the same way.
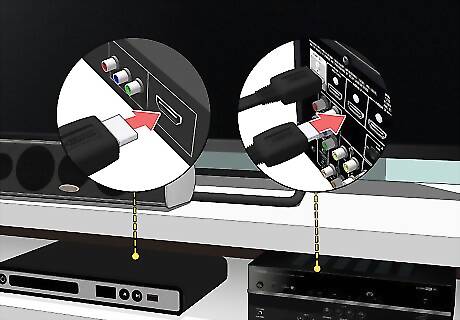
Connect your video input to your receiver. Plug one end of an HDMI cable into the back of your video component (e.g., a Blu-Ray player), then plug the other end of the cable into an "HDMI In" port on the back of the receiver. Virtually all modern video components will connect to your receiver via an HDMI cable.
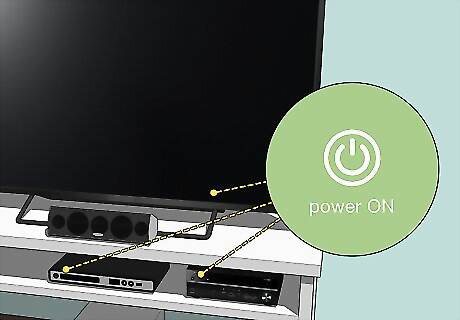
Test and troubleshoot your video connection before moving on to the speakers. At this point, you should have everything you need to test the video. Turn on the TV, receiver, and media player and switch to the correct input number on your TV by pressing the "Video" or "Input" button until you arrive at the correct HDMI input. You should see a picture from your DVD player or smart component. For troubleshooting: Check all of the inputs for loose connections. Attach the media player (output) directly to the TV (input), skipping the receiver, to make sure that the media player works. Check that you have the right signal flow. Things should go “out” from the media player and “in” to the TV.
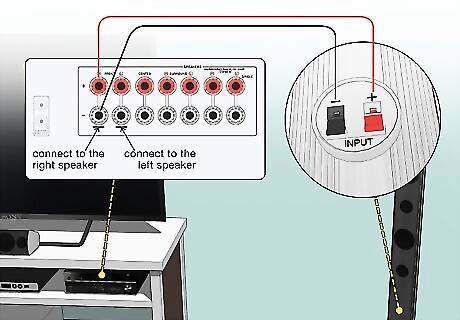
Connect your speakers to the receiver. This is often the most complex part of any home-theater installation because every room has different needs and challenges. While the basic wiring is easy, hiding the wires professionally takes time and forethought. Speaker wire is actually two attached wires, a red and a black. The wire runs from the back of the speaker to the receiver's “Audio Output” ports. Connect one wire to the red “input” on your speaker and the red “output” on the receiver and do the same with the black end to connect your speaker. Some modern speakers have plugs instead of speaker wiring. In this case, the wires are color coded for easy access. Most speaker wire is covered in a wax sheath to protect it. You must use scissors or wire cutters to trim this sheath and pull it off, exposing the bright copper wire inside. This wire makes the connection, not the sheath, so you must remove the wax to get your speakers working.
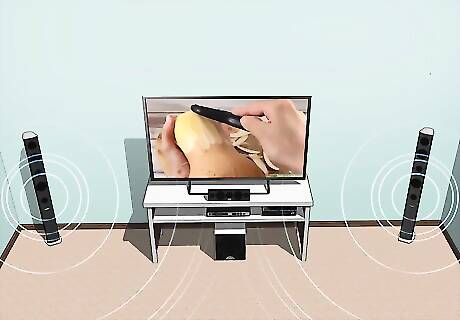
Test your first two speakers. Connect your two front speakers first, then test them out by playing a movie. Once you can get them to work, move on to the rest of the speakers. If you're using a soundbar, you'll most likely use an optical cable to connect your speaker to your receiver. This will conclude your home theater's speaker setup.
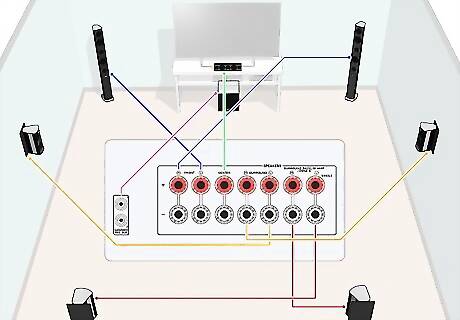
Connect the right speakers to the right inputs on the receiver. Surround sound works because the DVD tells the receiver where to send the information. If there is a stalker creeping up in the movie, you want your rear speakers to sound like leaves are crunching behind you, not the front ones. Make sure you attach each speaker to its appropriate channel, which is usually labeled ("rear audio," "front speaker," etc.). Some pre-packaged systems have label ports while high-end systems can automatically detect which speaker goes where, allowing you to plug them all in anywhere. If there are no labels on the back of the receiver, simply plug them all into the “audio output.” The subwoofer is usually labeled as a “sub out” or “sub pre-out,” and may need a specific subwoofer cable.
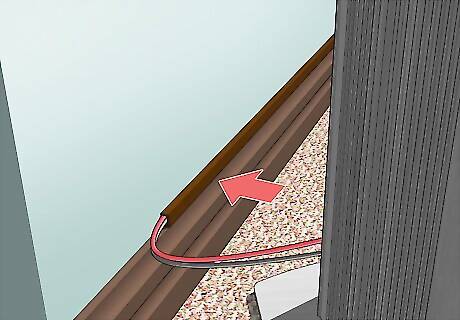
Hide your wires. In addition to looking professional, it also prevents people from tripping and ripping cables or pulling down speakers accidentally. Run cables under rugs, staple them to the baseboards along the sides of the walls, or run them through the walls if you are comfortable with carpentry. There are a variety of services, including teams at Best Buy or Geek Squad, that will run your wires for you for a fee.
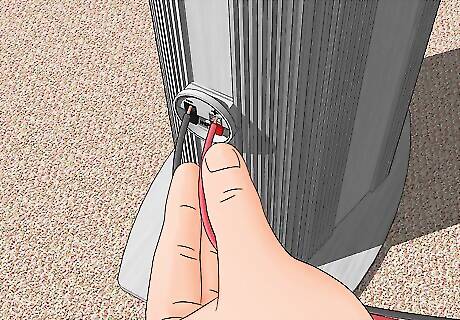
Troubleshoot your speaker system if you can't hear any sound. Speakers are generally easy to attach, but that doesn't mean problems won't arise: Check the channel on your receiver. When you plug in your speakers to the receiver, you'll often see them categorized as “audio output, channel 1.” This means your receiver can handle multiple speaker formats. Make sure the channel on the front of the receiver matches the channel you plugged yours speakers into. Check the inputs. They should be firmly attached. Make sure that the same wire connects the red end of the speaker to the red end of the receiver or they won't work. Test your speaker by plugging in an iPod or music player and testing that before trying a DVD.


Comments
0 comment