views
Steps
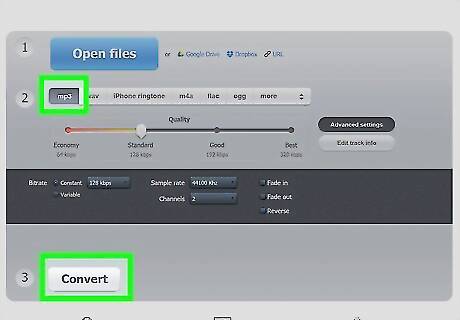
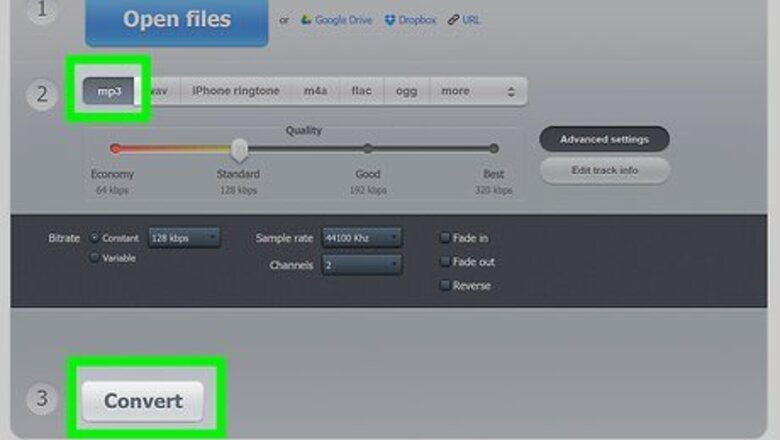
Convert your music to MP3 format. MP3 is the most universally-supported music format, so it's best to convert to this if your music is in a different format. This will help ensure that your friends will be able to play the files. If your music is in iTunes, you can use iTunes' MP3 encoder to create MP3 versions. Open the itunes Preferences window from the "Edit" (Windows) or "iTunes" (Mac) menu. Click the Import Settings... button and select "MP3 Encoder" in the dropdown menu. In the "Setting" dropdown menu, select "Higher Quality". Right-click on any of your songs and select "Create MP3 version" to convert the file to MP3. Click here for more details. If your music is in WAV format, you can use Audacity (a free audio editing program) and the LAME encoder to create MP3 files. Open the WAV file in Audacity, select "Export Audio..." from the menu, choose "MP3" as the format, and then load the LAME encoder. Click here for more details.
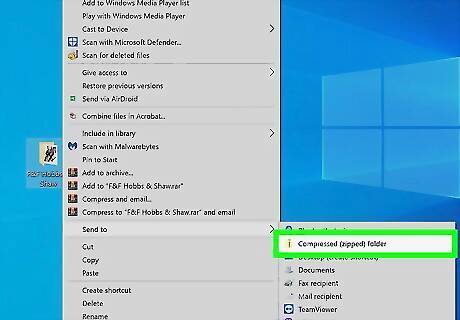
Add all of the songs you want to share to a single archive. Uploading a bunch of individual tracks can make downloading each one a hassle, and it also makes it more obvious what you are sharing. You make things a lot easier for the people you're sharing with by creating a single ZIP file with all of the songs you want to share. Collect all of the songs into a single folder, or into a single folder with multiple subfolders. Right-click on the folder and select "Send to" → "Compressed (zipped) folder" (Windows) or "Compress FolderName" (Mac). If you want to create a ZIP file with a password, you can use the free 7-Zip utility. Click here for more details on creating archive files.
Cloud Storage
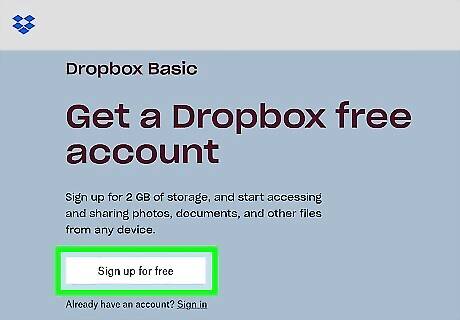
Sign up for a cloud storage service that allows sharing files. Several of the most popular cloud storage services allow you to upload and share files with others, and you may already have an account. Google Drive and Dropbox both allow you to quickly upload your music files and then distribute links to your friends. All Google accounts come with 15 GB of Google Drive storage. You can log in or create an account at drive.google.com. Free Dropbox accounts come with 2 GB of storage, plenty of space to upload and share some albums. There are plenty of other cloud storage services that offer similar features if you don't want to use Drive or Dropbox. The process will be pretty much the same.
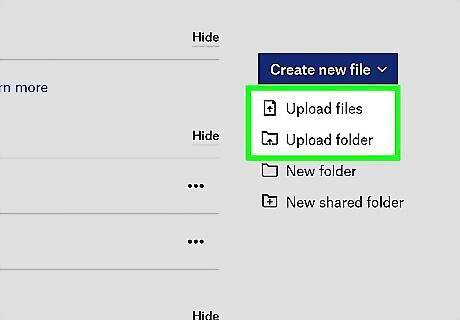
Upload the ZIP file containing your music. Uploading files is a snap for both Google Drive and Dropbox. Simply drag the ZIP file into the browser window that has your account open. The file will begin uploading to your account immediately. Depending on the size of the ZIP file and the speed of your internet connection, the upload process could take a few minutes or several hours. Upload speeds are almost always slower than download speeds.
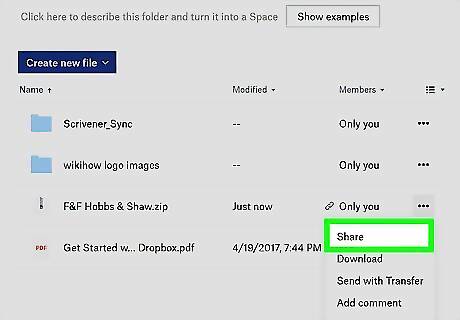
Right-click on your uploaded file and select "Share". This will open the link-sharing window.
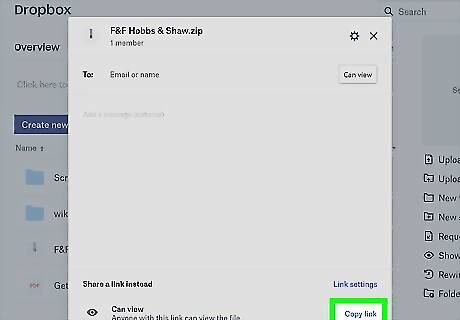
Copy the link that appears. If you're using Google Drive, you'll need to click "Get shareable link" first. This link is a direct link to the ZIP file that you've uploaded.
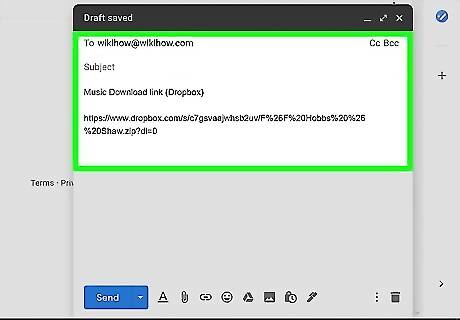
Send the link to your friends. Once you've copied the link, you can send it to your friends via email or chat. When they click the link, they'll be prompted to download the ZIP file to their computer. If you want to text the link, you'll probably need to use a URL shortener so that it will fit in a message. This method is best used to share a ZIP with just a few people. If too many people start downloading your file, you'll likely raise some eyebrows and action may be taken against your account. If you want to share your music with a lot of people, see one of the following methods. If you've password-protected the ZIP file, make sure to give the password to your friends. For more information on sharing files with Google Drive, click here. For more information on sharing music with Dropbox, click here.
Torrents
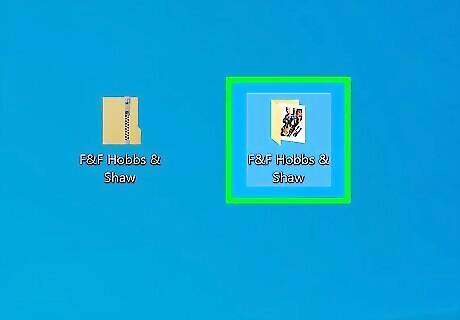
Collect all of your music files into a folder. You don't necessarily need to create a ZIP file when you're making a torrent, since the entire folder will be downloaded with the torrent file. Just make sure all of the files you want to share are in a folder (there can be subfolders). Note that this method will technically make your shared files public. Other users will need to know that the file is available, so the chances of other users joining in is slim, but it is possible.
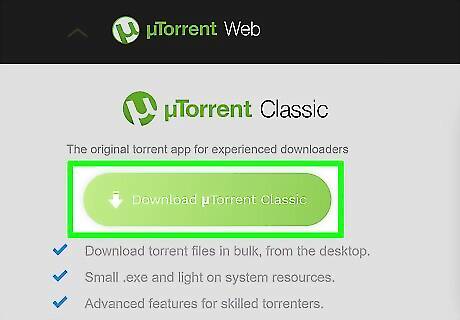
Download and install a torrent client if you don't have one. You'll need a torrent client to create the torrent file and "seed" it so that others can download it. One of the most popular free torrent clients is qBittorent (qbittorrent.org).
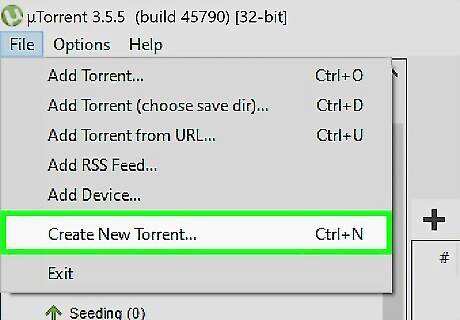
Open the torrent creator in your torrent client. All torrent clients come with the ability to create torrents. You can usually open the torrent creator from the Tools or File menu, or you can press Ctrl+N (Windows) or ⌘ Cmd+N (Mac).
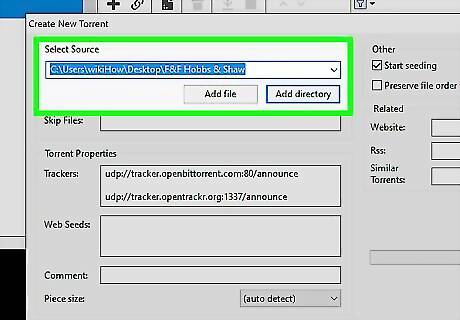
Select the folder that contains your music files. If you created a ZIP file, select it instead.
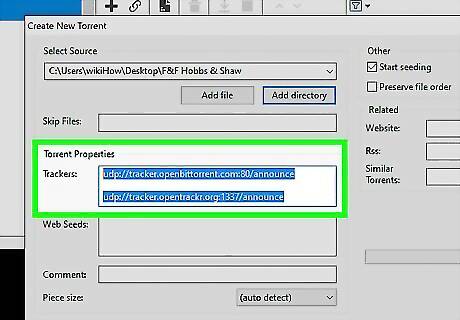
Add trackers to the "Tracker URL" field. These are lists of users that allow the torrent client to connect to people sharing the file. You'll need at least one tracker listed for others to connect to you. Below are some of the most popular free, open trackers. Add a few or all of them to the field: udp://tracker.pomf.se udp://tracker.blackunicorn.xyz:6969 udp://tracker.coppersurfer.tk:6969 udp://open.demonii.com:1337 udp://exodus.desync.com:6969 udp://tracker.leechers-paradise.org:6969
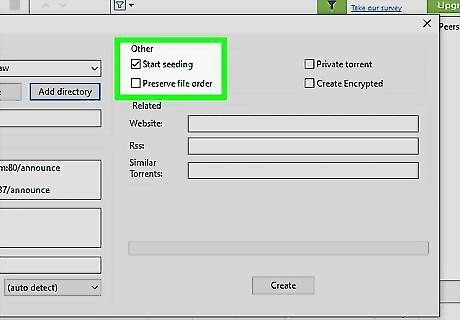
Check the "Start seeding immediately" or "Start seeding after creation" box. This will add the torrent to your client so that users with the torrent file can connect to you and begin downloading.
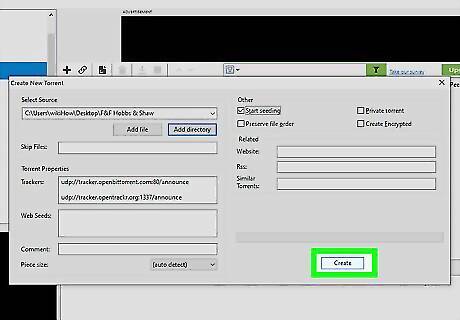
Create and save the torrent file. After you're finished adding trackers, you can create and save the torrent file to your computer. Make sure you save it to a location that you can easily find. Since you've checked the "Start seeding" box, you should see the torrent appear in your transfer list. The progress will say "100% (Seeding)", since you have all of the files.
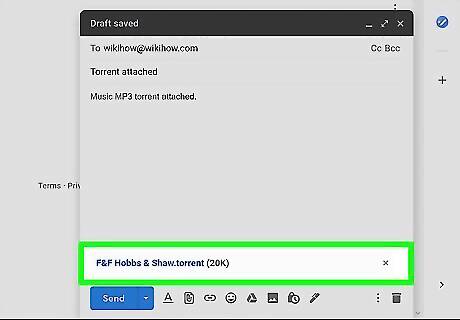
Send the torrent file to your friends. Now that the torrent has been created and you're seeding it, you'll need to distribute the torrent file to your friends. The file is quite small, and is required in order to connect to you and download the files. Since the file is small, you can attach it to an email without any worries about the size limits. Your friends will need torrent clients in order to connect to you.
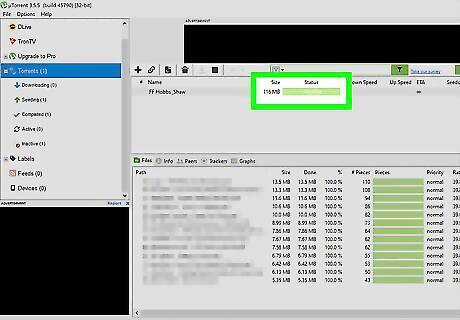
Seed the file until your friends have it. Make sure that you don't move any of the files while you're seeding, or the torrent clients won't be able to download. Ask your friends to keep seeding after they finish downloading so that you don't have to seed for everyone. As more of your friends connect, all of their downloads will become faster. For more information on creating and sharing torrents, click here.
Skype
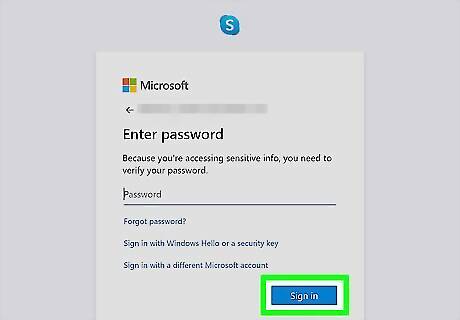
Log into the Skype program. You can use Skype to transfer files of any size to any of your contacts. If the connection gets interrupted, you'll be able to resume when you're both connected again. Adding your songs to a ZIP file will make it easier to send them all at once.
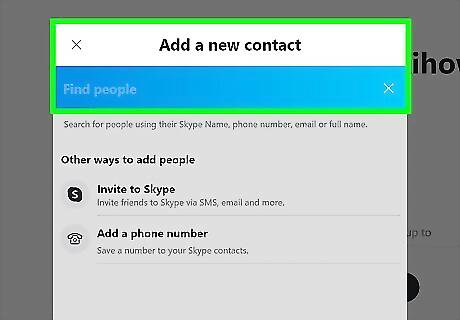
Add your friends to your contact list (if necessary). If you don't have your friends added, you'll want to add them before sending the file. Enter the email address or Skype user name into the Search field, and then send them a contact request.
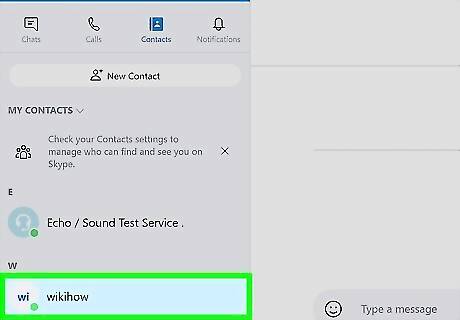
Start a conversation with the person or people you want to share with. You can share a file with a single person by starting a conversation with that person. If you have a group conversation, you can send the file to everyone in the group.
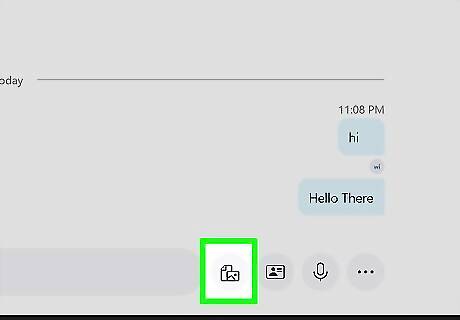
Click the Attachment button and select "Send file". You can then browse your computer for the ZIP file containing the music you want to share. You can also drag and drop the ZIP file into the conversation to share it.
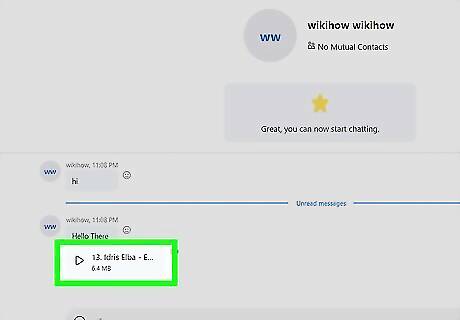
Have your friends download the file. As soon as you add the file to the conversation, your friends will be able to begin downloading it by clicking or tapping the file in the conversation window.
FTP

Understand what FTP does. FTP stands for File Transfer Protocol, and allows users to connect directly to the FTP server and select which files they want to download from it. By turning your computer into an FTP server, you will be able to securely share your entire music collection with your friends and allow them to pick and choose what they want to download. You can turn any computer into an FTP server. It will need to be turned on, connected to the internet, and have the server software running in order for your friends to connect to it.
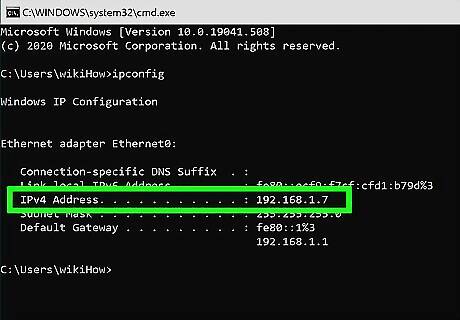
Find your computer's IP address. You'll need this later on when you're setting up the server. Open the Command Prompt. You can find this in the Start menu, or you can start it by pressing ⊞ Win+R and typing cmd. Type ipconfig and press↵ Enter. Note the IPv4 Address entry for your network adapter.
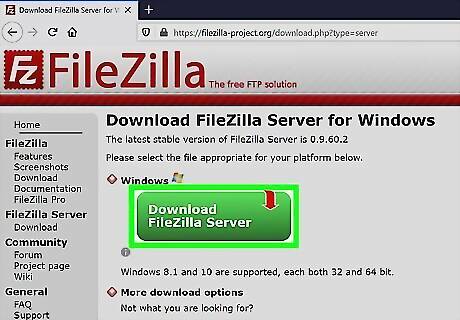
Download and install the server software. There are lots of options for doing this. One of the most popular options is FileZilla, which is a free, open-source FTP program. The FileZilla server software is Windows-only. You can download the FileZilla server software from filezilla-project.org.
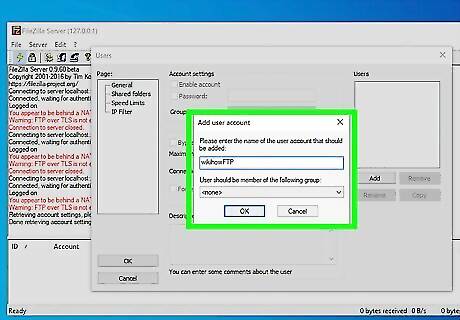
Create a user. In order for someone to connect to your FTP, they'll need to log in using a user account. You can create one user account and distribute the information to all of your friends. Multiple people can be connected at the same time using one account. Click the Edit menu and select "Users". Click Add underneath the Users list and give the user a name. Remember that you can have multiple people use the same user, so you could just name it something like "guest".
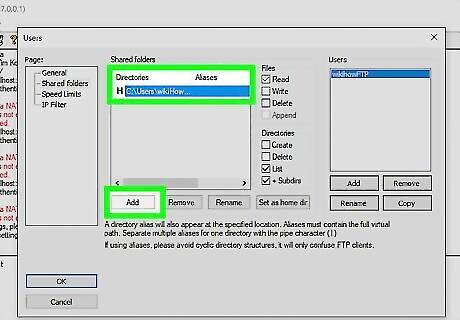
Select the directories you want to share. Click the Add button underneath the "Shared folders" list. This will allow you to select what folders the user has access to. Set it to the folder containing all of your music, and they will gain access to all of the subfolders as well.
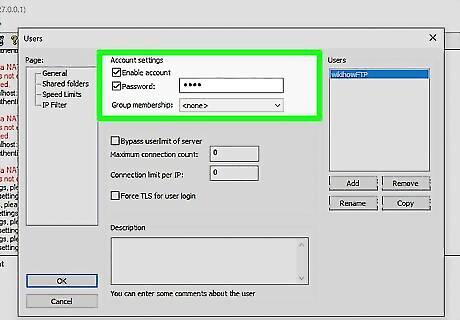
Click the "General" option and check the "Password" box. Enter in a password that you want to use for the user you just created. This will help ensure that only the users you want are able to access your files.
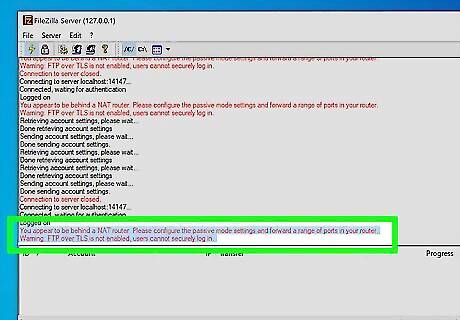
Determine if you need to open router ports for FileZilla. Chances are that you're connecting to the internet from behind a router. If FileZilla displays the message "You appear to be behind a NAT router. Please configure the passive mode settings and forward a range of ports in your router", you'll need to set up port forwarding by following these steps. If you don't see this message, skip down to Step 16.
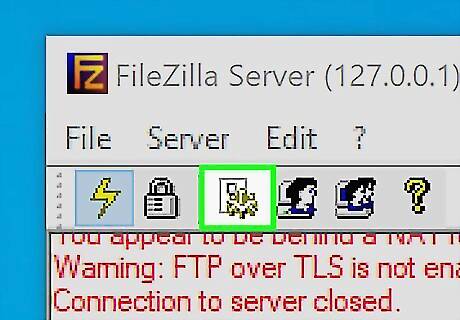
Return to the main FileZilla window and click the "Options" button. This will open the FileZilla Options menu, where you'll be configuring your port settings.
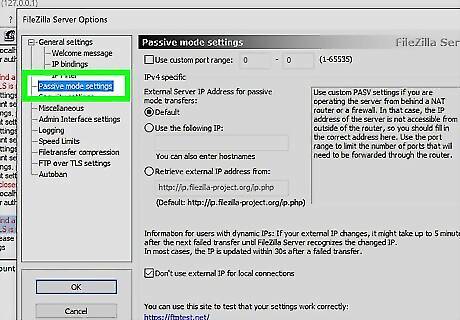
Select "Passive mode settings" in the left menu. This menu will allow you to set your port forwarding settings for FileZilla.
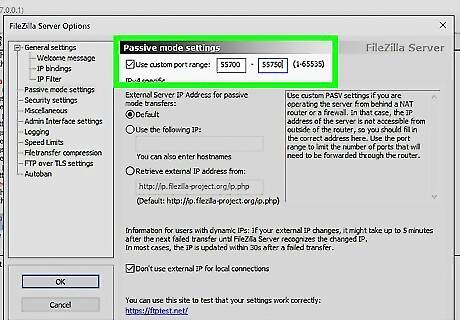
Check the "Use custom range" box. Enter a range of ports in the 50000-port range. Make sure the ports you enter are less than 65535. The range should be about 50 ports (e.g. 55700-55750).
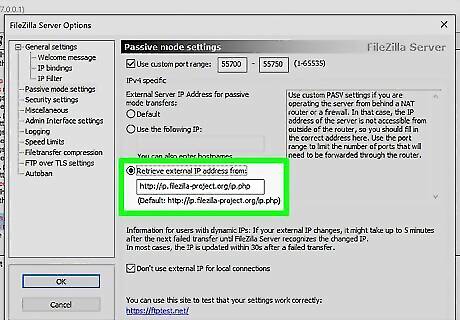
Select the "Retrieve external IP address from: address" box. This will automatically determine your server's external IP address.
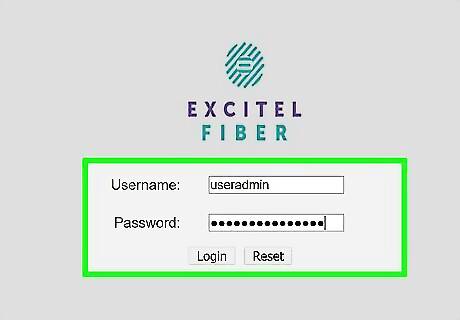
Open your router's configuration page. Most routers can be accessed by entering their address into a web browser's address bar. The most common browser addresses are 192.168.1.1, 192.168.0.1, and 192.168.2.1. You'll need to enter your administrator username and password.
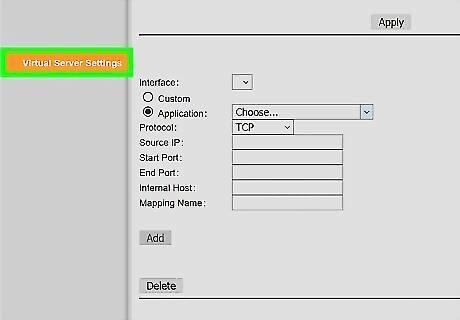
Open the Port Forwarding section. This may be located in different areas depending on the model of router you are using. Check the "Advanced" section if you can't find it.
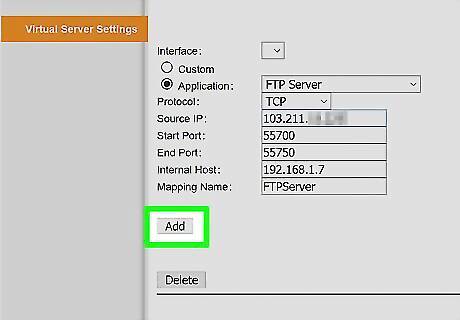
Create a new rule. You'll need to create a new port forwarding rule to open the ports for your FTP server. Enter in the range of ports that you set earlier. In the "IP address" field, enter in the IP address for your computer that you found in Step 2. Click here for more information on forwarding ports.
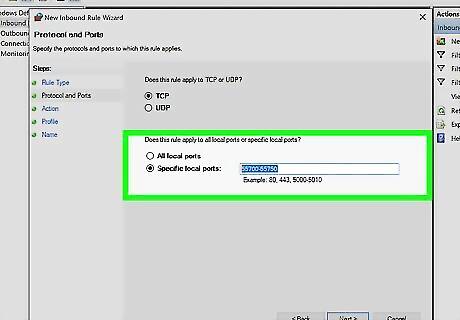
Allow your FTP server in Windows Firewall. If you use Windows Firewall, you'll need to open the same ports in it as well. Press ⊞ Win and type firewall. Select "Windows Firewall" from the list of results. Click the "Advanced settings" link in the left menu. Select "Inbound Rules" in the left menu, and then click "New Rule" in the right frame. Select "Port" and then click Next >. Enter the ports you opened in your router into the "Specific local ports" field. Follow the rest of the prompts to save the new rule.
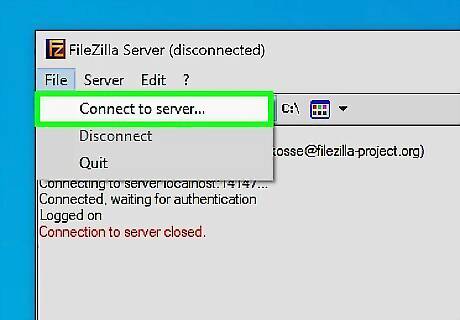
Start your server. Your server will need to be running in order for your friends to connect to it. By default, FileZilla will start automatically when you log into Windows.
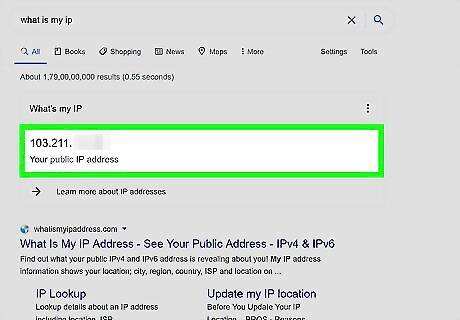
Find the public IP address for your server. Your friends will need this address to connect to the server. You can find your public IP address by opening Google and searching for "my ip". Your public IP address will be displayed at the top of the list of results.
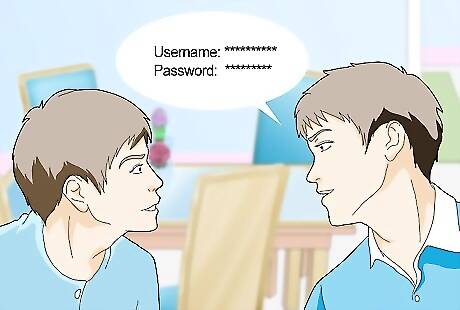
Distribute the login information. Your friends will need the username and password to connect to the FTP server. Make sure to let them know not to share the login information with anyone you don't want connecting. Unless you know your friends' IP addresses, you won't be able to tell who's connecting. You will also need to give your friends the IP address and port that the FTP is using. If you didn't change the FTP port, it will be "21".
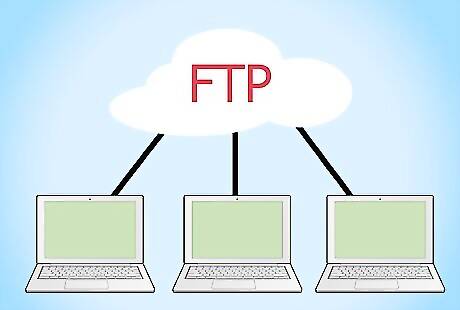
Learn more about FTP. FTP is a fairly complex protocol, and it can be powerful if you know how to use it to your advantage. Click here for detailed information on getting the most out of FTP.





Comments
0 comment