

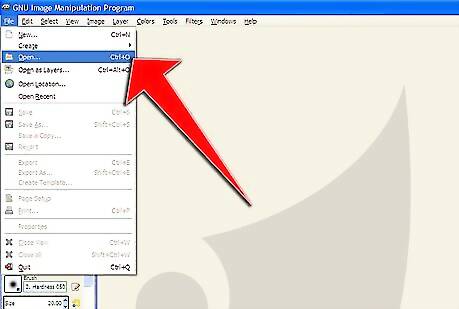
Open your image in GIMP.
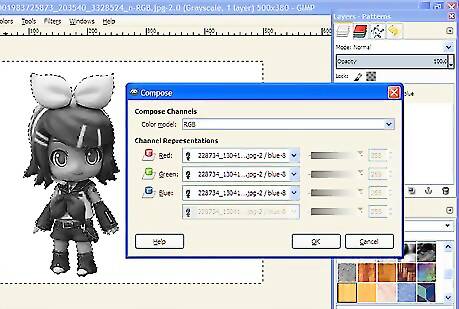
Create a layer mask of your photo. Separate the image into RGB channels. Click on Colors >> Components >> Decompose.Simulate Shallow Depth of Field in Gimp Step 2Bullet1.jpg Examine each resultant image to see which one provides the greatest contrast. For this particular picture, the blue channel provides the greatest contract.Simulate Shallow Depth of Field in Gimp Step 2Bullet2.jpg Delete the two layers that will not be used.Simulate Shallow Depth of Field in Gimp Step 2Bullet3.jpg Lessen the amount of required work by tracing around the desired part of the image by drawing around it with the lasso tool.Simulate Shallow Depth of Field in Gimp Step 2Bullet4.jpg Invert the selection (CTRL I) and then fill in the area with black. Be sure that black is the foreground color, that FG Color Fill and Fill Whole Selection are selected. Your image should look like this.
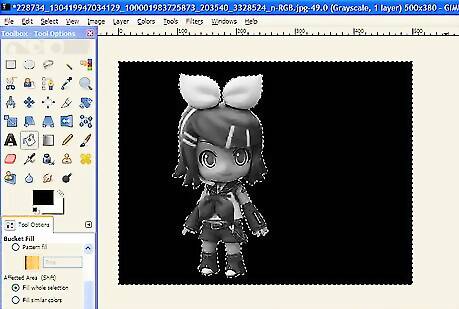
Force the outline of your chosen subject to white. Right click on the image and choose Colors >> Threshold.Simulate Shallow Depth of Field in Gimp Step 3Bullet1.jpg Click in the histogram and drag it towards the right. Watch as the image turns to black and white.Simulate Shallow Depth of Field in Gimp Step 3Bullet2.jpg Move the selections/controls around until you find something that looks the best to you.Simulate Shallow Depth of Field in Gimp Step 3Bullet3.jpg Click OK.Simulate Shallow Depth of Field in Gimp Step 3Bullet4.jpg
Fix any last problems that you see with the image (this can get tiresome, depending on the contrast that you have gotten so far.).
Composite the mask and the image.

Create a new layer. If you don't see the Layers dialog box, click on Windows > Recently Closed Docks and reopen it.
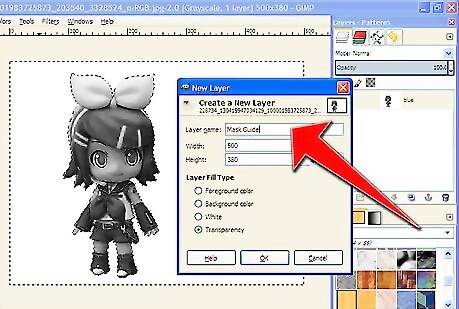
Name the layer something definitive, as in "Mask Guide".
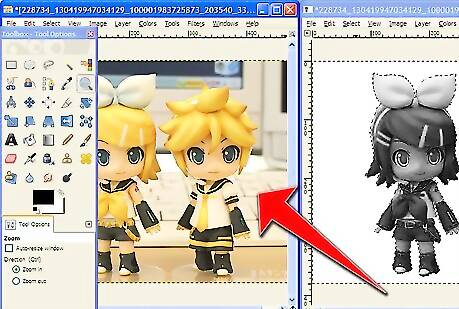
Make sure that your original image window is open.
Select that image, and copy it. (CTRL A and CTRL C).
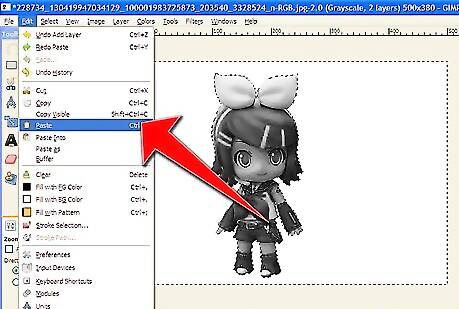
Go back to the mask image and paste into the new layer. It will paste as a grayscale image.Simulate Shallow Depth of Field in Gimp Step 10Bullet1.jpg
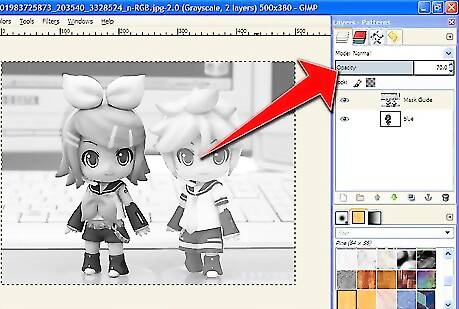
Anchor the pasted image and reduce the opacity of the Mask Guide to about 70%. By doing this, you will be able to view your image and the mask simultaneously.Simulate Shallow Depth of Field in Gimp Step 11Bullet1.jpg
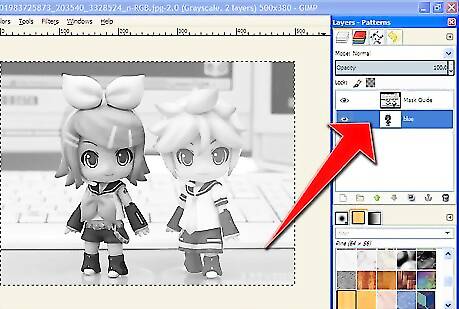
Select the background layer in the mask image. The mask image is simply a guide.Simulate Shallow Depth of Field in Gimp Step 12Bullet1.jpg
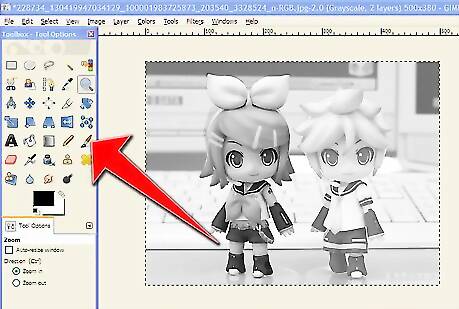
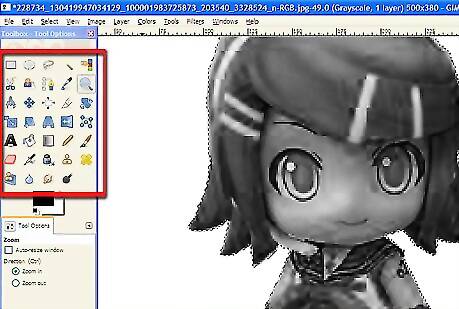
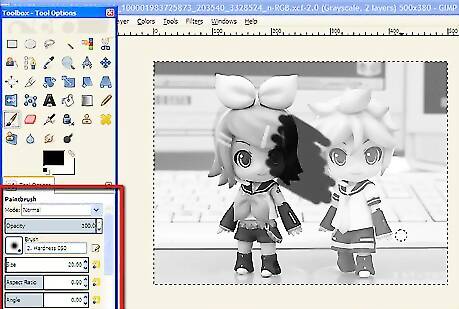
Select a brush (probably small and a bit fuzzy) from the Brushes Dialog (CTRL B).
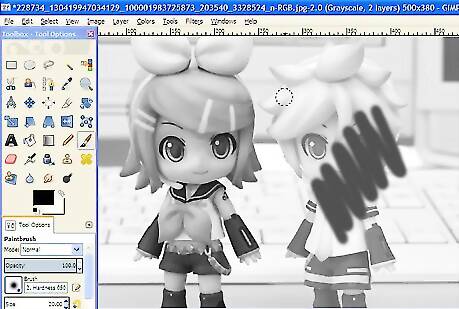
Choose the paint tool and start painting the mask.
Be sure that the subject is white so that anything that is not the subject would be black.
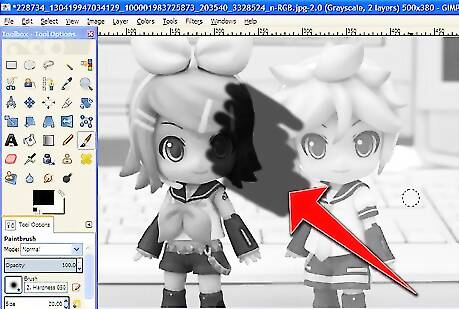
Be prepared to change your brushes. Also, you will need to move around the image refining it. Periodically, turn off the visibility of your Mask Guide (click on the "eye") to view your progress.Simulate Shallow Depth of Field in Gimp Step 16Bullet1.jpg
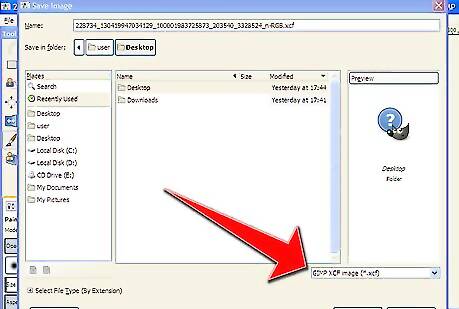
Save the mask as an XCF file so that you will have the mask if you need it again.
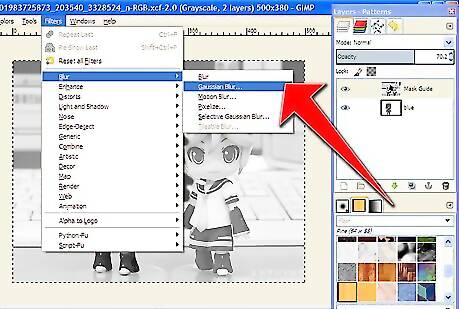
Do a Gaussian Blur (Filters >> Blur >> Gaussian Blur)) of about five pixels.
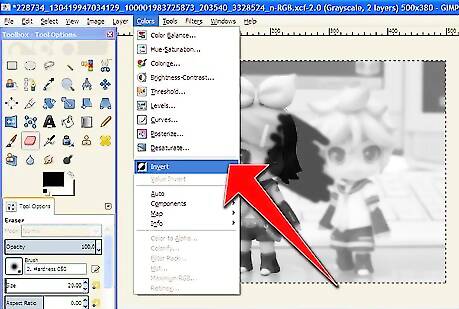
Then invert the mask (Colors >> Invert).
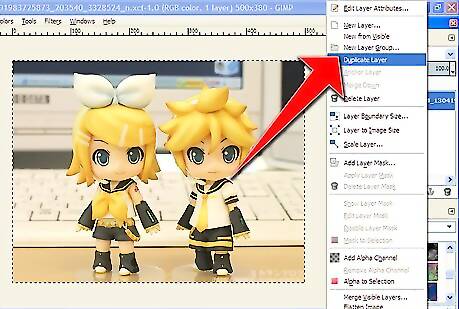
Select the original image in the drop down box. It will be one of the layers in the Layers dialog. Then duplicate it.
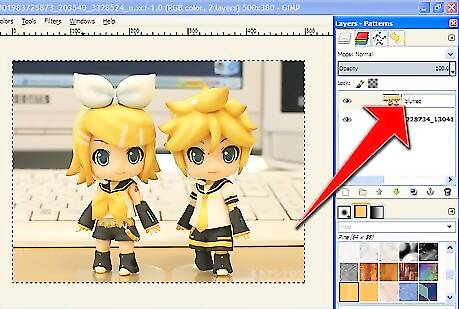
Double click on the top layer. Rename it "Blurred".
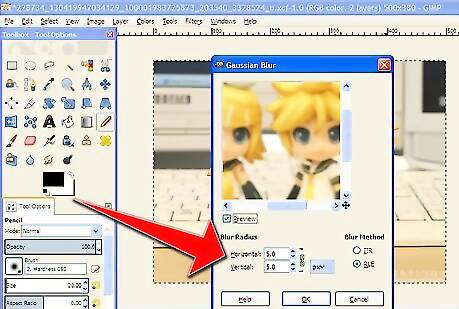
In the original image, right click and select Filters >> Blur >> Gaussian Blur. Experiment with the various values to get your' depths of field. What you like.
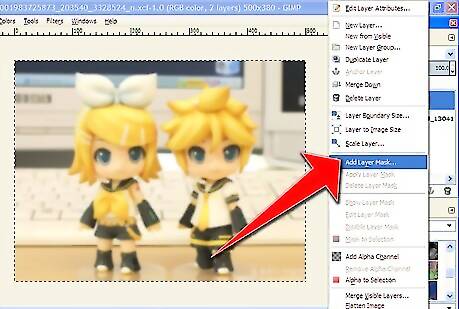
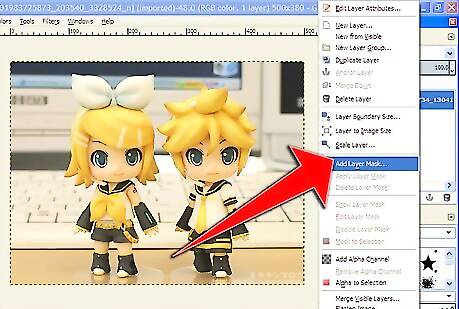
Go back to the Layers dialog and right-click on the "Blurred" layer; select "Add Layer Mask".
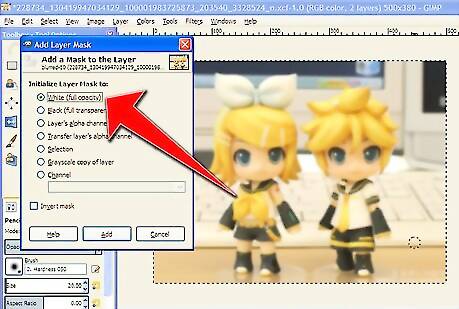
In the Add Mask Options dialog make sure White (Full Opacity) is selected.
Go to the mask image window and Select All and Copy (Ctrl+A then Ctrl+C). In the original image window, Paste (Ctrl+V). This should paste the inverted mask into the layer mask.

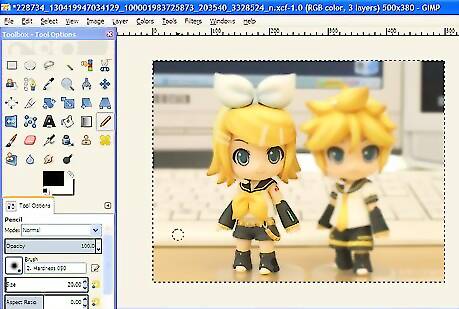
In the Layers dialog, click on the anchor button to anchor the pasted image. If done correctly, your subject should be sharp and the background blurry.Simulate Shallow Depth of Field in Gimp Step 26Bullet1.jpg


Comments
0 comment