views
Using the Built-in Updater
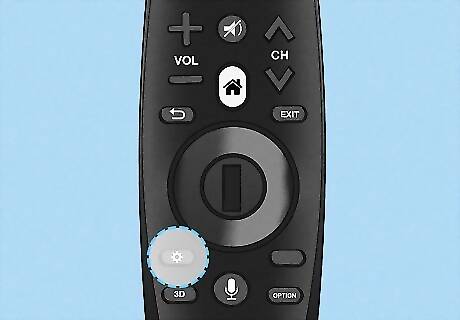
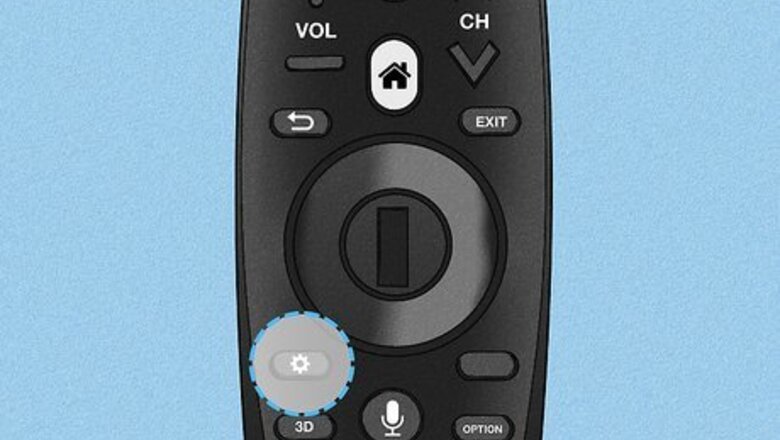
Press the Android 7 Settings button on your remote. If the TV is not powered on, this will not work. You'll see the Settings button on your remote near the navigation wheel towards the bottom of the remote.
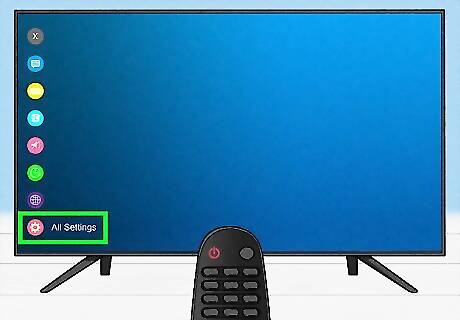
Navigate to and select All Settings. It's the gear or three-dot menu icon at the very bottom of the TV's menu. Use the arrow buttons to navigate (the buttons that form a circle on your LG remote), or point your remote if that feature is available, and press the Select/Ok button in the center of the navigation buttons.
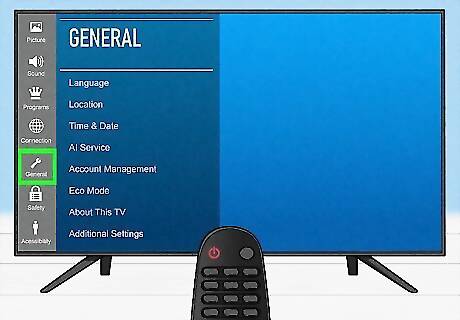
Navigate to and select General. You'll see this in the vertical menu on the left side of the screen next to an icon of a wrench.
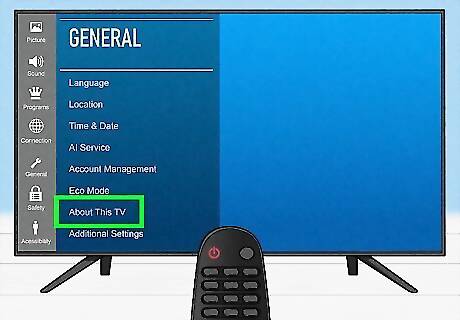
Navigate to and select About This TV. This is in the menu that appears to the right of the vertical menu.
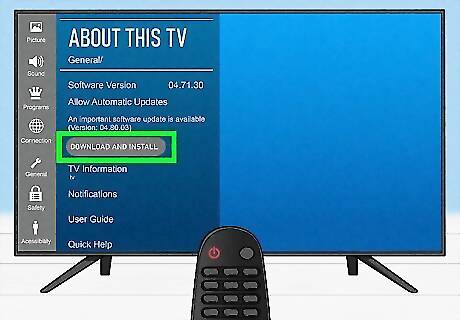
Navigate to and select Download and Install. This might say "Check for updates" in the panel on the right under the toggle for "Allow Automatic Updates" if there isn't an update immediately available or one queued. If you don't see an update available and click "Check for updates," your TV will check for any outstanding updates, then display any that you can apply. If there aren't any updates, a text that says "No updates found" will appear above the Check for updates button. You can also tap the toggle for "Allow Automatic Updates" if you want your TV to update automatically without your interference.
Using Your Computer to Update
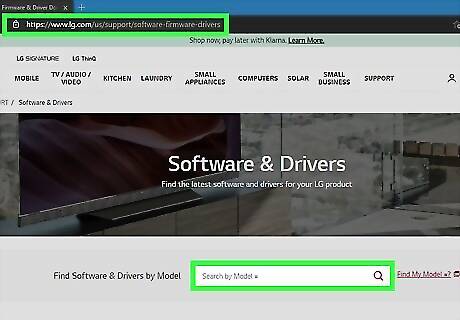
Find your product support page. Go to https://www.lg.com/us/support/software-firmware-drivers in a web browser. You'll be downloading a file from this site onto a USB drive. To accurately locate your product support page, go to that support site and enter the model number for your TV, then select the correct result from the drop-down.
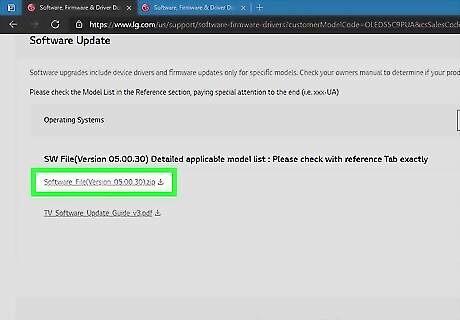
Click the software update file. This will prompt a file manager window to open where you can change the location and name of the downloaded ZIP file if you want to. By default, it will download to the Downloads folder in Finder and File Explorer.
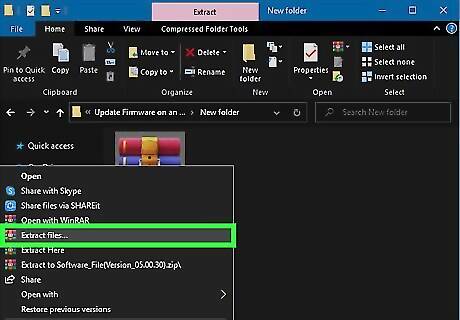
Unzip the file. You can double-click the file in your file manager (like Finder or File Explorer) or right-click it and select "Extract All > Extract."
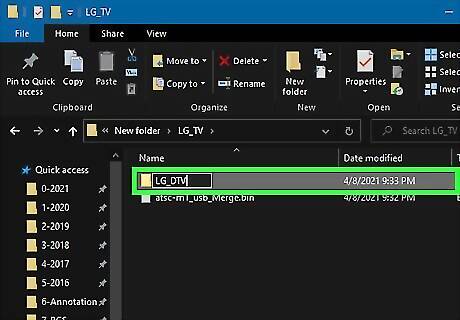
Create a folder inside the extracted folder named "LG_DTV." To do this, right-click inside the folder and select "New > Folder."
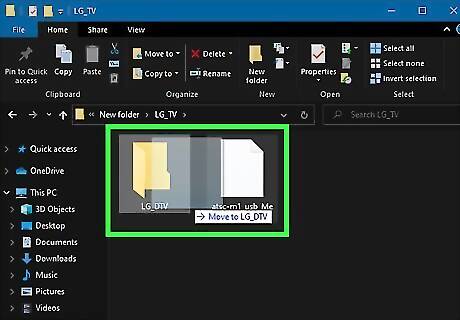
Move the .bin file into your folder. You can do this by dragging the .bin file to your folder and dropping it.
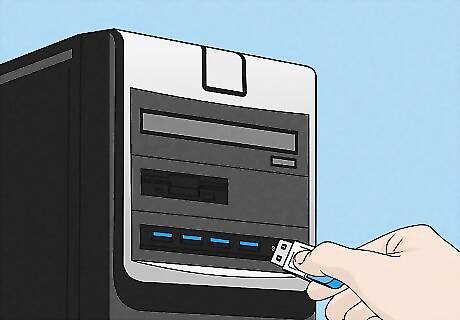
Plug in your USB drive to your computer. On computers with towers, you'll find the USB ports on the front; on all-in-one computers, the USB ports are either on the sides or back of the monitor; on a laptop, the USB ports are on either side of the case. The USB drive should open automatically on your computer once it's connected. If not, you'll need to open it manually from Finder or File Explorer. Format the drive if you haven't already to FAT32. Formatting the drive will also erase it.
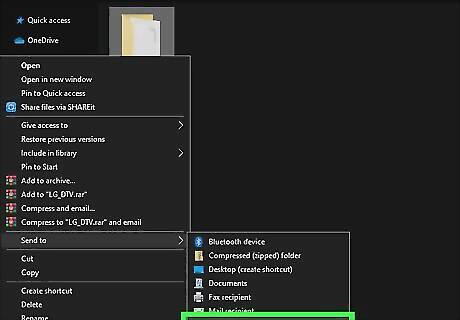
Move the "LG_DTV" folder to your USB drive. You can do this in your file manager by dragging the folder from your computer to the USB drive's folder.
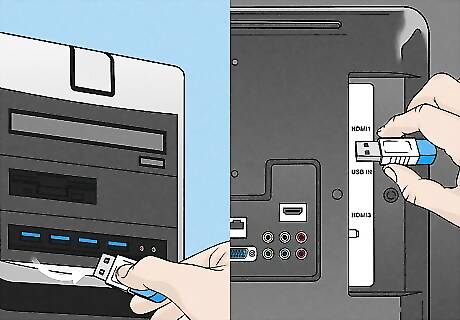
Disconnect the USB drive from your computer and plug it into your TV. You'll find the USB port for your TV on the back, which might be labeled "USB IN." You need to have your TV powered on for this process. If it is off, it will not be able to access the USB drive. Otherwise, your TV will automatically access the USB drive once it's plugged in.
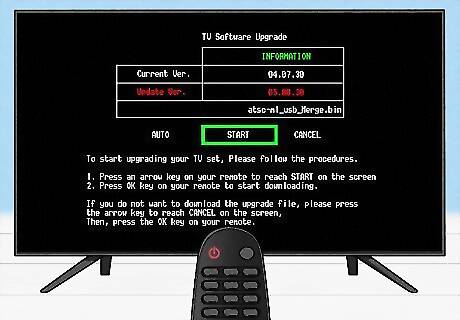
Navigate to and select Start. On the screen, you'll see that an update is available when it reads your USB drive. Use the Select/OK button on your remote to make selections. It's usually the center button in the navigation arrows. Your TV will automatically restart to update to the newer version.


Comments
0 comment