
Treating the Wood

Select a rectangular piece of plywood or MDF in any size. Before you begin working, you must acquire the right piece of wood. The easiest and best type of woods to use are plywood and medium-density fiberboard (MDF), which you can purchase from your nearest hardware store. When you visit the hardware store, ask the attendant to cut the wood to a specific size, or buy a large piece and trim it on your own. You can go as large or small as you want, depending on how you’re using your sign. The majority of precut wood is sold in 48 in (120 cm) by 24 in (61 cm) or 24 in (61 cm) by 24 in (61 cm). Square or rectangular pieces of wood are the easiest shapes to work with, especially for beginners. However, if you’re trying to fit a certain theme or just want something different from the norm, use a woodcutter to shape your wood differently. Circular signs make excellent wall art, for instance. Alternatively, a heart-shaped sign with a romantic quote is a great choice for decorating yours and your significant other’s bedroom.

Choose or create a typography template for the letters. You can’t write on wood without first having an idea of what you want to write! If you have an eye for design and typography, draw out a template of your own on a piece of paper with a calligraphy pen. Alternatively, do an online search for typography designs and print out a design you like. For example, you could write something like, “Welcome to our abode,” to create an entrance sign for house guests. If the sign is for a specific room in your home, use your favorite phrase to describe the home. For instance, this could be a literary quote about enjoying family and the smaller moments in life for your living room. Alternatively, write a family member’s name to create a nameplate for their bedroom.
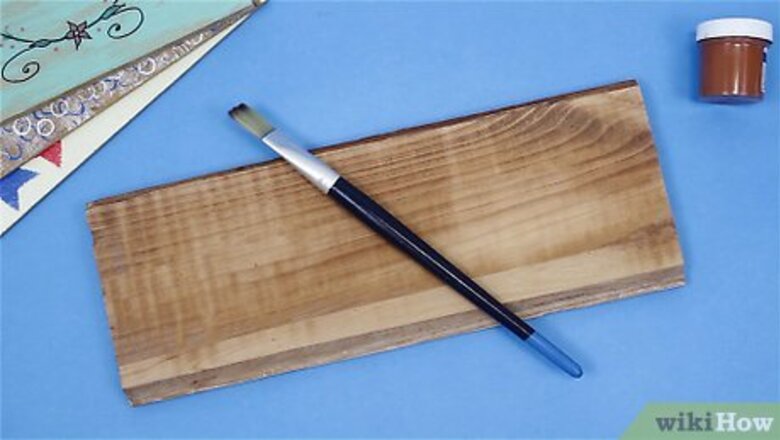
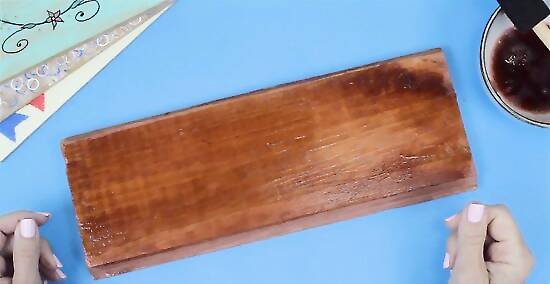
Sand the wood with 120- to 220-grit sandpaper until it's smooth. Sand the entire surface of the wood—even the sides and back—by rubbing the fine-grit sandpaper back and forth along the grain. Sanding will make the wood easier to stain and write on. Alternatively, you could use an electric sander.
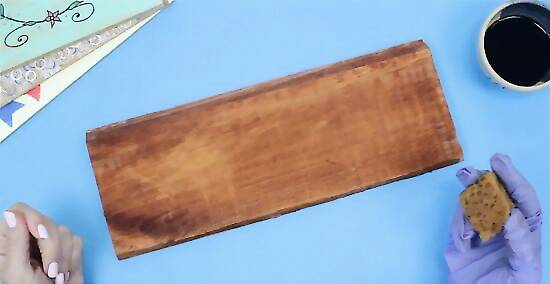
Apply oil-based stain to the wood. Mix the stain thoroughly with a wooden spoon or a stick. Apply the stain with either a paintbrush or a clean rag. Load up your paint brush or rag with stain and swipe it across the wood. Coat the wood with stain from top to bottom. Don’t forget to put on a pair of gloves before you begin staining! The stain can be any color you want. Don’t be afraid to get creative!
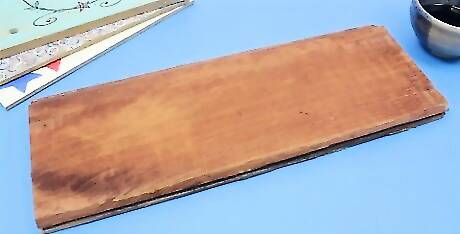
Wait until the stain has dried before you start writing. The stain may take around 2 hours to dry. Waiting to add your lettering will ensure your writing looks clear and tidy. Test for dryness by swiping a gloved finger across the wood and seeing if it comes away clean.
Smear a stain blocker onto the wood to protect your lettering. This will especially help if you’re writing with permanent markers. Focus on coating the darkest parts of the wood and use a soft cloth to apply the product. Add a second layer once the first layer has completely dried. Most stain blockers take between 6 and 8 hours to dry. Stain blocker is available at your local hardware store.
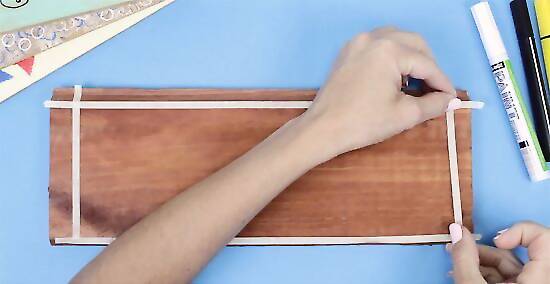
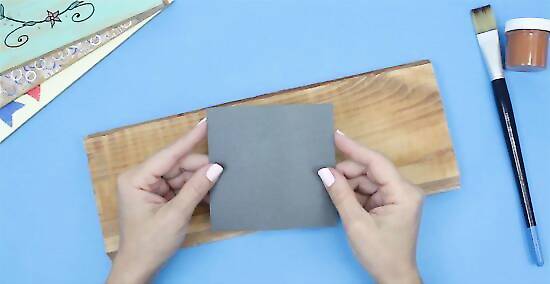
Sketch out the size and spacing for your lettering. You may want to use a ruler to calculate exactly where you want each letter to be and what size to make your writing. Sketch out how much space the writing will take up on the wood by making a box (or boxes) to fit your letters into. The box(es) will form a guideline to help you center your template and keep your letters organized. Alternatively, make a frame to block your letters into with masking tape.
Adding Your Lettering
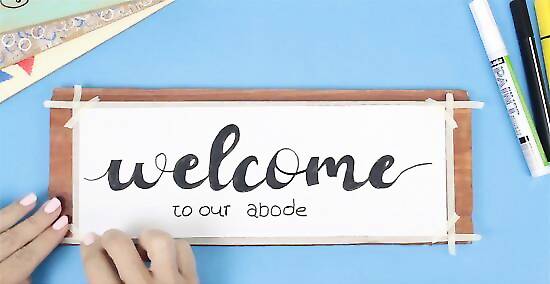
Center the template on top of the wood. Retrieve the template you’ve made or printed out and lay it on top of the wood. Line up your template within the guidelines you’ve drawn. Add tape to the corners of your template to keep it in position as you draw.
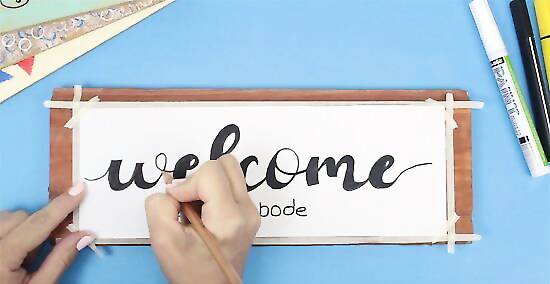
Trace the outlines of each word on the template with a pencil. Press the tip of your pencil into the paper and trace over the lines of your template. Focus only on the outlines of each letter. Apply strong pressure so the strokes show up on the wood. Use a pencil so that you'll be able to correct any mistakes.

Take the template off of the wood to check the visibility of your outlines. If your outlining was successful, you’ll notice strokes left behind by the pencil. If you can’t make out the lines, place the template over the wood and outline the letters again. You can erase any mistakes you’ve made with a pencil eraser.
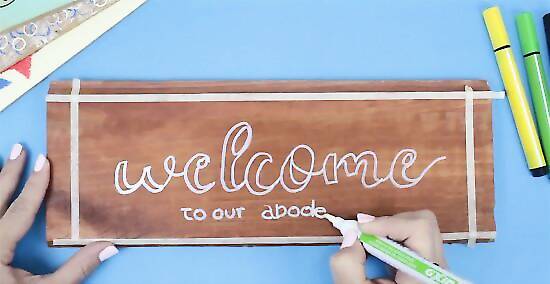
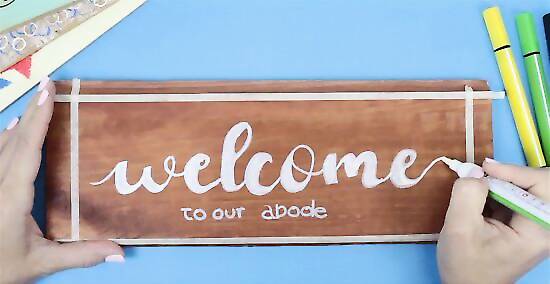
Write each letter carefully with a permanent marker or paint pen. Mistakes made with permanent markers or paint markers cannot be erased! Pay attention to the lines as you trace over them. Focus on drawing the correct positioning and shapes of each letter.
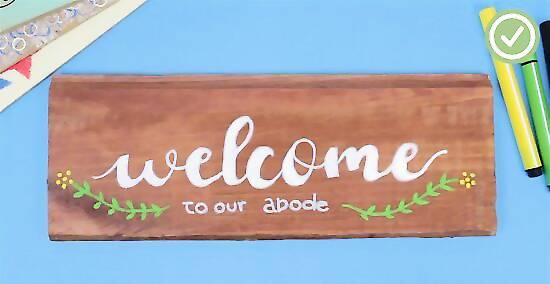
Embellish your letters with different stroke widths and curly designs. Focus on making them look appealing once the letters have been outlined properly. Make wider strokes where the letters loop to add visual appeal. Add curls to the ends of letters for flourish. Follow your template to remember where to add the extra designs to your letters.
Go over the words with your pen or marker to darken them. Adding a second layer to the letters with your paint marker will sharpen them and create a cleaner design. Make sure the first layer has dried before you re-apply! Use fast-drying paint markers to save time and create bolder lines; fast-drying markers take only a couple of minutes to dry.


Comments
0 comment