
Downloading and Extracting Canon CameraWindow
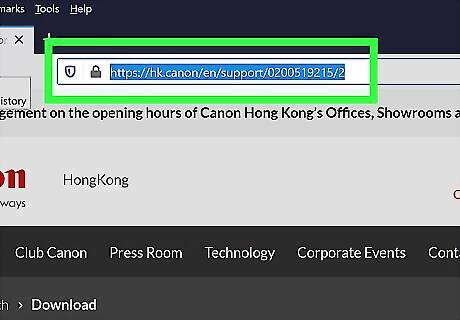
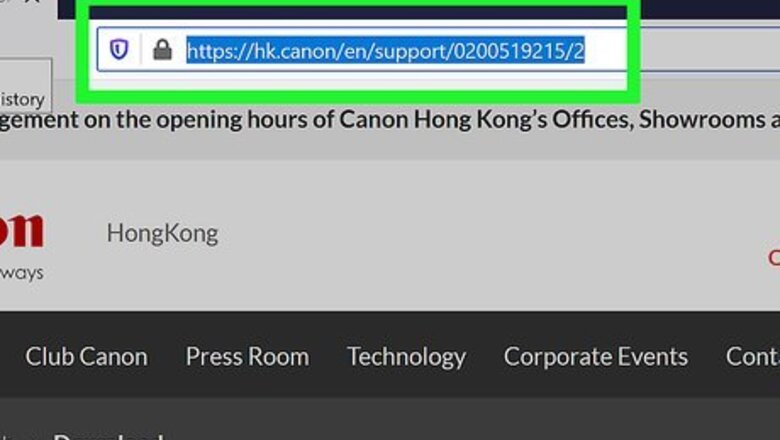
Open the CameraWindow download page. Go to https://hk.canon/en/support/0200519215/2 in your computer's web browser.
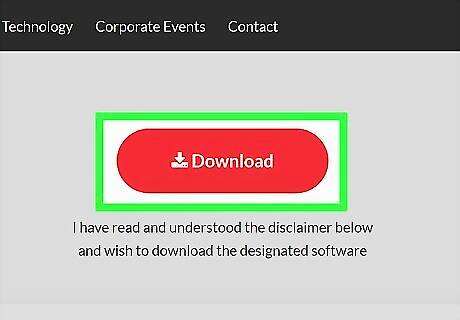
Click Download Now. It's a red button in the middle of the page. The CameraWindow ZIP folder will begin downloading onto your computer. You may first have to select a download location or confirm that you want to download the file before it will begin downloading.
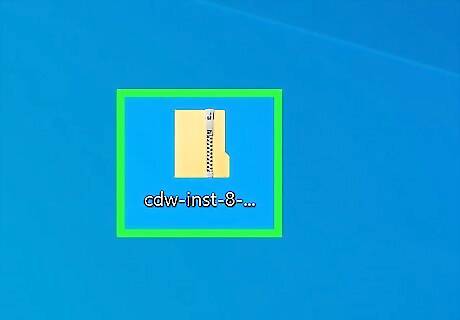
Double-click the downloaded ZIP folder. You'll find it in your browser's default downloads location (or the location you selected). Doing so will open the ZIP folder.
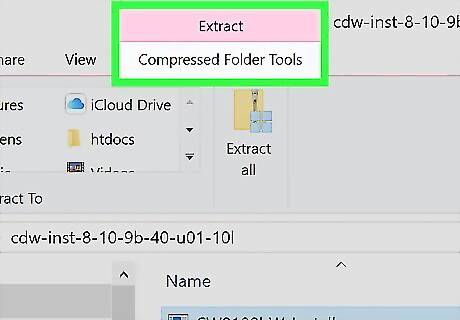
Click Extract. This tab is at the top of the window. A toolbar will appear below the Extract tab.
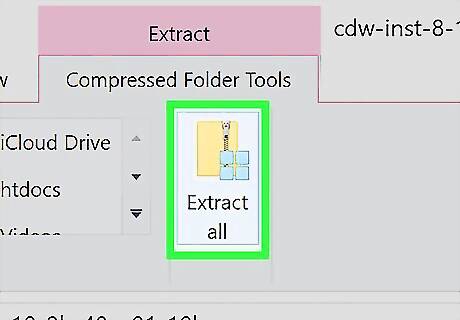
Click Extract all. It's in the toolbar.
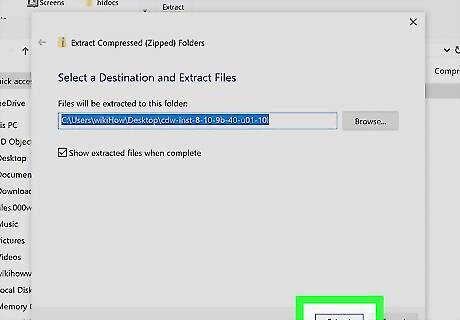
Click Extract when prompted. This is at the bottom of the pop-up window. Doing so will extract the ZIP folder's contents into a regular folder and then open that folder. Once the extraction is complete, you can open CameraWindow. Make sure the "Show extracted files when complete" box is checked; otherwise, you'll need to open the extracted (regular) folder that appears before proceeding.
Installing CameraWindow
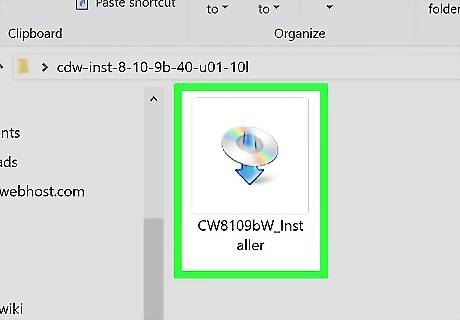
Double-click the installer file. It's in the extracted folder. Doing so will open the CameraWindow installation window.

Select a region. Click the region in which you currently live.
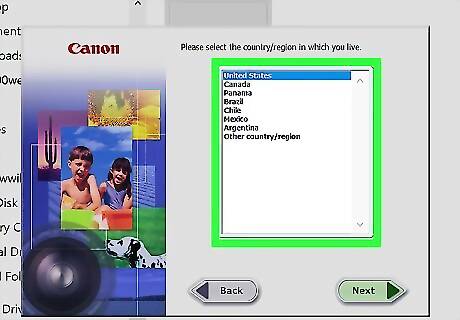
Select a country. Click the country in which you live in the middle of the window.
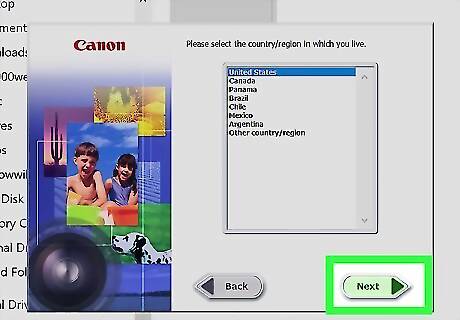
Click Next. It's in the bottom-right corner of the window.
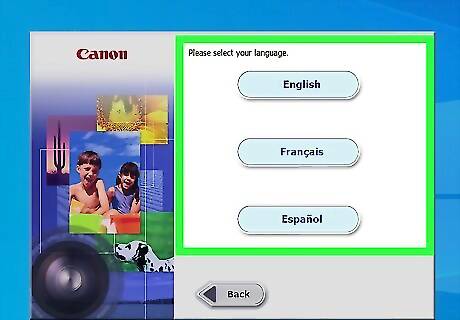
Select a language. Click the language in which you want to use CameraWindow.
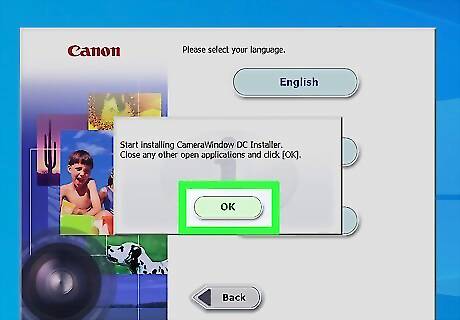
Click OK when prompted. This will take you to the installation confirmation page.

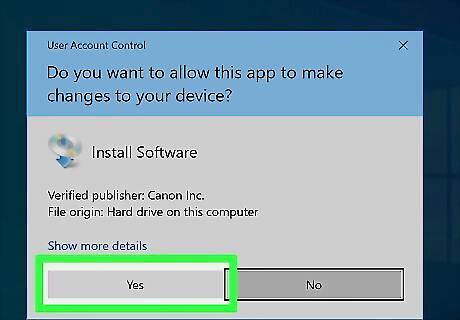
Click Yes. It's in the middle of the window.
Click Yes when prompted. Doing so allows CameraWindow to begin installing.
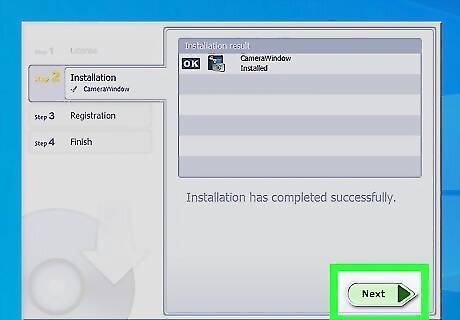
Click Next. It's in the bottom-right corner of the window.
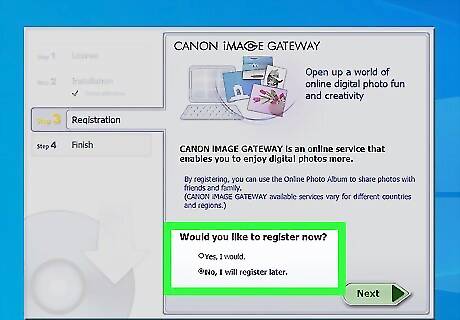
Indicate that you'll register later. Check the "No thanks, I'll register later" box, then click OK when prompted.
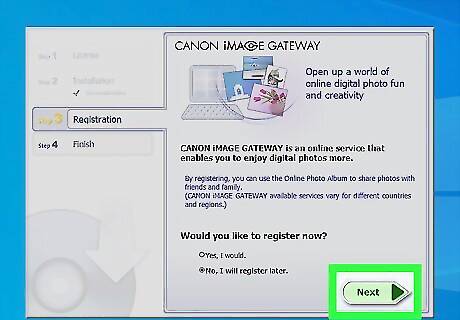
Click Next. It's in the bottom-right corner of the window.
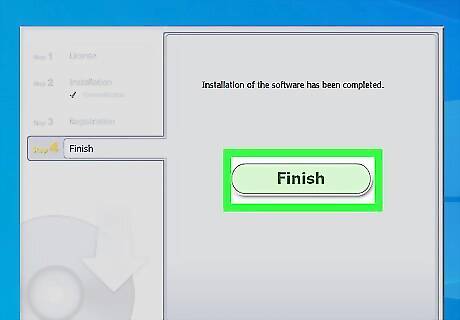
Click Finish. You'll find this in the middle of the page. Clicking it closes the window and marks the end of the installation process. At this point, you're free to begin connecting your camera to your computer.
Connecting Your Camera to Your Computer
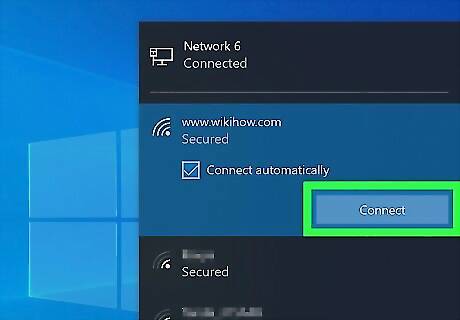
Make sure your computer is connected to a Wi-Fi network. In order to connect your camera to your computer, your computer must be connected to a wireless network. You'll need to connect your camera to the same wireless network as your computer.
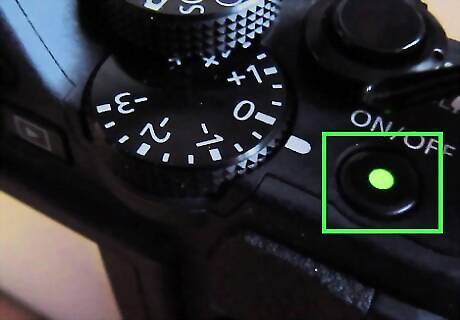
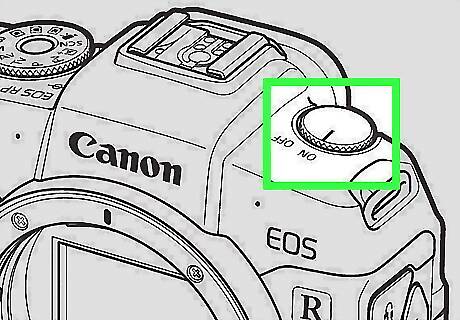
Turn on your camera. Turn the camera's dial to the "ON" position or press the "Power" Windows Power icon to do so.
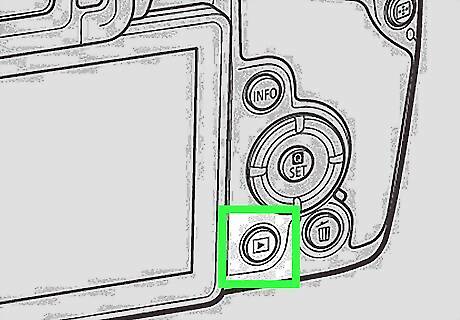
Press the "Playback" button. This is the triangular button on the back of the camera.
Open the Wi-Fi menu. Scroll using the arrow buttons (or the dial) on your camera until you find the "Wi-Fi" or "Networks" option, then select it by pressing the FUNC. SET button.
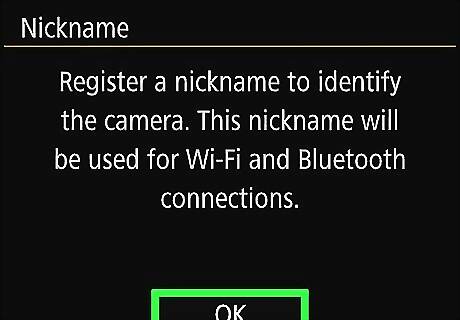
Enter a camera nickname if prompted. If asked to type in a nickname for your camera, do so by selecting letters in the on-screen menu. You'll need to set this nickname in order for your computer to recognize your camera.
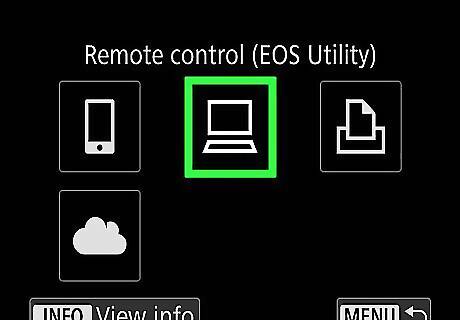
Select the "Computer" icon. Scroll over to the computer-shaped icon by using your camera's arrow buttons or the dial, then press the FUNC. SET button to select the icon and open the menu.
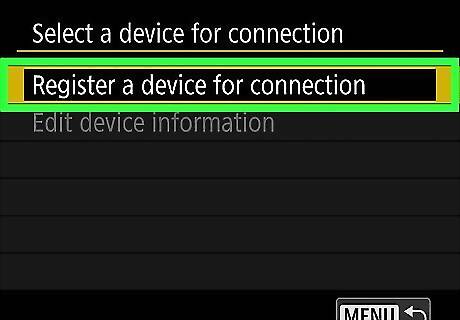
Select Add a Device…. It's in the computer menu. Doing so opens a list of available Wi-Fi networks.
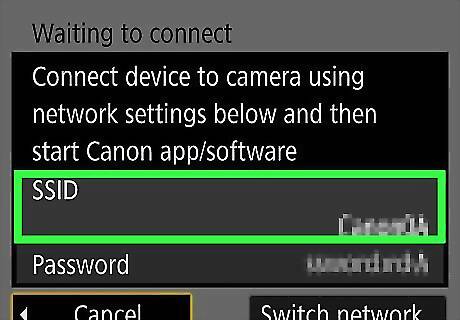
Select your computer's network's name. Scroll down until you find the name of the network to which your computer is connected, then press FUNC. SET to select the network.

Enter your network's password when prompted. Use the on-screen keyboard to type in the password you use to log into the network.
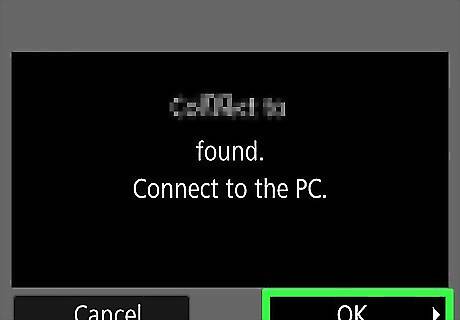
Select your computer. Scroll until you find your computer's name, then select it with the FUNC. SET button. This will connect your camera to your computer. You may first have to select Auto when asked to set up your network settings.
Transferring Pictures
Install your camera's drivers if necessary. If you haven't connected your camera to your computer via a USB cable before, you'll have to install the camera's drivers by doing the following: Open File Explorer Windows File Explorer. Click Network on the left side of the window. Double-click your camera's name. Follow the on-screen instructions.

Open Start Windows Start. Click the Windows logo in the bottom-left corner of the screen to do so.
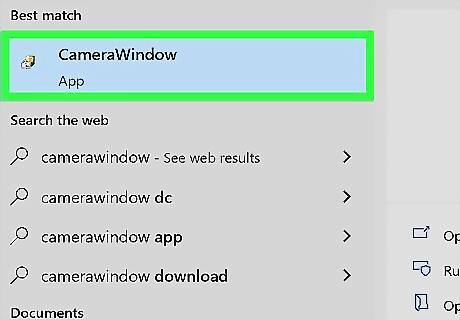
Open CameraWindow. Type camerawindow into the Start window, then click CameraWindow at the top of the list of search results when prompted.
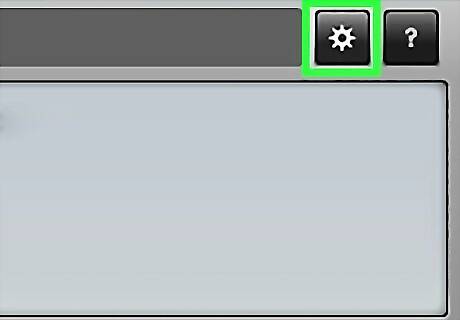
Click the "Settings" icon. It's a gear-shaped icon in the upper-right corner of the window. Doing so opens the Settings window.
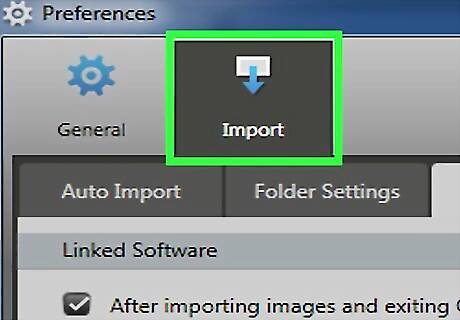
Click the Import tab. This is at the top of the Settings window.
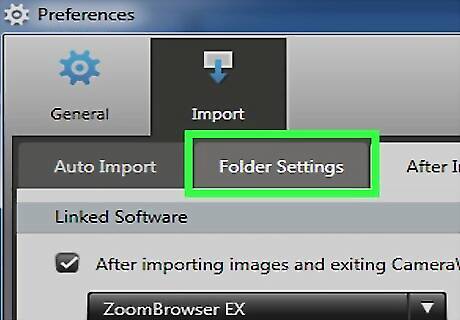
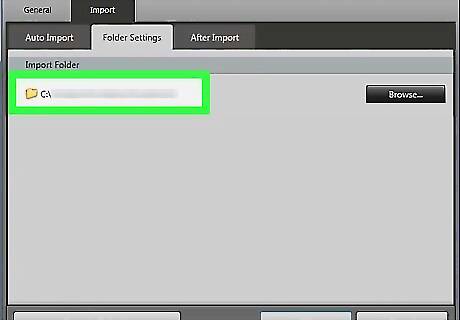
Click Folder Settings. You'll find this tab near the top of the window.
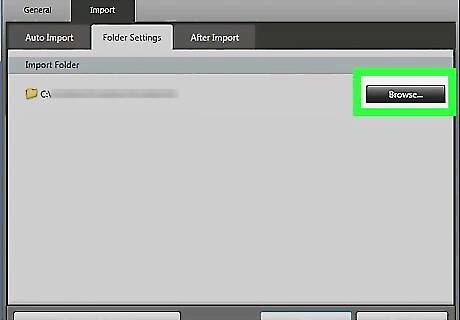
Click Browse…. This is on the middle-right side of the page. Clicking it opens a File Explorer window.
Select a folder. Click the folder you want to use to store your transferred photos, then click Open or Select Folder in the bottom-right corner of the pop-up window.
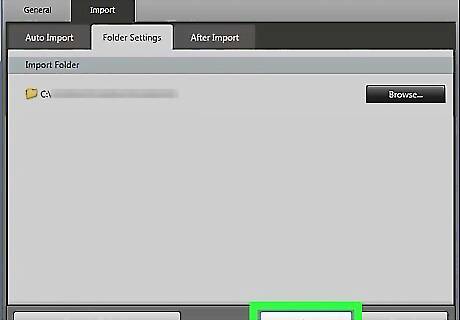
Click OK. It's at the bottom of the window. Doing so saves your settings and closes the Settings window.
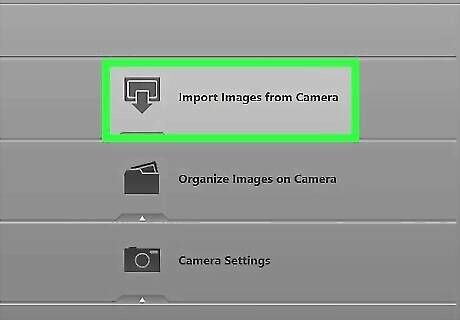
Click Import Images from Camera. You'll find this option in the middle of the window.
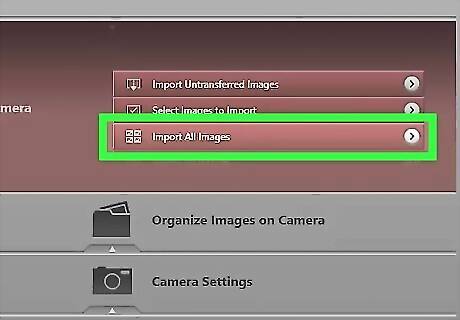
Click Import All Images. This is in the middle of the menu. Your camera's photos will begin transferring onto your computer. If you want to import specific images, click Select Images to Import, select each image you want to import, and click the Import arrow in the bottom-right corner of the window.
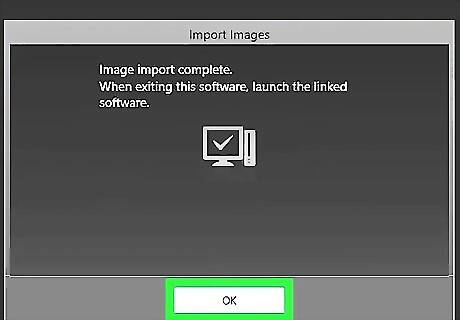
Wait for the import to complete. Once the progress bar in the middle of the window disappears, your photos have finished transferring. You'll find them in the folder you selected earlier.


Comments
0 comment