views
Cutting the Pieces
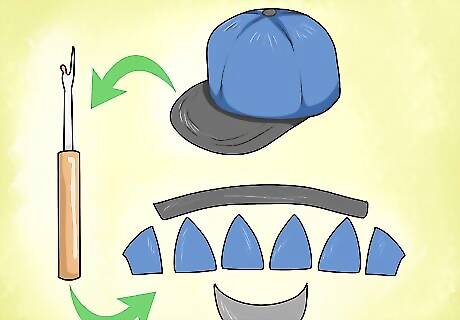
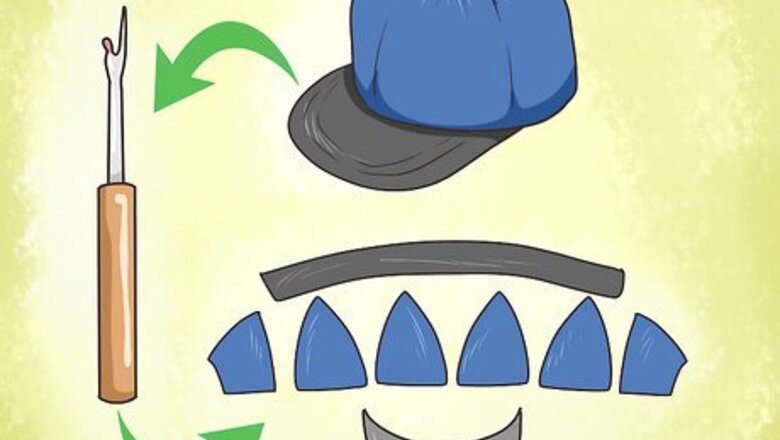
Take apart an old baseball cap with a seam ripper. The order in which you take the pieces apart will depend on how your cap was made. In most cases, however, you'll start with the brim, then the facing (inside band), and finally the panels. Remove the plastic insert from inside the brim as well. To use a seam tripper, insert the sharp point into a seam, then slide it away from you, along the seam. Alternatively, find a pattern online or in a pattern book. Print the pattern (if it's online), then cut it out. Click here to continue. This method may also work for other types of multi-panel caps, such as newsboy caps.
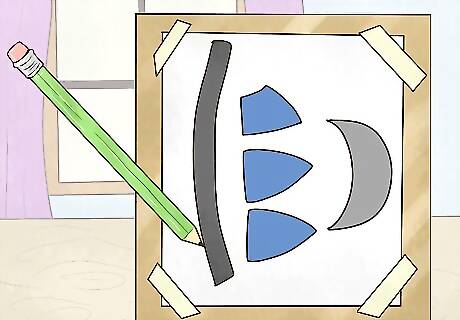
Fold the seams down, then trace the pieces onto paper. If you trace the pieces as they are, you might end up with narrow seam allowances that are difficult to work with. Instead, using the creases as a guide, fold the seams down, then trace around each piece onto paper. You will add your own, larger seam allowances. Trace the following: brim, facing/inside hat band, and panels. The left and right side of a baseball cap are identical, so you only need to trace 1 front panel, 1 side panel, and 1 back panel. You must fold the original seams down. If you don't, the hat will be too big once you add your own seam allowances.
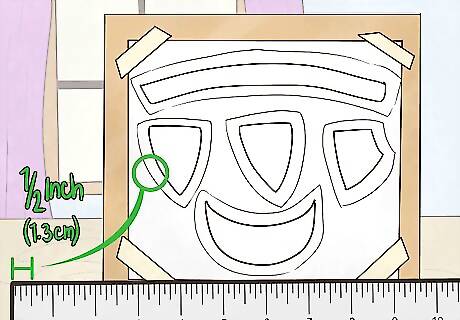
Use a ruler to add ⁄2 in (1.3 cm) seam allowances. Pick a piece to start with. Place the end of a ruler against a point on the tracing. Measure out ⁄2 inch (1.3 cm) and make a point with a pencil. Work your way around the tracing, making points every 1 inch (2.5 cm) or so. Connect the points to make a second outline. This is your cutting line. Repeat this step for all of the pieces.
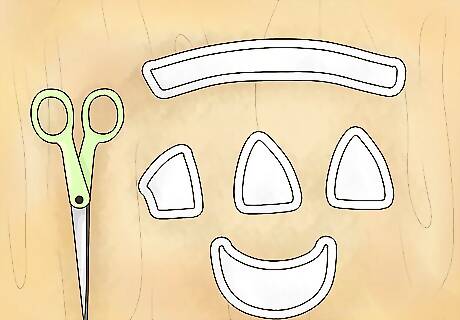
Cut the pattern pieces out along the seam allowance. Do not use fabric scissors for this; cut the pieces out using regular scissors. If you are cutting a pre-made pattern that you found online or in a pattern book, be aware that it may have multiple sizes. Cut along the line that corresponds to your size.
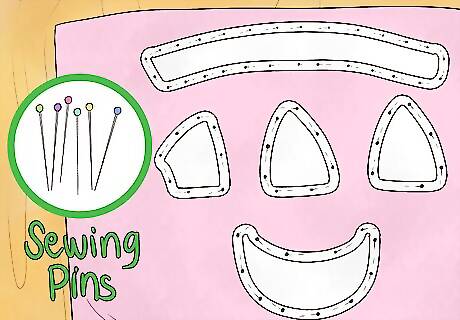
Fold your desired fabric in half, then pin the pattern to it. It does not matter which way you fold the fabric: right-side-out or wrong-side-out. Just make sure that the side edges and corners match up, then pin your pattern pieces to it. The right side of the fabric is the front. The wrong side of the fabric is the back. Choose a durable, woven fabric for this. Denim, sports twill, and canvas are all great choices.
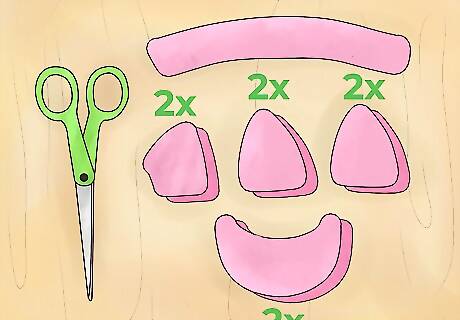
Cut the pieces out, then set the pattern aside. Use fabric scissors to cut all of the pieces out. Carefully unpin the pattern pieces, then set those aside for another project. You only need 1 piece for the facing/inside band. Cut this out at the very end from a single layer of fabric. If your fabric is thin, cut some iron-on interfacing out, then iron it to the wrong side of the fabric following the instructions on the package.
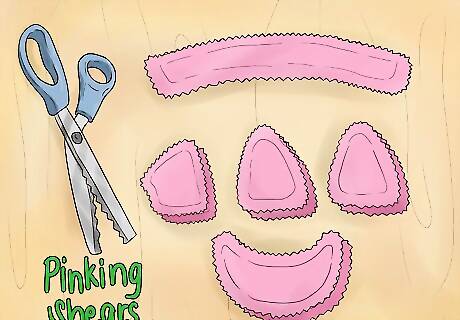
Finish the raw edges on the panels as desired. Cut them with pinking shears or go over them with a zigzag stitch your sewing machine. If you own a serger, you could use that instead. Make sure that you do this for all of the pieces. You don't have to do this, but it will give your hat a nicer, more professional-looking finish.
Assembling the Panels
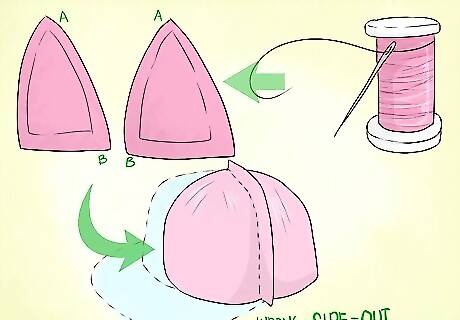
Sew the front and side panels using a ⁄2 in (1.3 cm) seam allowance. Pin a front panel to a side panel, with the wrong sides facing out. Staring ⁄2 inch (1.3 cm) from the tip, sew down the left side using a straight stitch and a ⁄2 in (1.3 cm) seam allowance. Repeat this for the other set of panels, but this time along the right edge. Backstitch when you start and finish sewing. This is where you reverse the sewing machine for a few stitches. It will keep the stitches from comping apart.
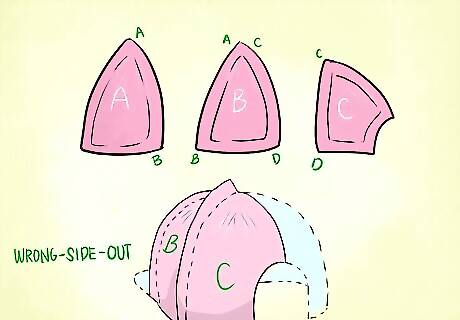
Add the back panels to the side panels. Pin the back panels to the matching side panels, right sides together. Sew them using a ⁄2 in (1.3 cm) seam allowance, stopping ⁄2 inch (1.3 cm) from the top, pointed edges. Don't sew the front and back panels together just yet.
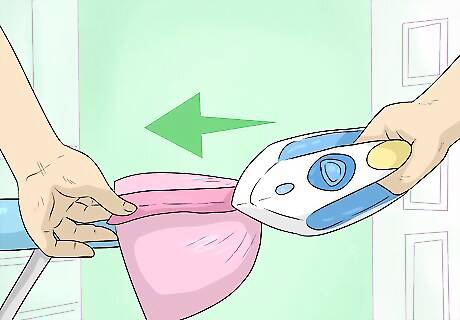
Press the seams open using the curved edge of the ironing board. Place the assembled panel against the curved edge of your ironing board, wrong side facing out. Press the seams open with your fingers, then iron them using a heat setting appropriate for the fabric. Repeat this step for the second set of panels too. Most iron labels have the fabric type printed on them. If yours doesn't, use "hot" for cotton or linen, and "cool" or "warm" for polyester. You can iron on the top, flat side of the ironing board, but it'll be much easier if you wrap the panels around the curved end instead.
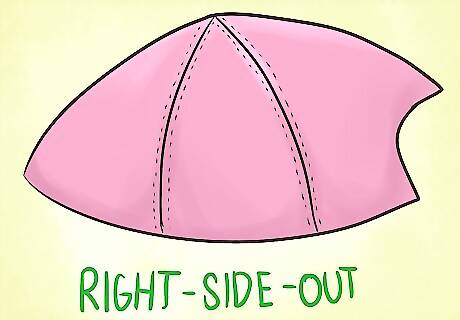
Add 2 rows of topstitching to both sides of each seam. Topstitching is simply where you sew a straight stitch alongside a seam. Work from the wrong side of the fabric so that you can see the seams clearly. Match the color of the thread to the fabric, or use a contrasting color for a decorative touch. Sew about ⁄8 to ⁄4 inch (0.32 to 0.64 cm) away from each seam. Topstitch all the way to the top of each panel; don't stop ⁄2 inch (1.3 cm) away from the points like you did before.
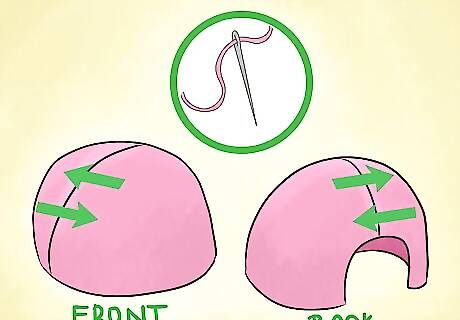
Sew the 2 halves together along the front and back seams. Pin the 2 halves together so that the front seams and back seams match up. Sew the hat together using a ⁄2 in (1.3 cm) seam allowance. Start at the bottom edge of the front seam, and finish at the bottom edge of the back seam. Don't press open and topstitch the seams yet. You need to test the fit of the hat first. Most caps have a U-shaped groove in the back where the strap is. Don't sew this groove shut. Backstitch when you start and finish sewing.
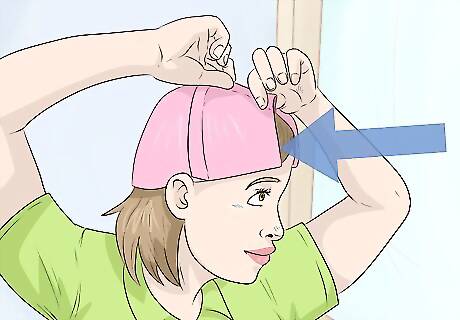
Put the hat on, wrong side facing out, and see how well it fits. If the hat is too big, use sewing pins to adjust it until it does fit. Remove the old seams and sew new ones using the pins as a guide.
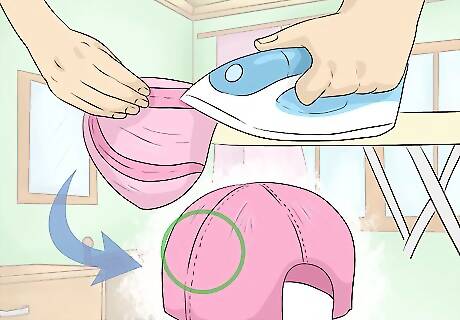
Press the seams open, then topstitch them. This is just how you did the other seams. Iron the seams open using the curved edge of the ironing board first. Next, topstitch on both sides of each seam using a ⁄8 to ⁄4 in (0.32 to 0.64 cm) seam allowance.
Adding the Elastic Strap
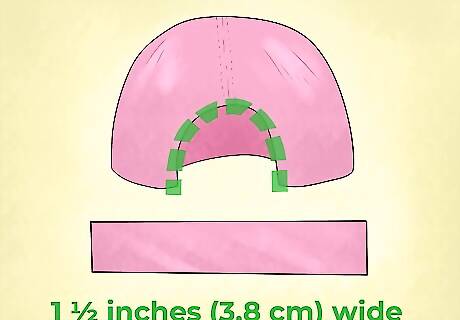
Create a bias tape for the curved gap in the back of the cap. Unless you're making a newsboy cap, your cap will have a curved gap along the back edge. Measure the circumference of this gap, then make a bias tape using your fabric: Cut a diagonal strip of fabric that's 1 ⁄2 inches (3.8 cm) wide. Fold the strip in half with the right sides facing out and iron it. Open the strip and fold the raw edges to the middle. Fold the strip back up again and iron it once more.
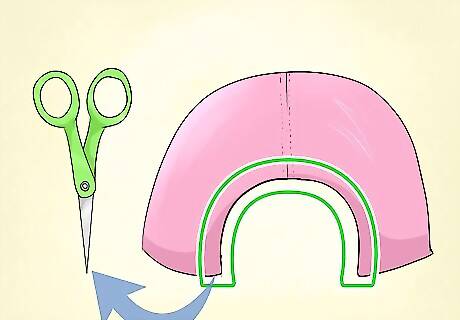
Cut away the seam allowance from the gap in the back of your cap. Use a pair of scissors to cut the raw edges of the gap by ⁄2 inch (1.3 cm). You do not need to refinish the raw edges, but you can if you want to. If you don't do this, then the hole will be too small.
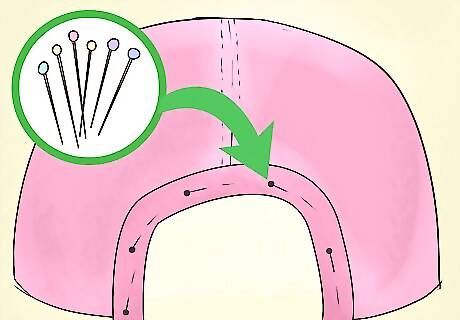
Fold and pin the bias tape over the raw edge, then sew it in place. Open up your bias strip and fold it around the raw edges of the gap to hide them. Secure the bias tape with as many pins as you need to keep it in place. Sew it down as close to the inside folded edge as possible. Remove the pins as you sew. This will give you a nicer finish than just folding the raw edges down and hemming them.
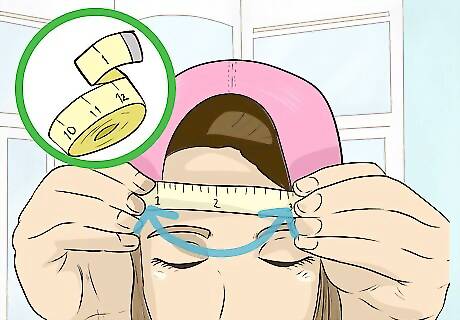
Measure the width of the gap, then cut a strip of elastic for the strap. Put the cap on and bring the edges of the gap together until you get a comfortable fit. Measure the width of the gap, then take the hat off. Choose a piece of wide elastic, then cut it about 1 inch (2.5 cm) shorter than the gap. Choose a wide, non-roll elastic. Something around 1 inch (2.5 cm) wide would work just fine. The color doesn't matter.
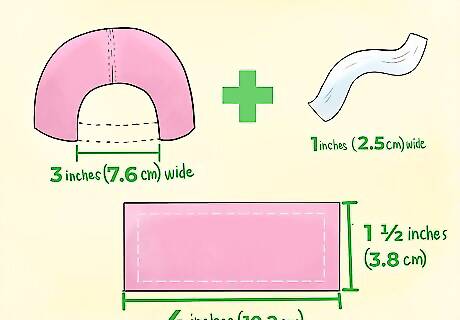
Cut a strip of fabric for the elastic casing. Fold your fabric in half, then draw a rectangle along the folded edge. Make the rectangle the same width as the gap, and the same height as the elastic. Add ⁄2 in (1.3 cm) seam allowances to the side and bottom (not folded) edges. Cut the rectangle out when you're done. It does not matter which side you fold the fabric on. This is just to get the shape of the piece. For example, if your gap is 3 inches (7.6 cm) wide, and the elastic is 1 inch (2.5 cm) wide, your rectangle will be 4 by 1 ⁄2 inches (10.2 by 3.8 cm), including the 2 side seam allowances and the 1 bottom seam allowance.
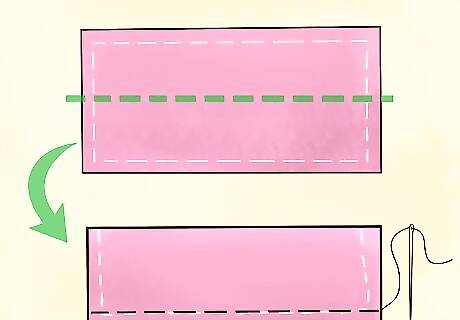
Fold the strip in half lengthwise and sew along the bottom. Fold the strip in half lengthwise with the wrong sides facing out. Sew along the long, bottom edge using a ⁄2 in (1.3 cm) seam allowance. Backstitch when you start and finish sewing. You don't need to finish the raw edge, but you can if you want to.
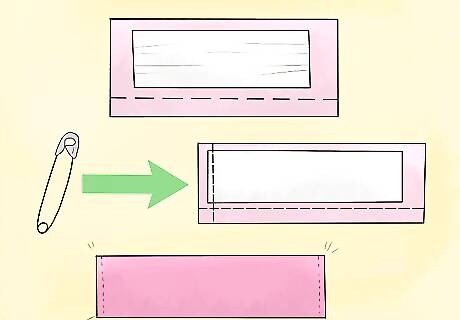
Turn the casing right-side out, insert the elastic, then sew it to the sides. Use a safety pin to turn the strip right-side-out. Slide the elastic into the strip so that the left ends are aligned. Sew the left end using the edge of the bias tape as a guide. Scrunch the casing along the elastic to that the right ends are aligned, then sew the right ends using a ⁄2 in (1.3 cm) seam allowance. Keep the elastic's edges about ⁄4 inch (0.64 cm) away from the fabric's edges. This will help reduce bulk. Backstitch when you start and finish sewing each time. This will prevent the stitches from unraveling.
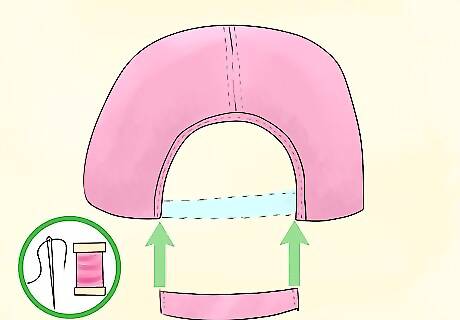
Sew both sides of the strap to the gap. Place the strap behind the gap in the back of the cap, ⁄2 inch (1.3 cm) from the bottom. Slide the left end ⁄2 inch (1.3 cm) behind the left side of the gap, and sew it down, from top-to-bottom. Repeat the process for the right end of the strap and the right side of the gap. The gap will scrunch a little due to the elastic, but it will widen once you put it on your head. Rather than using seam allowances here, use the edge of the bias tape as a guide. Remember to backstitch for both sides of the strap. This will make the stitching nice and strong.
Creating the Brim
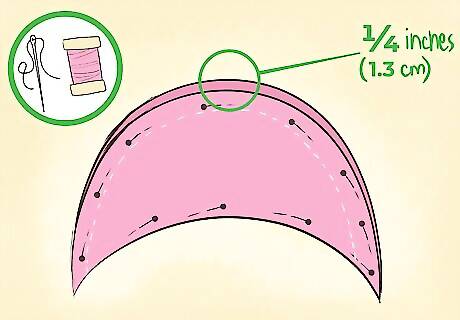
Sew together the brim pieces using a ⁄2 in (1.3 cm) seam allowance. Pin the 2 brim pieces together with the right sides facing in. Pull the top layer back by about ⁄4 inch (0.64 cm), then pin everything in place. Sew the 2 brim pieces using a ⁄2 in (1.3 cm) seam allowance. Refer to the top layer of fabric for the seam allowance, not the bottom layer that's peeking out from under it. You don't have to offset the 2 pieces, but it will give you a more professional-looking finish. Only sew the top, outside edge of the brim. Don't sew the bottom, inside edge, or you won't be able to insert the brim.
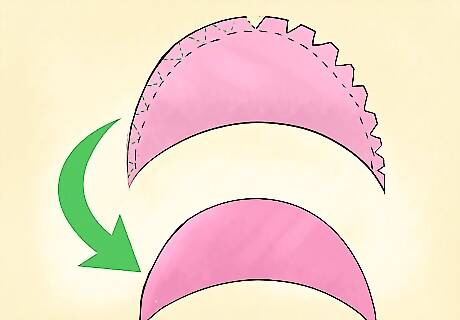
Cut notches into the seam, then turn it right-side-out and press it. Cut V-shaped notches into the seam allowance, about 1 inch (2.5 cm) apart. Turn the brim right-side-out, then press the seam with an iron.
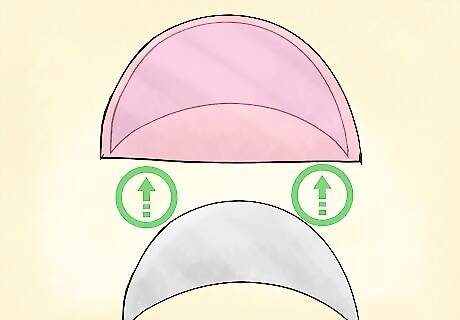
Slide the brim insert into the fabric, then align and pin the bottom edge. Take the plastic or cardboard brim from the original cap, and slide it into the fabric brim. If you offset the fabric pieces earlier, gently pull on the bottom piece so that the raw edges are aligned. This will cause the seam to roll over the edge of the brim and settle on the underside. If you used an online or store-bought pattern, use the original pattern to trace and cut a brim insert out of thin cardboard. Cut the ⁄2 in (1.3 cm) seam allowances off.
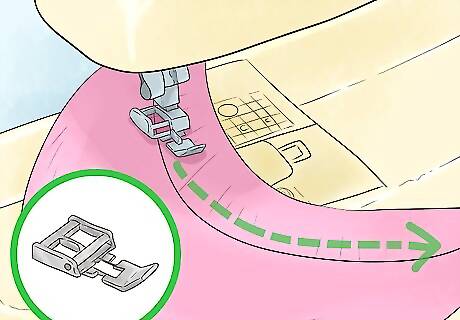
Use a zipper foot to sew the bottom of the brim shut. Pop the regular foot off of your sewing machine and replace it with a zipper foot. Sew the opening of your brim shut, as close to the brim insert as possible. The seam allowance may vary at this point, but it should be roughly around ⁄2 inch (1.3 cm). Cut more slits or V-shaped notches into the seam allowance. Keep them about 1 inch (2.5 cm) apart.
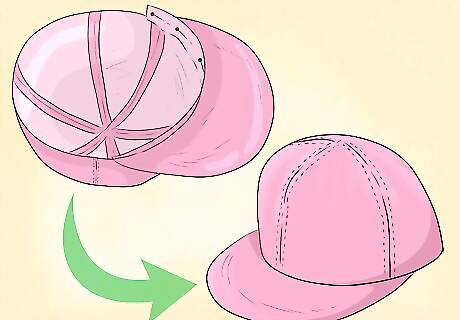
Pin and sew the brim to the cap using a ⁄2 in (1.3 cm) seam allowance. Pin the brim to the front of the cap so that the top part (not the underside) is touching the outside of the cap. Sew the brim to the cap using the zipper foot and a ⁄2 in (1.3 cm) seam allowance. Backstitch when you start and finish sewing. This will reinforce the brim.
Adding the Inner Band
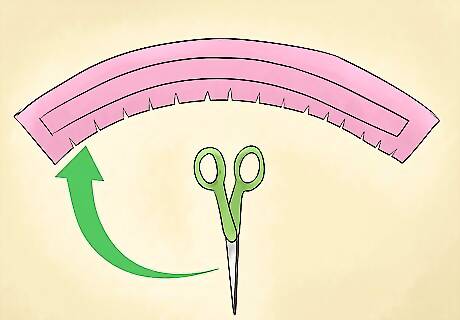
Cut slits into the inside edge of the facing piece. Take the pattern piece for the facing/inner band. Cut ⁄4 inch (0.64 cm) slits into the smaller, inside curve. Make the slits about 1 inch (2.5 cm) apart. You are only doing this for the smaller, inside curve. Leave the larger, outside curve alone for now.
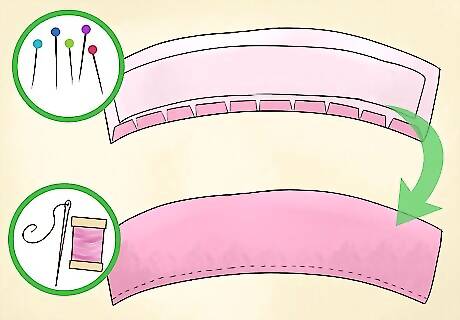
Fold and pin the edge down by ⁄2 inch (1.3 cm), then topstitch it. Turn the fabric so that the wrong side is facing you. Fold the smaller, inside curve down by ⁄2 inch (1.3 cm). Work in small sections at a time, pinning as you go. Once you have the edge pinned, sew it down using a ⁄4 inch (0.64 cm) seam allowance. Press the folded edge with an iron before you sew it. This will help keep it flat as you sew. Use a regular sewing foot for this step. It'll be easier to get the seam allowance right.
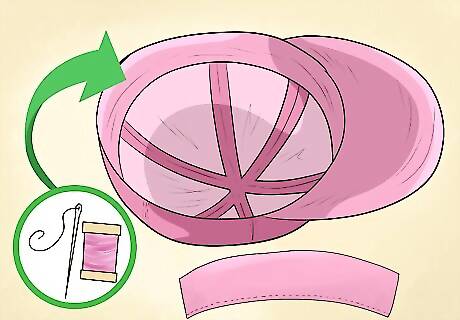
Sew the outside edge of the curve to the bottom edge of the cap. Pin the facing to the outside of the cap so that both of the bottom, raw edges are aligned. Make sure that the wrong side of the facing is facing out, then sew it to the cap using a ⁄2 in (1.3 cm) seam allowance. The folded edge of the facing you just topstitched should be pointing up. Make sure that the facing is centered on the cap, and that ends are sticking into the gap. You need this excess fabric so that you can hem it nicely. You can use a regular foot for this step, but switch to a zipper foot once you get to the brim. Follow the stitching along the brim.
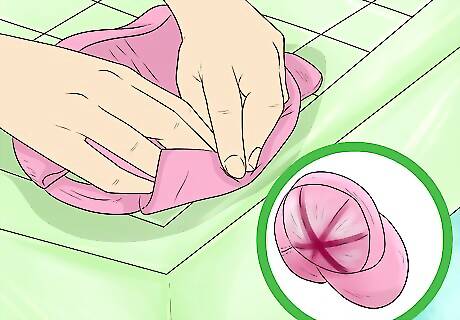
Fold and press the facing into the cap. Take the facing and fold it into the cap so that the seam is along the bottom edge. Working your way around the cap, press the facing with an iron. Make the bottom seam as crisp as you can. Don't worry about the side edges of the facing sticking into the gap just yet.
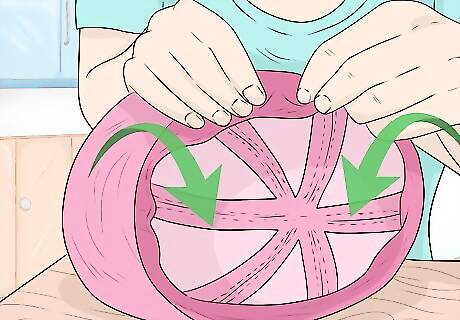
Fold and press the side edges into the facing, then sew them down. By now, you should have the narrow, side edges of the sticking into the gap. Fold these edges under the facing so that you can't see them anymore. Secure them with sewing pins, then press them with an iron. Sew them down using the edge of the gap's bias tape as a guide, then remove the pins. Don't fold the edges onto the outside of the hat; it won't look very nice. Peel back the facing, if you have to, so that you can see what you are doing. How much you fold the edges in by will depend on the circumference of your cap. It will probably be around ⁄2 inch (1.3 cm), however.
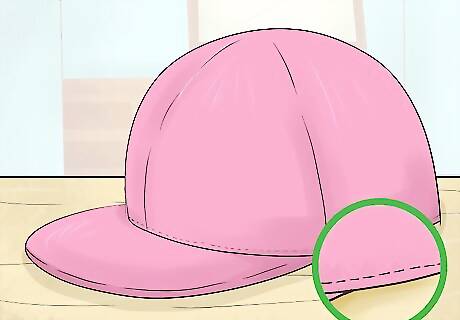
Sew along the bottom edge of the cap. Start sewing at 1 side of the gap. Work your way around the bottom edge of the cap, over the brim, and back down the other side. Finish at the other side of the gap. Backstitch when you start and finish sewing. Sew close to the bottom edge of the cap. Something between ⁄8 and ⁄4 inch (0.32 and 0.64 cm) would be good. You can use a regular foot for the most part, but you'll have to switch to a zipper foot once you get to the brim. Sew as close to the brim as you can.








Comments
0 comment