
Studying Your Subject
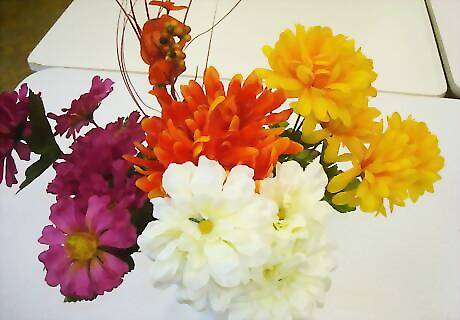
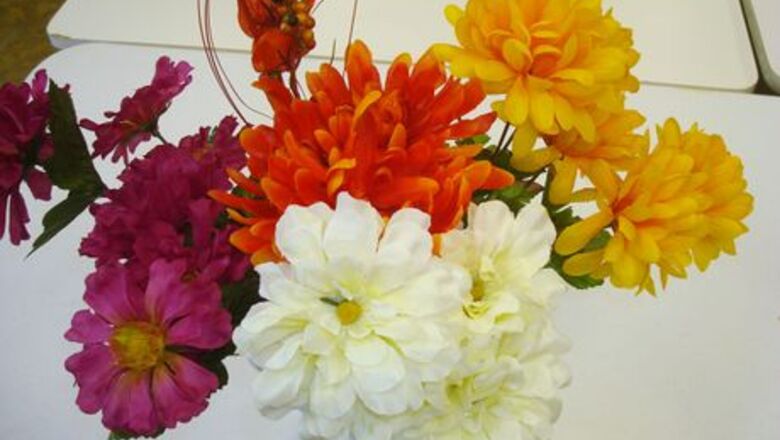
Purchase a pot of mums. In the fall, they are available everywhere and the plentiful blooms last a long time. They are the perfect model to study for a painting. Don’t worry which color you pick because as you paint, you can color them however you wish. The cut flowers can also be purchased fresh, in bouquets, or in artificial form. Most discount stores carry clusters of mums in a wide variety of colors, including white, during the autumn season.
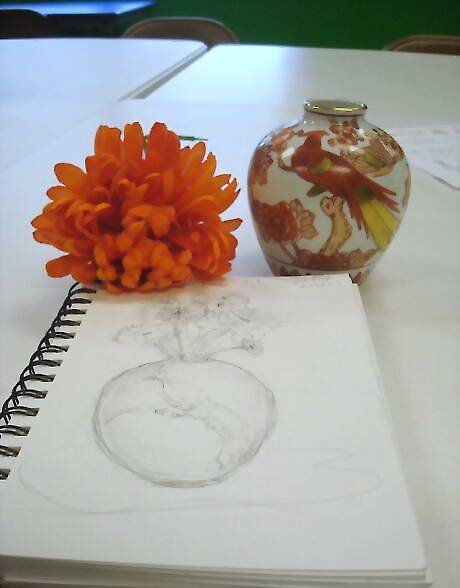
Study the flowers, stems and leaves. Sketch them in your sketchbook to discover the various ways of depicting them.
Look at mums on the internet. Find pictures of live ones growing in a garden as well as illustrations and paintings of the flower in vases and pots. This research will help you decide how you want to handle the subject.
Setting Up
Prepare your supplies and work area. You will need a place with a good view of the plant. Have all supplies, including your water, on the side of your dominant hand. This is to avoid getting unintentional drips on your painting. Immediately, activate your colors with a few drops of water on each pad or squeeze of color.
Hold your watercolor paper in either orientation. Begin to sketch in pencil making circles for the flower blossoms. Drop a double line down from the center of each circle to represent the stem, even if it will eventually be covered by leaves. It is a good idea to know the direction of growth in a live plant or placement for each flower in a bouquet in a vase. This gives a sense of life and realism to the subject.
Treat the vessel holding the flowers with care. Try to get both sides of the pot or vase to agree as to angle or curvature. A quick way to do this is to cut out a template of the vessel from printer paper. Fold the paper in the center, draw one side of the vase or pot. Hold the paper on the fold and cut along your drawn lines. Open the paper and place it on your watercolor paper. Having this cut shape allows you to play with placement. If the height or size is off, repeat the process and make another template. This method is freeing. It allows you to include very intricately shaped vases without spending a long, frustrating time trying to get the sides to agree.
Think about the background and imagine various ways you might treat it. If nothing comes to mind, go back to references on the internet to see how others have handled the background. The possibilities are endless. A wash of a contrasting color or colors. Dropping black behind the flowers for drama. Leaving the white of the paper gives the illusion of a botanical sketch. Adding a curious cat or dog nestled within the flowers adds a personal touch. Birds, butterflies, bees or dragonflies add life as well.
Painting
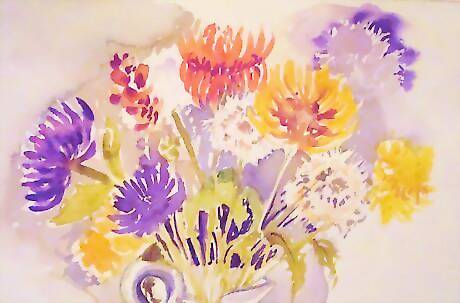
Paint a first wash on the piece. Begin wherever you wish. A common starting place is with the bright flower heads. Simply lightly cover the circles with a thin wash of color to plot their movement over the page. Wash in greens for the leaves and stems. No need to worry in this first wash about details. Let the piece dry thoroughly.
Return to the painting and begin putting in as many details as you wish. Fast short strokes will bring the flower to life as a mum. Do concentric rows of these working around the center of each flower. Some mums have centers that show as a little yellow button, but some do not.
Put veins in some of the leaves. Use a darker color or, if desired, plan ahead and leave light veins by painting around them.
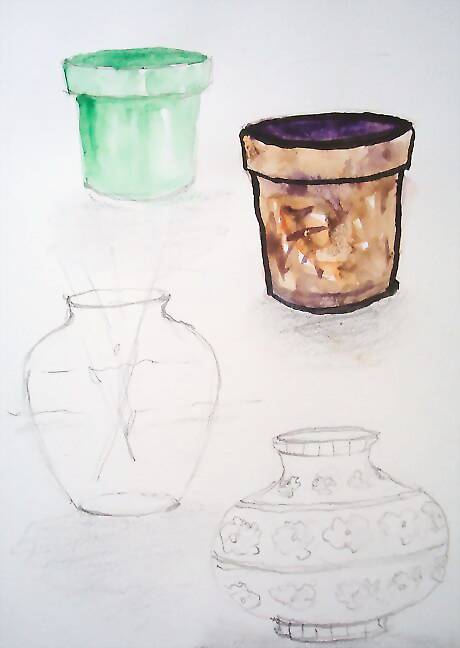
Work on the container as much as you wish. If it is a standard plastic nursery pot, it can be done in a few strokes. A terra-cotta pot can have a lot of character, blotches and stains show years of wear. A fancy vase might require some extra time and delicate painting with a small, pointed brush. If the flowers are in a clear glass vase in water, another approach is required which allows the viewer to see through the glass to the opposite side of the surface on which it is standing. Extra care can be taken with the placement of the stems, too. Remember, the three important things about doing vases: Be sure the ellipse or curvature at the foot of the vase carries up and is repeated on the mouth of the vase. Avoid a flat, straight across line. Also, if there are designs on the vase, have them adapt to the shape of the vase and not be painted flat. Stripes going around the vase need to contour to the roundness of the object. Finally, every arrangement will cast a shadow on the table surface. Keep it transparent, neutral in color and do it fast and in one swipe. Do not try to alter or edit that shadow shape.
Finishing Up
Stand up your finished painting and study it. Analyze the space that the flowers take up and the surrounding “negative” space. If either needs work, add more elements to fill out the composition. Let it dry overnight to really see how it is going to look. Wet watercolor paper takes a long time to really dry and appears gray when wet.
Hang your work for all to enjoy. Seeing it will inspire another painting. Possibly of the same subject, but perhaps another entirely different one. This is the joy of painting, always moving forward and working on a new challenge.


Comments
0 comment