
Preparing Yourself
Gather your supplies. If you’re lucky enough to last two weeks in the game, you’ll notice the weather slowly growing colder and the aesthetics of the game gaining a cooler tone. This sets in by day 16 of the game, and if you’re caught unprepared, then you’ll definitely freeze to death. So before anything else, before day 16 hits and you’re left frozen, make sure to gather as much materials and resources as possible. Items like Berries and Saplings don’t grow back during Winter, which means you wouldn’t get any of those for 16 days. You need possession of at least a Science Machine before winter, but an Alchemy Engine is even more preferable. With them around, you could create many sources of food, protection, and warmth you’ll be needing for the harshest 16 days of your playthrough. Even if you’re playing Reign of Giants, Winter is still the harshest season of the game. Preparation must start at day 14 at the absolute latest, since you’ll be using day 15 to do some last-minute checking and to brace yourself against the cold, figuratively speaking. You can gather most of your necessary materials by going up to it and left-clicking (PC) or pressing X (PS4) on the item. Berries, Carrots, Stones, Flint, Twigs, and Cut Grass must be stockpiled obsessively since Berries and Twigs don’t grow in the winter. Carrots, Stones, and Flint don’t grow back, and Grass grows extremely slowly in the winter. Carrots can be found poking out of the ground. Berry bushes are scattered around the world. Stone and Flint can be picked up anywhere, though Stone is less common. Twigs come from dried-out bushes called Saplings, and Cut Grass can be gathered from long, yellowing tufts of grass found nearly everywhere in the world. Stone and Flint can be more easily acquired by mining boulders with a pickaxe, and Logs have to be chopped from trees with an axe. You’ll be needing at least a Pickaxe and an Axe to gather some of the required materials for prolonged survival. They’re both available through the Tool tab, represented by a crossed axe and pickaxe icon. Axes cost 1 each of Twig and Flint (sharp-looking rock that’s scattered everywhere in the game), while pickaxes cost 2 each of the same materials. To use, select them by right-clicking on the tool (PC) or scrolling to it with the right analog stick and pressing the right button of the D-pad (PS4). Go up to the tree (axe) or boulder (pickaxe) and hold down the left mouse button (PC) or X button (PS4) to wear them down to states you can gather with. Making a Science Machine requires a Gold Nugget, 4 Logs, and 4 Stones, and is made in the Science tab, which is located in your crafting hotbar (right-hand section of your screen on PC and L2 on the PS4) and represented by an atom icon. An Alchemy Engine can be made in a Science Machine for 3 Cut Stone and 4 Boards under the Science tab. You can gather Gold Nuggets by trading Meats to the Pig King (if he’s available in the current world); mining yellow-streaked Boulders, which are dominantly available in rockylands; or finding them scattered around Graveyards. Trees are not affected by winter, and you can keep planting as many trees as you want in winter and keep chopping them down. To plant a tree, you need a pinecone dropped from felled trees. Select it and right-click (PC) or press the left direction button (PS4) on your chosen spot to place your tree. In about a day in the game, your tree will sprout up into an actual tree, which you can chop down immediately. You can also wait another day or so for it to grow bigger, and thus yield more wood. Small trees only yield 1 log, bigger trees yield 2 logs, and fully grown trees yield 3.
Grab food. Aside from Berries and Carrots, you need Meats and perhaps even plant a few crops to stockpile. You can acquire meats easily through trapping, and you’ll need a farm plot to grow produce. But only trapping remains a steady source of food during winter, since farm plots freeze over when winter hits. To make a trap, you need 6 Cut Grass and 2 Twigs, and you can craft it in the Survival tab, represented by a looped rope icon. Once created, place it near or on top of a rabbit hole, which is a small hole in the ground found in grasslands and savannahs, then wait until a rabbit is caught. Once caught, the trap will rattle and jump around. If you pick it up, you’ll get both the trap and the rabbit. You can then re-use the trap for 7 more times before it disappears. You’ll need to “murder” the rabbit before you can make use of the meat, though. Right-clicking (PC) it or pressing the right direction button (PS4) when a rabbit is selected will do the trick. With a Science machine, you can also craft a Bird Trap for 3 Twigs and 4 Silk through the Survival tab, and functions similarly to a trap, but only catches birds. You can get silk from killing Spiders, which are normally found in their Dens, which resemble a white mound with cobwebs. To make a farm plot, you need at least a Science Machine, and you can make through the Food tab, represented by a buried carrot icon, for 8 Grass, 4 Manure and 4 Logs. You can get Manure from Beefalo, which excrete them regularly at random intervals and found in savannahs. You can also get Manure by feeding a pig, found individually in random spots in the map or collectively in huge villages normally found at the end of roads, with some non-meat food (berries, carrots, produce from farm plots, cave bananas, etc.), excluding seeds. Once you’ve placed the farm plot, you can place a seed into it by selecting the seed and interacting with the farm. You can either wait for it to grow slowly throughout the day or pile manure on it until it grows. Once grown, simply interact with the crop to gather it, and congratulations! You now have some food! There is a better version of a farm plot that grows crops faster. You can make it through an Alchemy Engine for 10 Grass, 8 Manure, and 4 Stone. But they both yield the same crops either way.
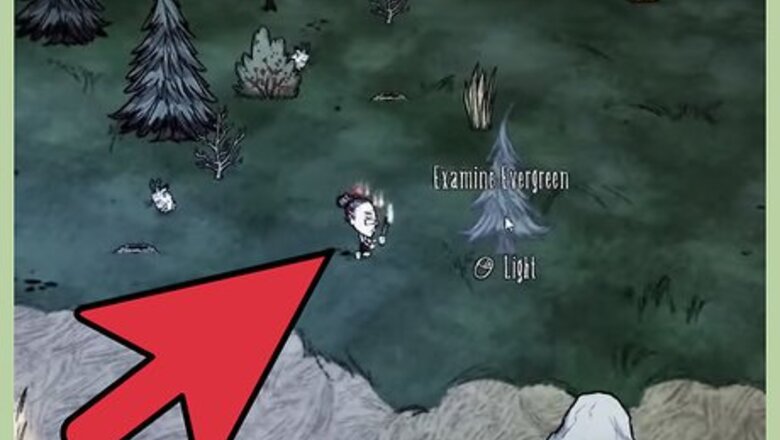
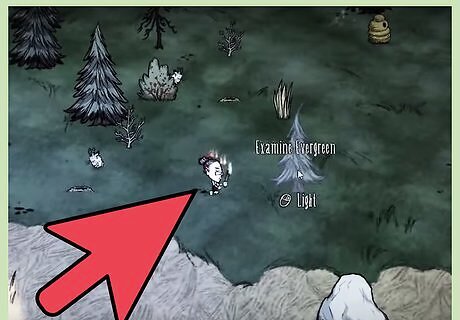
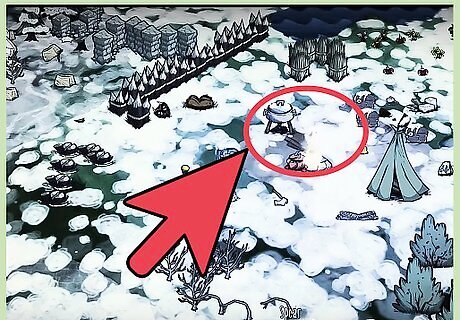
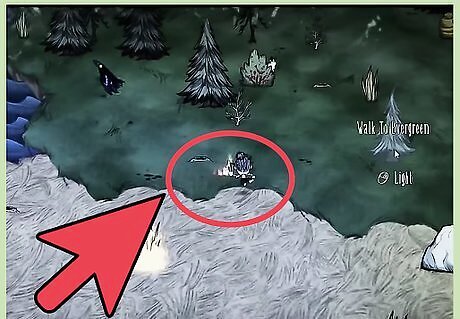
Build your camp. While Don’t Starve doesn’t have any traditional building mechanics like other sandbox games, you can still make an impressive hideout for your survival needs. At the very least you’ll need at least a Pit Fire, 5 Drying Racks ready and Drying Meat, plus some storage for leftover vegetables and berries from your foraging ventures. To make a Pit Fire, you need 12 Stones and 2 Logs. You don’t need your Science Machine or Alchemy Engine to make one. Head over to the Light tab, represented by a flame in your crafting hotbar, then select the second option there. Pit Fires are permanent structures and can keep you warm for a very long time as long as you keep feeding it fuel. Even when it’s extinguished, you can simply rekindle it by dumping fuel into it. You can also make regular Campfires for 2 Cut Grass and 2 Logs, but it isn’t permanent, and you have to keep it going indefinitely or it extinguishes and leaves only a pile of ashes. You can also make a torch with 2 Twigs and Grass, which provides you temporary portable light and heat, but isn’t as good as Campfire or Pit Fires. To feed fuel to a Campfire or Pit Fire, select some flammable material (logs, grass, twigs, manure, petals, and grass or log suits are some flammable material), then interact with the fire by clicking on it (PC) or pressing X (PS4). It will immediately drop the fuel into the flames and consume 1 unit of said material. To create a drying rack, you’ll need 3 Ropes, 3 Charcoals, and 3 Twigs. To use, simply select a piece of meat of any kind, except meaty bulb, and interact with the rack. The meat is then placed on the rack and dries into jerky in a few days, which is one of the best foodstuff in the game. Keeping plenty of jerky around during winter is a great way to keep yourself alive, healthy, and sane. You can get charcoal by burning down a tree with a torch, but you have to be careful since fire spreads, and you might accidentally burn down your entire campsite with a single careless flame.
Surviving through Winter
Keep warm. Keeping warm is the most vital part of winter survival. At dangerously low temperatures, you’ll start freezing, which decreases your health periodically in huge amounts. There are many ways to keep warm, such as staying near your fire, wearing clothes, or carrying a thermal stone in your inventory hotbar. Clothing can be created through the Dress tab, which is represented by a green top hat icon. The easiest to make is Rabbit Earmuffs, which costs 2 Rabbits and 1 Twig, and can be crafted through a science machine. The warmest clothing require hard-to-get materials, so unless you want to expend a lot of effort into getting them or have gotten them early enough, then by all means, make them! Once you have an Alchemy Engine, you can craft a thermal stone in the Survival tab, for 10 Stones, 3 Flints, and a pickaxe. To use, drop it on the ground next to a fire, then wait until it turns bright orange. Then pick it up and keep it with you always! Placing it directly in your crafting inventory would keep you much warmer for a long time than keeping it in a backpack. Alternately, you can simply let it recharge by standing near a fire.
Hunt whenever you can. Your only reliable source of food is Meat. While you may have some vegetables and berries left over in scattered bushes, farm plots, and maybe even a few carrots left in the ground, they’ll eventually run out if you rely on those. Trapping rabbits and birds will be your most reliable method of procuring food throughout the game, and must be done in a regular basis to supplement your stockpiled rations.
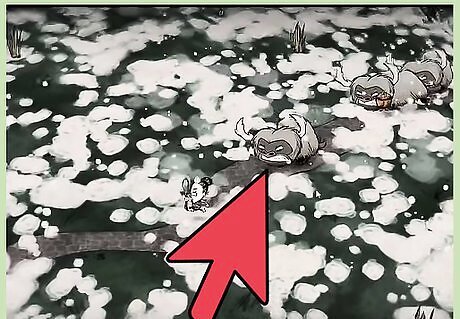
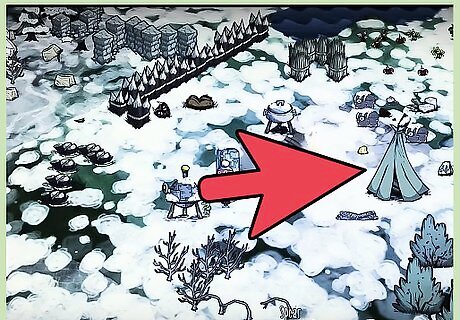
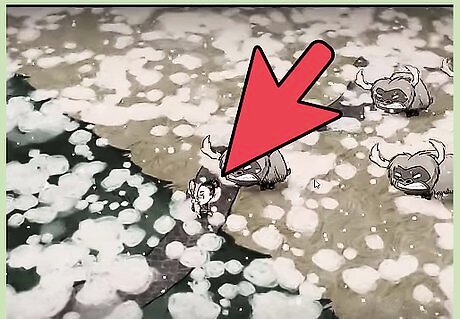
Avoid the winter mobs. Once winter sets in, two very dangerous mobs spawn. One of them is the Walrus Hunting Party, and the other is the extremely dangerous Deerclops. Tackling them unprepared is tantamount to suicide, and even with ample preparation you’ll still have the short end of the stick during encounters, so it’s best not antagonize them unless you’re feeling very lucky or have acquired late-game weapons and armors. Walrus Hunting Parties spawn in pre-determined campsites. They’re distinguishable by a reddish circular marking on the ground during the warmer season and becomes a full-fledged igloo once the cold sets in. If you look at the map (tab on PC, touch pad on PS4), it would be represented by an igloo regardless of season. The Walrus duo are active in the day and sleep at night, and have two Blue Hounds guarding the igloo. If they spot you, they’ll trail after you over a huge distance and can be very hard to shake off, much less defeat, though thankfully they only start attacking you if you’re near them or if you hit them first. Deerclops immediately spawn in random areas of the map once winter sets in and will roam around until it finds the player. Deerclops are much more dangerous than the other winter mobs, and would gleefully trample and demolish your camp if it manages to find you there. Don’t even try to fight it if it does find you. Just hit it once to lure it away from your camp and keep running until it loses interest.


Comments
0 comment