
views
Identifying Veins by Eye
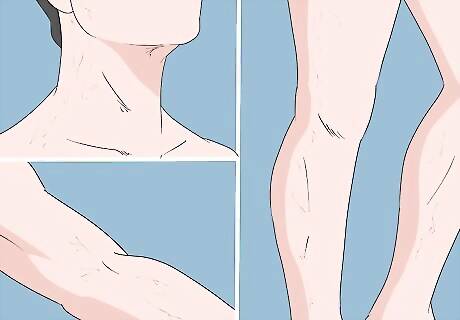
Inspect the arm, leg, or neck to find a vein near the surface of the skin. There are veins all over your body, but it can be kind of difficult to find a vein on thicker surfaces of the body. Start with the neck, or grab an arm or leg to look for a vein. They tend to be more raised and visible in sections of the body with less fat tissue.Tip: The most common vein to draw blood from is the median cubital vein, which is located in the crevice of the elbow, where it travels at a downward angle from the basilica vein to the median cephalic vein. This is the most common vein because it’s large and easy to locate. While it’s perfectly fine to draw blood from a vein, you never want to draw blood from an artery. Arteries carry blood to the heart, while veins send it out, and you don’t want to deprive the heart of blood returning to the ventricles and aortas. You can’t visually see arteries the way you can see veins. Arteries blend into the skin because they aren’t as close to the skin’s surface. They also aren’t raised on the surface of the skin the way veins are, which makes them hard to notice if you’re looking with a naked eye.
Inspect the surface of the skin in the arm, leg, or neck for a blue track. Hold the section of skin that you’re inspecting steady and look carefully over the surface. Look for bluish-green tracks, roughly 1–2 millimetres (0.039–0.079 in) in width running across the surface of the skin. Many veins run vertically up and down the limbs and neck, but you should be able to make out a few smaller veins connecting to larger veins in the arms, hands, legs, and neck. You’ll have an easy time finding veins on the top of the hands if you can’t find them anywhere else.

Feel the surface of the skin to see if it’s elevated and confirm a vein. On thinner individuals or people that work out, you’ll be able to feel the vein protruding from the skin a little bit. Run your hand lightly over the surface of a vein. If it feels elevated, you definitely have a vein. If you have trouble feeling the vein and it’s in an arm, wrap a tourniquet above the vein to restrict blood flow and raise the vein. A tourniquet is a rubber or cloth length of material that you tie tightly above a vein to restrict blood flow to the limb. This raises the pressure in the vein, making it easier to notice. Never wrap a tourniquet around someone’s neck. Tourniquets can also be used to prevent someone from bleeding out. They’re a good thing to have lying around if you’re an EMT, nurse, or medical professional.
Taking Vascular Ultrasounds
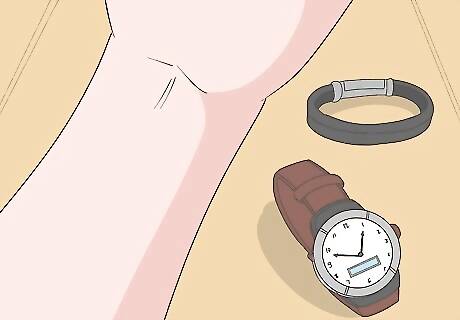
Ask the individual you’re testing to remove any jewelry or clothing in the area. You can take a vascular ultrasound, also called a Doppler ultrasound, on any part of the body. Ask the person that you’re testing to remove clothing from the 6–12 inches (15–30 cm) of the body that you’re testing. Request that they remove any jewelry that are near the area as well, since jewelry can interfere with the test.Tip: While you can certainly see veins in an ultrasound, you should have an easy time isolating the artery by looking at the direction of the blood flow once you turn the color box on. Veins flow away from the heart, while arteries flow towards it. You’re also more likely to find an isolated artery under the surface of the skin since you can see them pulsing. A vascular ultrasound sends sound waves through a section of the body and uses the sound waves to generate a two dimensional image of the arteries and veins.
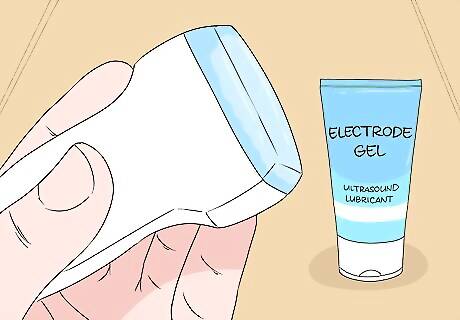
Rub water-soluble gel on the surface of the transducer’s sensor. You need an ultrasound lubricant to be able to freely move the transducer around to get a clean image. The lubricant will also create a bond between the skin and transducer, allowing sound waves to pass through the skin. Put on a pair of latex gloves and use the squeeze nozzle to apply gel to the sensor. Rub the gel around the sensor until it’s fully covered. The sensor is the semi-flat cover on the end of the transducer, opposite of the cable. Make sure that the transducer has been sterilized and thoroughly cleaned before using it on someone. Use as much gel as necessary to completely cover the transducer. It’ll be cold for the person you’re scanning, but it won’t create any practical problems if you apply too much gel.
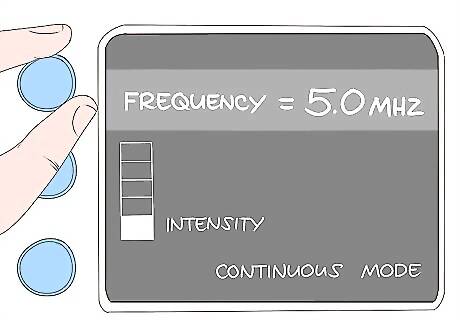
Turn the ultrasound machine on and change the settings. Turn the ultrasound machine on, and follow the necessary menu prompts to set the machine to the “ultrasound” setting. Change the frequency to 5.0 MHz for a vascular image by pressing the button or turning the dial. Turn the intensity all the way down to the lowest setting and work up from there. The ultrasound must be set to “continuous” mode if you want a consistent image and aren’t simply trying to take a single image. If the area is inflamed or swollen, turn the head warming settings off to keep the transducer cold if it has a head-warming function. The frequencies on an ultrasound machine are changed based on what you want to see inside of the person you’re testing. For example, you would use 2.5 MHz for a gynecological image, but 15 MHz for bones or muscle. You may need to modify the frequency slightly based on the individual you’re scanning.
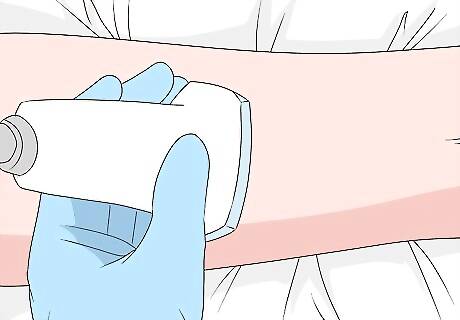
Stick the transducer on to the area you’re testing and look for an artery. Place the transducer on the surface of the skin where you’re searching for an artery. Move the transducer around to spread the gel over the area where you’re looking. The artery will usually look like a blank or empty tube since you can’t see blood in a black-and-white ultrasound image. The muscle will be white/gray and stringy looking. The artery shouldn’t have any color in it. If it does, try adjusting the frequency until the artery looks hollow. If you look on an arm or leg at an angle where you’re looking into the artery or vein, you’ll only see an empty circle.
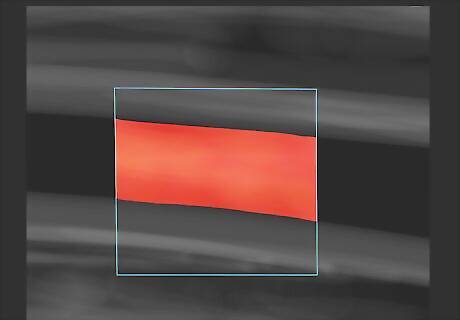
Turn the thermal reading on to monitor the flow of blood. Since blood is a different temperature than the rest of the body, and because it moves, you should be able to see whether blood flow is restricted or free in an artery by switching the thermal setting on your transponder. You will be able to see the blood flow through the artery in the color box on your screen. A range from positive 27 cm/s to -27 cm/s should be a solid range for gathering data on blood flow in an artery. If you’re struggling to find an artery, try following an empty space horizontally to see if you’re looking at a single length of hollow space. If you can’t see any blood flow on your screen and you’ve adjusted your settings several times (and you aren’t testing a cadaver), you most certainly aren’t looking at an artery.
Check whether a lumen pulses when flexed to tell an artery from a vein. While looking at a live image, if you’re looking at 2 lumens and are trying to figure out which is the artery and which is the vein, ask the patient to flex their muscles. As the vein and artery contract, the vein will close and open smoothly, while the artery will pulsate a little. You may also notice that the artery closes much slower than the vein. This pulsing motion will look sort of like a slight shiver. The lumen will open and close repeatedly as it forces blood through. You can also add more pressure to the transducer to make the vein collapse while the artery stays open. A lumen is a medical term for the hollow, tube-like structure that is found in veins and arteries. Some arteries won’t close at all. Veins will always close though.
Assessing Images of Arteries and Veins
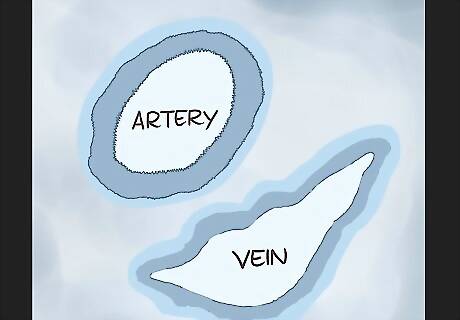
Compare the firmness and thickness of the walls. If you’re looking at a microscopic or thermal image of an artery or vein, start by looking at the wall of the lumens, which are the hollow tubes in a human body. Veins have thinner walls than arteries, and a vein’s walls usually have indentations around the circumference of the opening. When looking at a pair, the artery is the one with the thicker, smoother walls. The artery will almost always be a little smaller than the nearest vein as well.
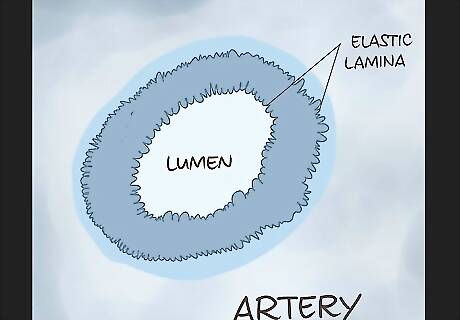
Look for the elastic lamina to identify an artery. Arteries have a sequence of elastic fibers running along the circumference of its lumen. This looks sort of like a crumpled-up set of fabric, set in an accordion pattern. This lining is known as the elastic lamina, and it’s only present in arteries. If you see the elastic lamina, you’re definitely looking at an artery.Tip: Arteries tend to be stronger than veins, so the internal lining of an artery has an extra layer. This is why the elastic lamina is present in arteries and not veins.
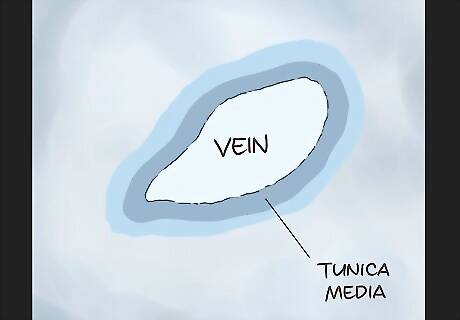
Inspect the space between the wall and muscle to spot a vein. When looking at a thermal or microscopic image of a vein, inspect the space between the edge of a vein’s lumen and the muscle, which will be stringy and textured. If this space lacks texture and is mostly smooth and thin, you’re looking at a vein. This section of the vein is known as the tunica media. The corresponding section on a vein looks pointed and textured, kind of like a distressed rug.


Comments
0 comment