

Doing the Scratch Test
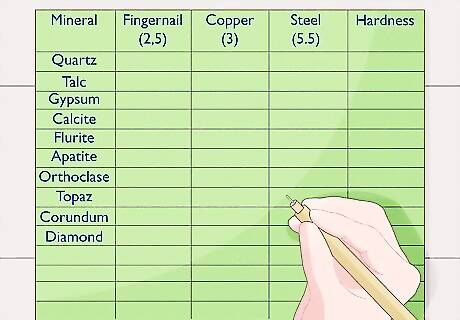
Make a chart if you want to plot your results. If you're testing more than 1 mineral and want to keep track of the data, get out a piece of graph paper and list the mineral samples on the left column. Then, make 5 columns along the top of the paper and write these in the spaces from left to right:Tip: These columns help you keep track of what you use to scratch the mineral or what substances your mineral is able to scratch. If you're only testing 1 or 2 minerals, feel free to do the test without recording the data on a graph. Fingernail (2.5) Copper (3) Steel (5.5) Quartz (7) Hardness
Take a mineral and try to scratch it with your fingernail. Always start the scratch test with the softest material, which is your fingernail. Take your first sample and try to scratch the surface with your fingernail. If your fingernail doesn't leave a mark on the mineral, try to scratch it with something harder. Write down your findings and continue the scratch test.
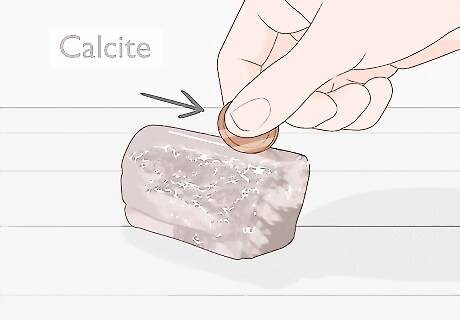
Try to scratch the mineral with a copper penny. Work with the same mineral sample and get out a copper penny. The penny has a hardness level of 3 compared to the 2.5 hardness of your fingernail. See if this harder material leaves a mark on your mineral. If you get a scratch with the copper but not with the fingernail, you know that the mineral has a hardness of at least 3 since that's the hardness of the copper. If you're unsure whether your mineral or the penny is harder, try scratching the penny with the mineral. If the mineral leaves a mark, the mineral is harder.
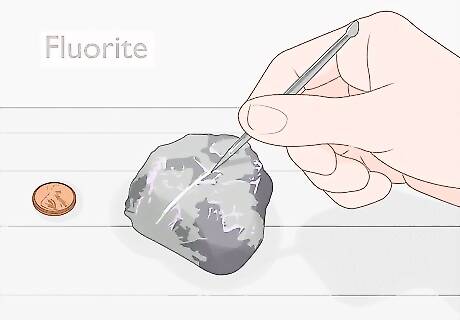
Use a steel nail to scratch the mineral. Next, try to scratch the surface with the sharp end of a steel nail. If it leaves a mark, this means your mineral has a hardness of at least 5.5. If it doesn't leave a mark, the mineral must be below a 5.5 hardness, which will help you narrow down the mineral when you interpret your results. You can also use a pocket knife or rock hammer for this part of the test.
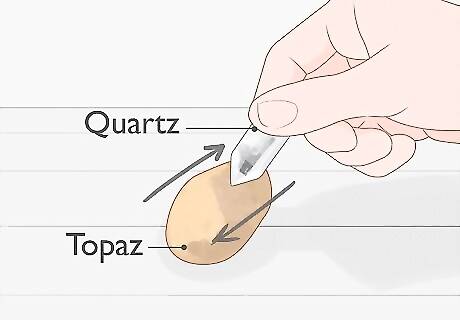
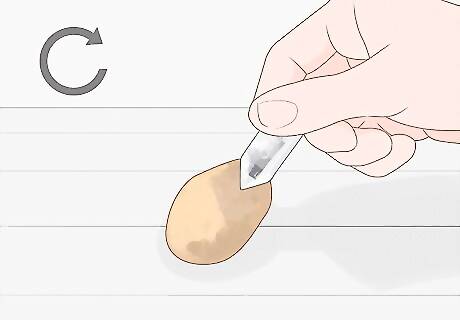
Rub a piece of quartz against the mineral to see if you can scratch it. At 7, quartz is one of the hardest objects you might have around the house to use in the experiment. Really push the quartz hard against the surface of your mineral and try a back and forth movement to leave a scratch. If the quartz didn't scratch your sample, your mineral is harder, which means it could be topaz, sapphire, or diamond.
Repeat the scratch test for each of your minerals. Once you've tested the first mineral, repeat the process for each of your mineral samples. If you're tracking the info on a graph, now you can look at results and write the minerals' hardness in the right-hand column.
Interpreting the Results
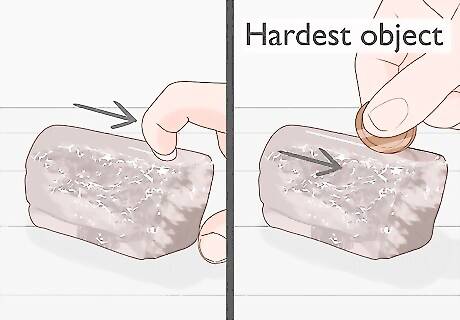
Figure out the hardest object that was able to scratch the mineral. Since an object can only scratch the mineral if it's the same hardness or harder, look for the hardest object that was able to scratch the mineral. This lets you know that the mineral can't be harder than this object. For example, if both your fingernail and the penny were able to scratch the mineral, the penny is the harder object.
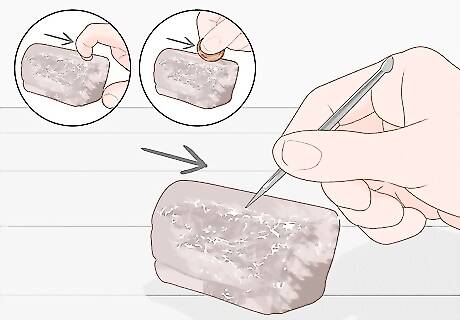
Locate the object that couldn't scratch your mineral. Your mineral's hardness falls between the object that could leave a mark and the one that doesn't. This helps you narrow down the range of your mineral's hardness. For example, if your fingernail and the penny were able to scratch the mineral but the steel nail couldn't, your mineral can't be harder than a 3.
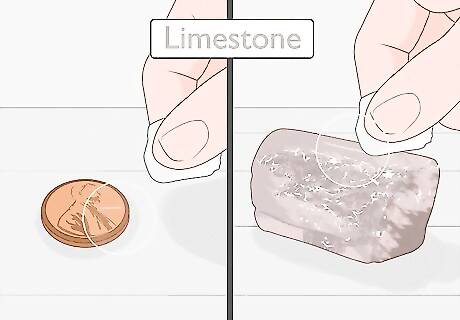
Decide if the mineral is the same hardness as one of the scratching objects. You might find that you can't easily tell if an object scratched the mineral. This can mean that they're about the same hardness, especially if you try to scratch the object with your mineral sample and you get the same result. If you're trying to rub a limestone sample against a calcite sample or the copper penny, they might make faint scratches since they all have a hardness of 3, for instance.
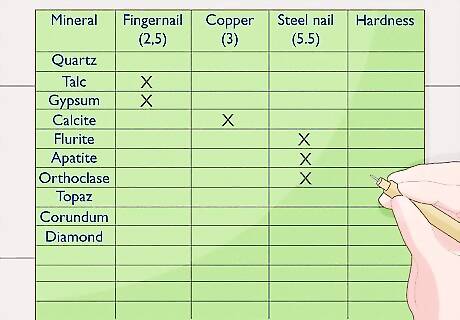
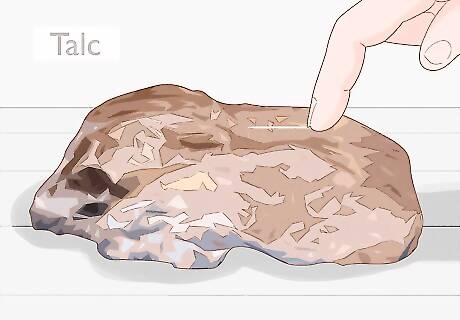
Look at the Mohs hardness scale to identify the mineral. Check all of your data to narrow down a hardness level for your mineral. Then, look at the Mohs hardness scale to identify minerals that have the same hardness level.Did You Know? These are the 10 minerals by hardness level on the Mohs hardness scale:1 Talc2 Gypsum3 Calcite4 Fluorite5 Apatite6 Orthoclase7 Quartz8 Topaz9 Corundum10 Diamond For example, if the copper penny (3) didn't scratch the mineral but a steel nail (5.5) did, you know that the hardness is between these. You can safely estimate the hardness of your mineral to be 4, which might be fluorite.


Comments
0 comment