
- On a digital microphone, set the decibel level to -6 to -12 dB. Use the dial on your microphone to change the gain—the further clockwise you turn it, the higher the gain will be.
- Use a preamp if you have an analog microphone. Find the "gain" or "trim" dial and set it to -8 to -12 dB.
- On both microphone types, test your settings by making recordings and listening back to them. Then, use the dials to finetune the gain levels as needed.
Tuning Digital Microphones
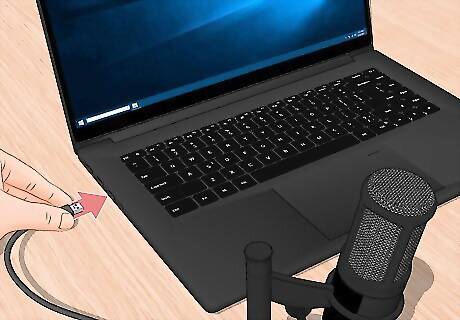
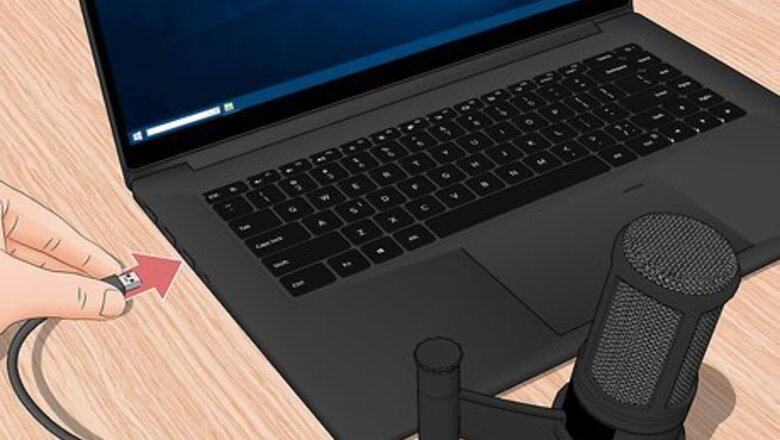
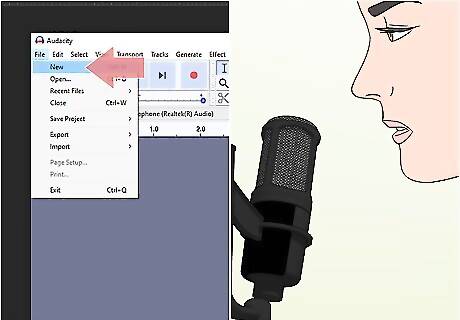
Plug the mic’s USB cord into a device and open the recording software. Select a spot near where you plan on recording. Choose a safe spot, like a desktop, and make sure you have plenty of room to get up close to the mic. Then, plug the mic’s USB cord into your computer. Open the recording software so you’re able to get an idea what sounds your mic is detecting. Try to arrange your equipment the same way you will when using it for a performance. It can save you some time later, but it also helps you adjust the gain more accurately. Digital mics are very easy to adjust, but you should still test them ahead of time to ensure the gain level is correct.
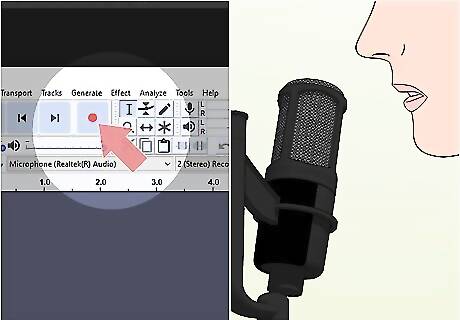
Press the record button and speak into the microphone. Think about how you plan on using the mic once everything has been set up. Stand in the same spot you plan on being for the official recording. Speak at the same volume you plan on using for the performance. You will end up with a more accurate test this way. Say or sing a few lines while the mic is on. If you’re using the mic to pick up sound from an instrument, play the instrument to perform the test. Make sure any other equipment you’re using, such as amplifiers, have been set up. You don’t need to create a long test recording to adjust the gain. Just do a short soundcheck, such as by reading a few lines or playing part of a song.
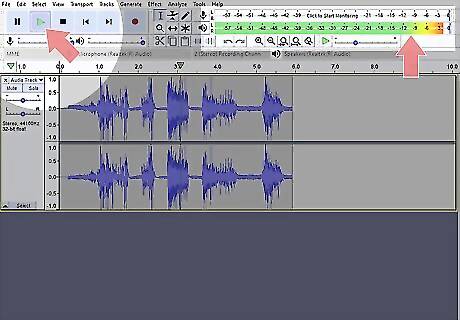
Use the sound software on your recorder to play back the test audio. Press the playback button in the recording program on your computer. Every program has a decibel (dB) meter you can use to monitor volume. Listen to the audio quality as well. When the meter fills up, the recording usually distorts and becomes unpleasant to listen to. If the meter stays at a low level, the recording most likely will be too soft. Audio clipping happens when the decibel level increases too high, usually above 0 dB. Clipping causes the audio to sound distorted, and distorted recordings are almost impossible to fix. Some recording software has an active meter so you can watch the dB level while the microphone is in use. Check the microphone tab in the recording program.
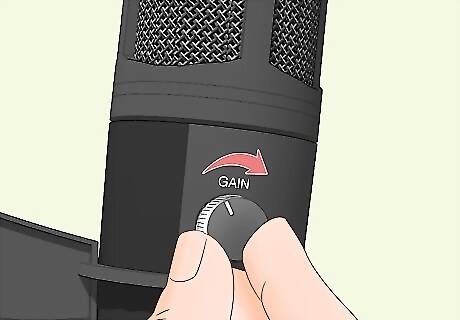
Turn the dial on your microphone clockwise to increase the gain. Most USB microphones have control knobs right on them, so adjusting the gain takes no time at all. Locate the dial, which will likely be marked gain and have a small, white stripe on it. Raise the gain to increase the volume. Turn the dial counterclockwise to lower the gain and decrease the overall volume. Think of the dial as a clock. When its white stripe points upward, to the 12 o’clock position, the gain will be pretty much nothing. It usually needs to be closer to the 2 o’clock position to make a difference in the sound quality. Gain dials usually aren’t labeled with numbers or settings, so you will have to adjust it manually through frequent tests.
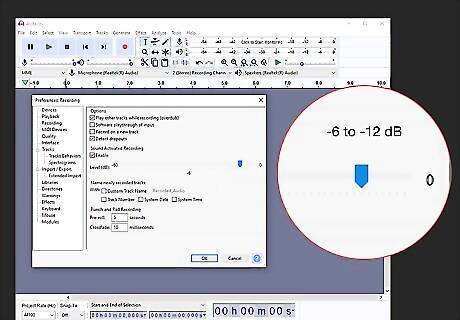
Set the decibel level on the microphone around -6 to -12 dB. The decibel level indicates how loud a recording sounds, but using the wrong level can make it too soft or too distorted. The loudest parts of the recording should be around -6 to -12. Watch the decibel meter through your recording software while also listening to the audio quality. Raise the gain if the recording is too soft, or lower it if it has noticeable clipping. The proper gain setting can vary a lot depending on the type of recording you’re doing. If you’re just talking into a microphone, a high setting like -6 dB will be fine. If you’re playing a loud instrument, set it lower to avoid clipping. When the gain is at a low dB setting, you can get louder without getting sound distortion. Normally, you should set the gain so the volume is consistent, but leave it a little lower if you expect the sound to get louder at any point. For example, at a -2 dB setting, you have to speak at a consistent volume to avoid clipping. If it’s at -10 dB, you can get a little louder sometimes, such as by speaking louder when you get excited or turning up an instrument’s volume.
Record more test audio to make additional adjustments to the gain . Each time you make an adjustment, start a new recording. Play it back while watching the volume level and listening to the sound quality. Then, make further adjustments to your mic as needed. At the right setting, you can make a quality recording that is enjoyable to listen to. Keep testing the audio and making adjustments to it until you’re happy with it. Sometimes, finding the right settings takes some time.
Using Analog Microphones
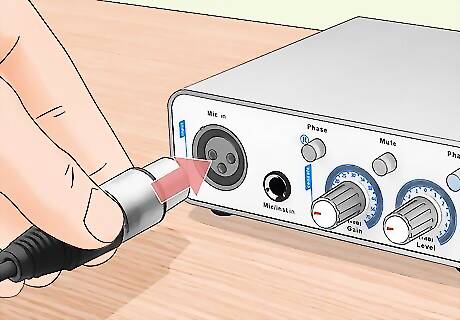
Plug the microphone into a mixer or preamp to control the gain. Analog mics don’t have their own gain controls, so they have to be plugged into something else to pick up sound. The simplest way to do this is by connecting the mic directly into a slot on a mixing board connected to a sound recorder. Mixing boards often have several different spots to plug in microphones, so they are great for recording things like live music. They also have separate gain controls for each mic you plug in. A preamp picks up the signal from a microphone and pumps it up so it sounds louder. It gives you a higher-quality recording that you can then edit later. If you’re using one, it will have its own gain control. Note that some places, like many concert venues, have sound systems that include mixing boards. Plug your recorder and microphones in there.
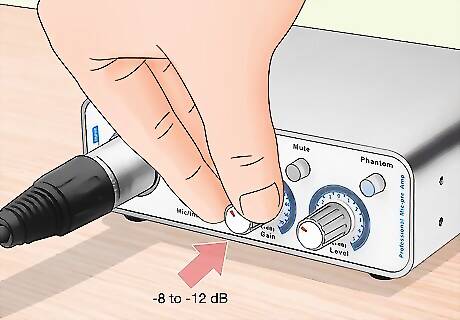
Rotate the control dial to set the gain to -8 to -12 dB. The dial will be labeled as “gain” or “trim.” It is well-labeled and numbered on most mixers and preamps. You usually have to turn it clockwise to set the gain to a negative rating. Keep the gain relatively low so the sound level isn’t too loud. If your device doesn’t have a labeled gain dial, turn it clockwise to about the 2 o’clock position. Then, make a recording, listen to it, and fine-tune the setting.
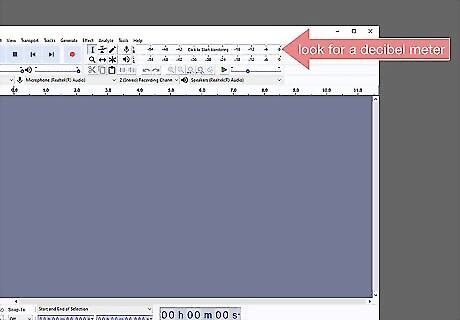
Turn on the sound recorder so you’re able to hear the microphone’s audio. Make sure your recorder is plugged into the mixer or preamp. If you’re using a computer, open up the recording software. Look for a decibel meter tracking the volume level coming from the mic. You can use this to figure out the best gain setting.
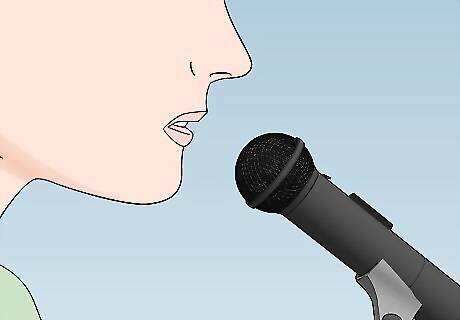
Speak a few lines into the microphone to create a test recording. Stand in front of the mic like you will during the recording. If you’re doing a vocal performance, speak or sing at the same volume you plan on using later. If you’re playing an instrument, tune it before playing it. Make sure any other devices you’re using, like amplifiers, have been hooked up and adjusted to the proper settings as well. Many mixers and recording software have meters that light up while a mic is in use. Watch the meter to see what decibel level the audio reaches so you can make adjustments to it.
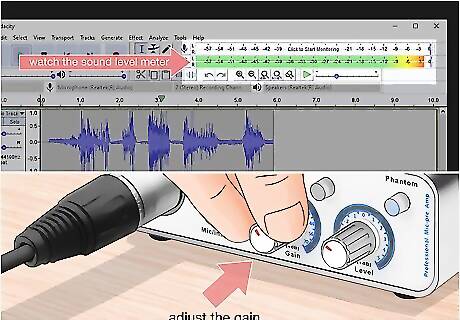
Change the gain level according to the test audio. Listen to the sound quality while playing back the recording. If you’re using recording software, watch the sound level meter in it. Note any spots that sound loud or distorted, and turn the gain down a little to compensate. Go back and make another test recording to ensure that the gain is right where you want it. If you’re using multiple mics, such as to record different instruments during a concert, check the gain on each one. Make sure the audio levels are relatively similar for each one. If the recording sounds soft, bump up the gain level a little to increase the volume. However, be careful, since the audio can become distorted when the sound gets too loud.


Comments
0 comment