
Prepping Your Eyelids
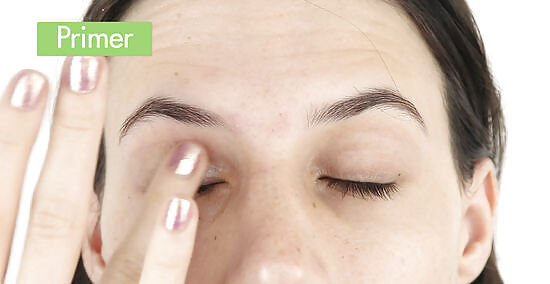
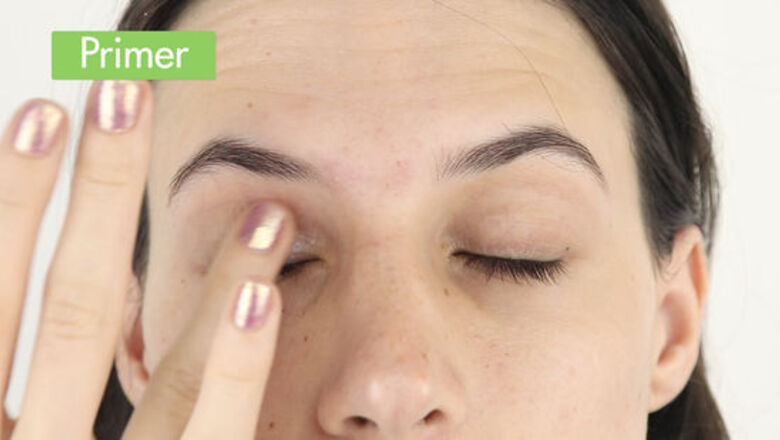
Apply a makeup primer. This step is too often skipped, and it makes all the difference in terms of how your makeup holds up throughout the day. Makeup primers smooth the skin and create a soft, even base for the eyeshadow to adhere to. It helps to make sure that your eyeshadow doesn’t smudge or crease throughout the day – 2 things that would ruin your matte look. Use your fingertip to apply primer all over your lid, extending up to your brow. Let it absorb for a couple of minutes before moving on. You can buy makeup primer at your local drugstore or beauty supply store.
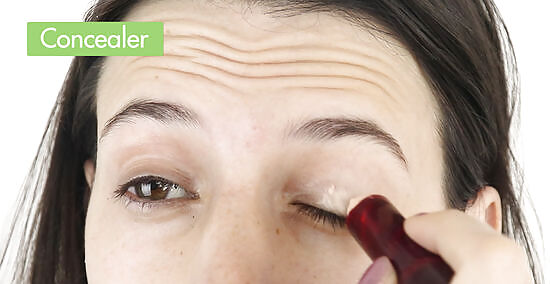
Blend concealer over your entire lid. Once your primer has been absorbed, apply a dot of your favorite concealer to each lid. Use your fingertip or a small brush to blend that over your eyelids and up to your brow. Eyelids can often be slightly discolored or blotchy, and this will help create a smooth, even-toned base for your shadow. If you prefer, you can use a neutral, flesh-toned shadow in a matte finish instead of concealer.
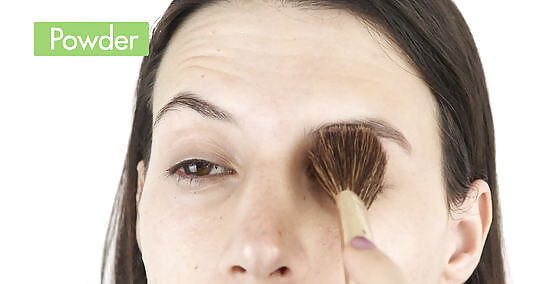
Set your concealer with powder, if needed. If you’ve used an eyeshadow primer and let your concealer dry, you can go ahead and start applying your eyeshadow. However, if you don’t have primer or don’t have time to wait for the concealer to dry, you can set your concealer with face powder. Using a foundation brush or a makeup sponge, dab your foundation over your lids. Don’t rub your skin, or you will smudge the concealer you just applied. Simply press the powder over your lids.
Applying and Blending the Shadows
Apply your medium transition color. When you work with matte eyeshadows, it’s best to work with a light, medium, and dark color. The first thing you will do is apply your transition color in your medium shade. This color will go above the crease of your eyelid. In other words, it is the color that you will be able to see when your eye is fully open. Use a fluffy eyeshadow brush to gently apply this color to your eyelid crease and the center of your eyelid. You don’t want a heavy coating of color, so use a soft hand. No matter what colors you’re working with, it’s a great rule of thumb to have the light, medium, and dark shades. If you want your eyeshadow to be more intense, put just a little water on your brush before you apply your makeup. This will especially make sparkly eyeshadows pop.
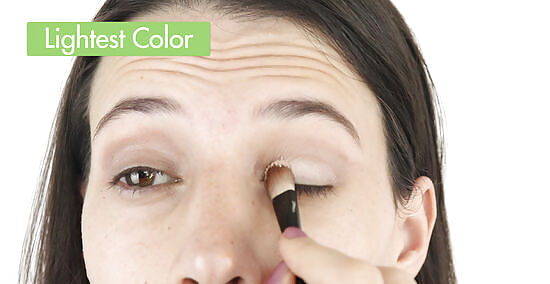
Use your light color on your lid and in the inner corner. By applying your lightest color to your inner corner, you will make your eye look large, bright, and open. Use a flat eyeshadow brush to pat it into the inner corner and across your lid. This shade should go up to where your transition color begins.
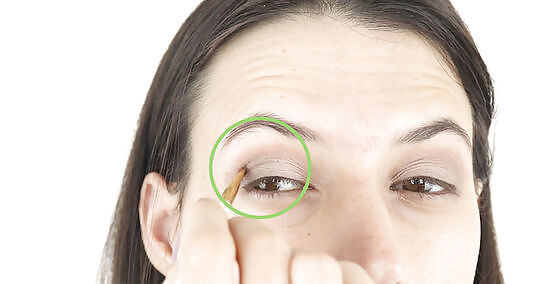
Apply the light color under your brows. Use the same brush you used on the corners of your eyes. Starting directly under the arch of the brow, sweep the color outward, highlighting the uppermost part of your eyelid.
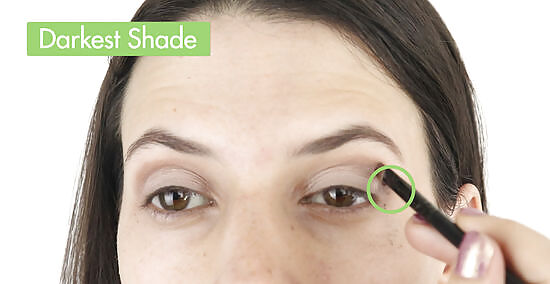
Add dimension by applying your darkest shade to the outer corners. Using a clean shadow brush, take your darkest color and begin at the very outer corner of your eye. Sweep the color inwards, so that it meets your lightest shade in the middle of your eyelid. This color shouldn’t extend higher than your crease.
Blend your 3 shades. Use a clean blending brush to blend out any harsh lines that were created between the 3 shades you used. The goal is to make your eyeshadows blend together seamlessly. Focus on the areas where the shades meet. Use a soft hand, focusing on gently blending rather than moving any of the product. After you’ve blended your colors, you can add more of each shade if you find it necessary. This will make your colors bolder and more intense. Whenever you apply more shadow, it’s important to blend again.
Finishing Your Look
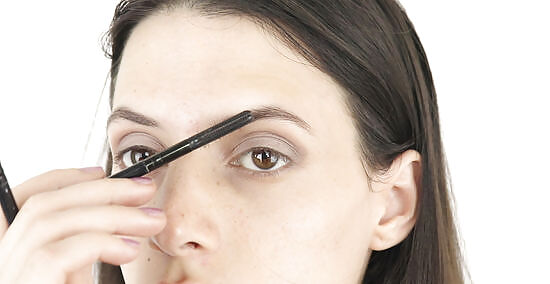
Fill in your eyebrows. Matte eyeshadows are great for a smooth, more natural look, and cleaning up your brows will actually help accentuate your shadow. You don’t want uneven or unruly brows stealing the show. Using a small eyebrow brush, apply a brow powder or gel to any areas of your eyebrows that are sparse or light. You want your eyebrows to look even, full, and polished.
Curl your eyelashes and apply mascara. When you apply eyeshadow, it’s normal to get some fall-out in your eyelashes. Once your shadow is done, you’ll need to clean up your lashes. Use an eyelash curler first, pressing down at the roots of your lashes to create a big curl. Then, apply your favorite mascara. Applying mascara will add volume and length to your lashes, and darken them so that they stand out against your matte eyeshadow. Clamping the eyelash curler 2-3 times will create a softer, more natural curve. Start at the roots of your eyelashes, then move out and clamp slightly again. Try heating up your lash curler with a blow dryer for 10 seconds before you curl your lashes. You'll get a more dramatic curl, and it will also last longer. Just be sure to test the heat on your wrist first so you don't burn yourself. Dark, curled lashes also help to make your eyes look bright and big, and they’re a perfect finishing touch for your matte eyes.
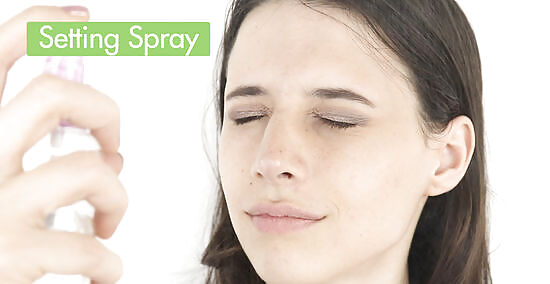
Spritz your face with a setting spray. Just like your primer helps to hold your shadow so that it stays put all day, a makeup setting spray seals it all in. Close your eyes, and gently spray it all over your face. It will air dry in a matter of seconds, so don’t disturb your makeup by rubbing or blotting your skin. Throw your setting spray in your purse to use as a refresher throughout the day and you’re all set!


Comments
0 comment