
- Calibrate your caliper before using it by closing the jaws and lining up the 0 marks on the two scales, then place your object between the jaws.
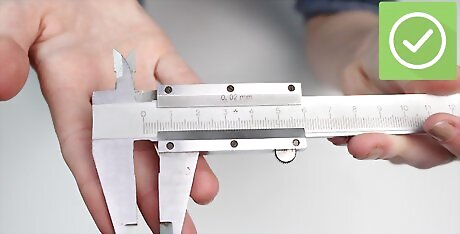
- Tighten the jaws by sliding the moving scale until the jaws are flush against your object.
- Record the values being shown on the main scale and moving scale separately, then add them together to get your final measurement.
Preparing Your Vernier Caliper
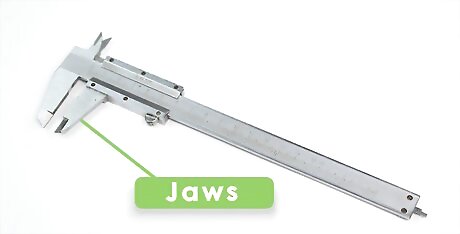
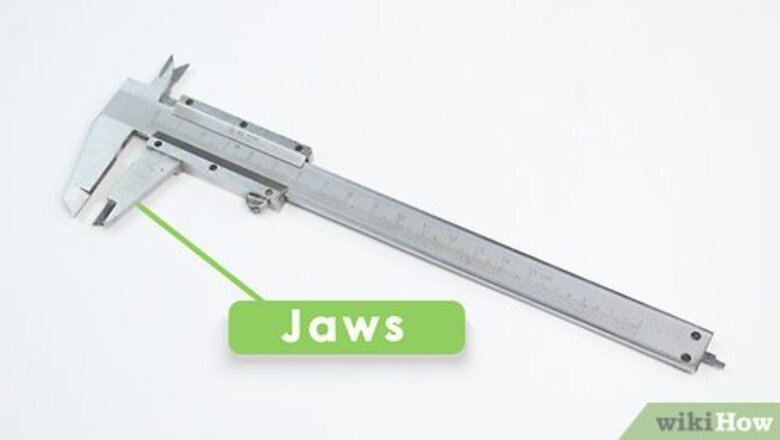
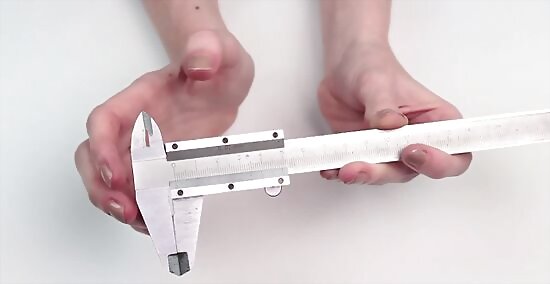
Locate both sets of jaws and measuring scales on your caliper. A Vernier caliper has large jaws that are used for measuring an object’s external diameter, as well as smaller jaws that are used for measuring the internal diameter. There are also two scales. The Vernier scale is the sliding scale that opens and closes the jaws, while the main scale remains fixed in place. Some models also have a depth gauge at the very end of the main scale.
Read the scales on your Vernier caliper like you would read a ruler. A caliper usually has a main scale marked with numbered inches or centimeters, plus smaller divisions between them. The sliding (Vernier) scale often has an engraved label that tells you what units are being used. If the sliding scale doesn't have a label, then assume that the numbered divisions represent 1/10 of the smallest division on the main scale. For example, if the main scale's smallest lines represent 0.1 inches, then each numbered division on the Vernier scale represents 0.01 inches. The main scale is "life-size" while the sliding scale is magnified for easy reading. This magnification system allows the Vernier caliper to measure more precisely than a ruler.
Determine the value of the smallest tick marks on the main scale. Before making a measurement, count the number of tick marks between two numbers on the main scale. Use this to determine how much distance each of the smaller lines represents. For example, imagine that the numbers on your scale represent 1 inch, and there are five unnumbered tick marks between them. 1 inches ÷ 5 = 0.2 inches. Therefore, each of the unnumbered lines represents 0.2 inches.

Clean the object you’re going to measure. Using a soft, dry cloth, wipe off any dirt or grease from the object. Make sure that there’s nothing in the way that will prevent you from getting the most accurate measurement.

Loosen the locking screw on your Vernier caliper. This screw is on top of the Vernier scale and prevents the scale from sliding around freely when not being used. Twist the screw counter-clockwise to loosen it and start using your scale.
Close the jaws to zero out your Vernier caliper. Before measuring anything, close the jaws so that the 0s on the main scale and Vernier scale line up exactly. Doing so ensures a precise measurement later on. If your caliper isn’t zeroed out from the beginning, you’ll have to correct for this zero error later to get the exact measurement. For example, if the zero on the sliding scale starts out lined up with the 1 mm mark on the fixed scale, you have a positive zero error of +1 mm. Subtract 1 mm from your final measurement to get the correct result. If the zero on the sliding scale is to the left of the main scale zero, you have a negative zero error and must add the error value to your measurement to get the precise number. Slide the Vernier scale so that the zeros line up while watching another mark to see the size of the error. For example, if you’re watching the 0.5 mm mark and see that it moves from the 1 mm mark to the 2.1 mm mark, the zero error is -(2.1 - 1), or -1.1 mm. Add 1.1 mm to your final measurement to correct the error.
Measuring & Reading Results
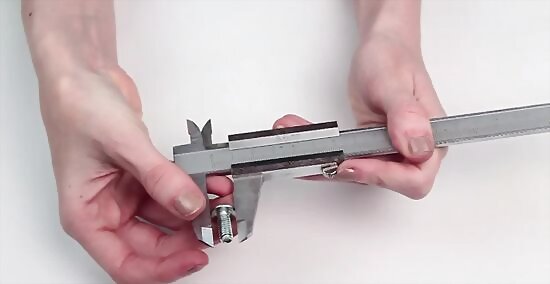
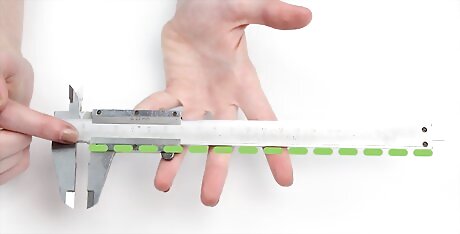
Open the jaws wide enough to fit around or inside your object. The caliper has two types of jaws. The larger ones tighten around an object to measure the distance across it, and the smaller jaws fit into an opening and can then be pushed outward to measure the internal diameter. Adjust either pair of jaws by sliding the Vernier scale along the track. If your Vernier caliper has a locking screw, twist it clockwise to tighten it once the jaws are in place around or inside your object. To extend the depth gauge, turn the thumb screw closest to the gauge counterclockwise to loosen it, then move the Vernier scale along the track.. Stick the depth gauge into the hole so that it touches the very bottom, then adjust the rod’s length using the Vernier scale until the main scale touches the top of the hole. Tighten the thumb screw once again to keep the scale in that position.
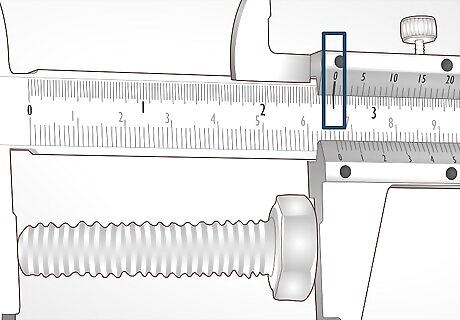
Read the line on the main scale that’s in line with the 0 on the Vernier scale. The main scale on a Vernier caliper typically tells you the whole number plus the first decimal of your final measurement. Read this just as you would a ruler, using the 0 mark on the Vernier (sliding) scale to determine which line you should be reading. For example, if the 0 on the sliding scale lines up with the 2 inch mark, your measurement is 2 inches. If it lines up past 2 inches by six 0.1 inch marks, your measurement is 2.6 inches. If the result is between two lines, round to the smaller value. Do not try to estimate a value between the two lines. Use the exact same process when reading the depth measurement.
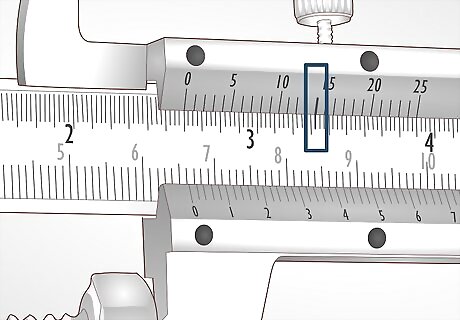
Find the first mark on the Vernier scale that lines up with a line on the main scale. This mark tells you the value of the additional digits of your final measurement. If the 0 mark of the Vernier scale is between two numbers on the main scale, this is how you’ll figure out what the exact measurement is. For example, let's say the tick marks on the Vernier scale represent 0.001 inch increments and that the first mark on the Vernier scale to line up with a tick on the main scale is the 14th mark. This means that the Vernier scale reading is 0.014 (14 x 0.001) It doesn’t matter which line the Vernier scale lines up with on the main scale. The important thing is that you find the first two marks that line up exactly. The process of reading the Vernier scale is exactly the same when you’re measuring depth using the depth gauge.
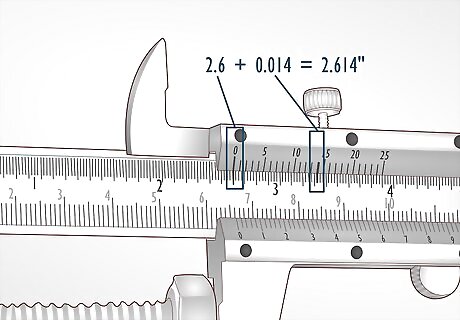
Add the two measurements together. Add the main scale and Vernier scale results together to get the final answer. Make sure you use the correct units as labeled on each scale, or you won't get the right answer. In our example, we measured 2.6 inches on the main scale and 0.014 inches on the Vernier scale. So our final measurement is 2.614 inches (2.6 + 0.014). For another example, if the main centimeter scale reads 0.85, and the Vernier 0.01 cm scale reads 12, adding them together results in 0.85 + 0.012 = 0.862 cm.


Comments
0 comment