
Securing Edges With the ZigZag Stitch
Thread your sewing machine with your desired type of thread. When using the zigzag stitch, you may choose to use a thread color that matches your fabric or that contrasts with it. This is based on your personal preference. For example, you might decide to finish the edges of a red piece of fabric with white thread for contrast, or go with a red thread that will match the fabric and blend in.

Set your machine to the zigzag stitch setting. The zigzag stitch is a common one, so all sewing machines will have a zigzag stitch setting. Set your machine to the zigzag stitch setting before you begin sewing. It is fine to keep the defaults in place for the zigzag stitch on your machine. If your machine does not automatically adjust the width and length of the stitch for you, then start with a stitch length of 1.4 and a stitch width of 5.0. Switch out your traditional sewing machine foot with a "zigzag" foot. This can prevent your needle from breaking.
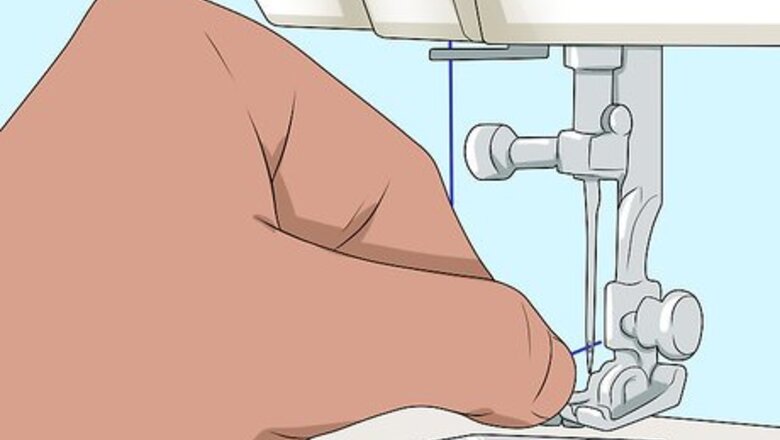
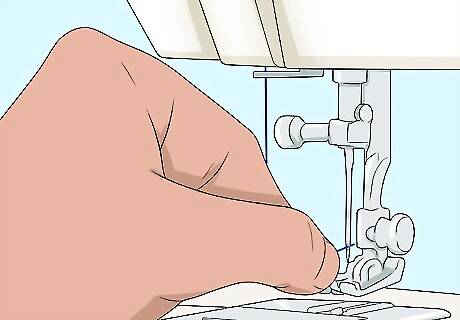
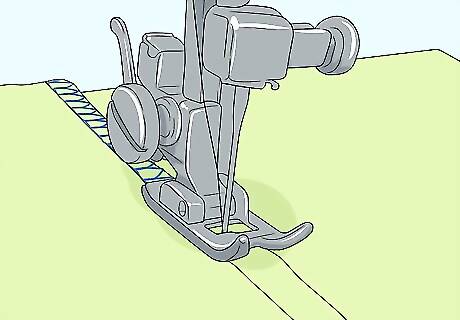
Raise the presser foot and position your fabric. When your machine is set, raise up your presser foot using the presser foot lever. Then, place your fabric under the presser foot. Make sure that the fabric is positioned so that the edge of the fabric will be lined up with the sewing area (where the needle comes down) on the presser foot.
Lower the presser foot and begin sewing. When you are happy with the placement of your fabric, lower the presser foot using the presser foot lever and begin sewing. Start by using light pressure on the pedal and check the stitches to see if they are coming out how you want them to. If you are unhappy with the placement of the stitches, then stop the machine and adjust the position of the fabric. If you are unhappy with the length and/or width of the stitches, then adjust the length and/or width to your liking.
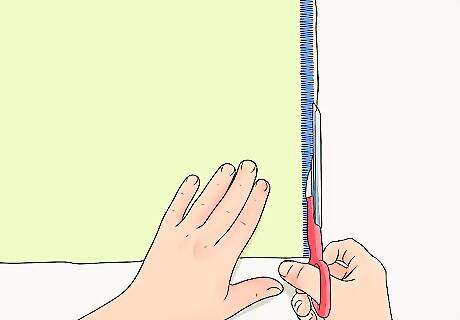
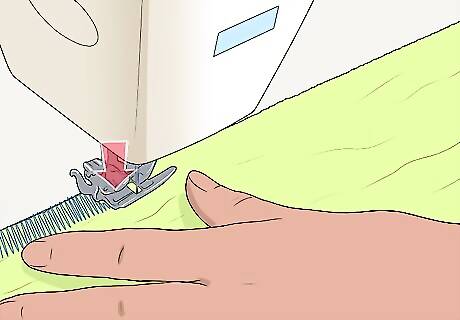
Trim away the excess fabric. Unless you are using the zigzag stitch for a hem, it is a good idea to trim away the excess fabric after you stitch the edge of the fabric. This will help to reduce fraying when you wash and wear the garment. Trim along the edge of the zigzag stitch, but be careful not to cut into the stitching.
Getting the Best Results
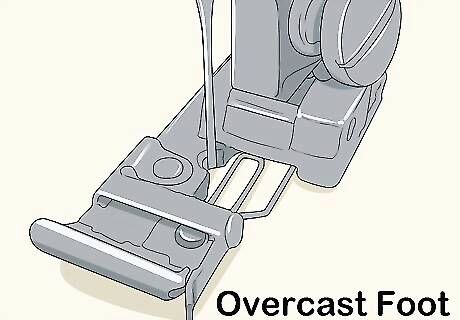
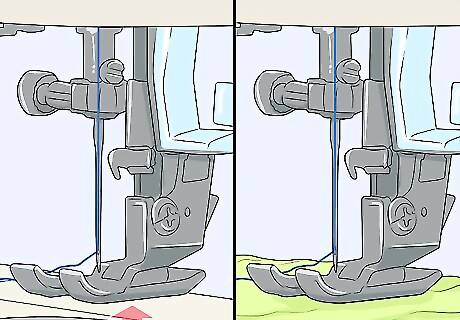
Use an overcast foot. A useful tool for stitching the edges of fabric is an overcast foot. This makes it easy to line up the stitch so that it is right on the edge of your fabric. If you have an overcast foot, then use it in place of your regular presser foot for this project. Keep in mind that an overcast foot is optional. You can also zigzag stitch along the edges of fabric without one.
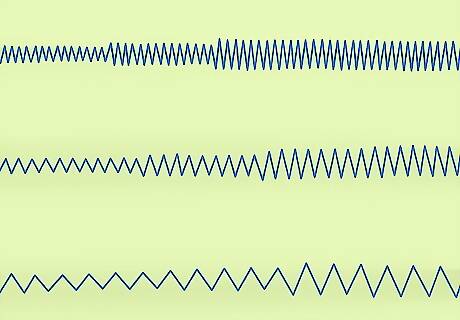
Try a few different stitch lengths and widths. The length and width of your stitches will change the way your zigzags look. If you are not sure how you want your zigzags to look, then try experimenting on some scrap fabric before you begin sewing your project. Try short, medium and long lengths and widths to find a zigzag setting that you like. It may be helpful to write each setting directly onto the scrap fabric so you know what each one will look like. This will make it easier to decide on a preferred setting and serve as a helpful reference for future projects.
Use the zigzag stitch to hem edges or finish edges. The zigzag stitch can be useful as a way to create a hem on a finished skirt, shirt, or other project. The zigzag edge that you sew into the hem will be decorative and functional. However, finishing raw edges with the zigzag stitch is also a good strategy. The zigzag stitching will help to prevent the edges of your finished product from fraying from normal wash and wear.


Comments
0 comment